Pages

Friday, March 28, 2014

With Love!


Hey everybody,

A quick post sharing a card I made using Winnie & Walter stamp sets. I wanted to play with confetti stamp.
Here is the card.

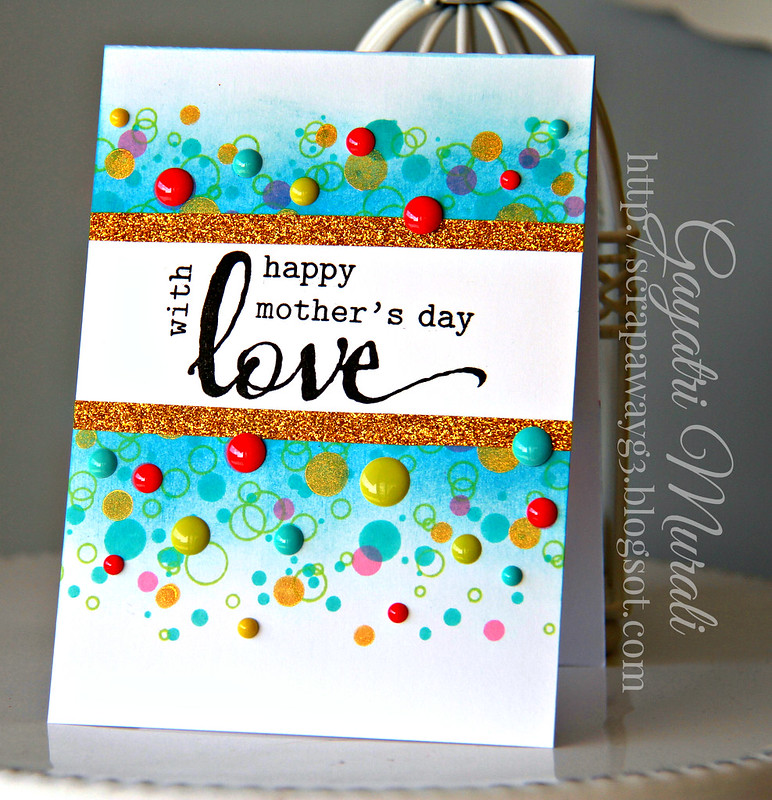
With Love

My inspiration for the layout of the card came from CASE Study Challenge #184


I really love how my card turned out. I masked off a session then sponged some distress ink. Then stamped the outline circle confetti with green ink, the solid circles with blue and pink inks. I also stamped some with gold ink. I then trimmed a thin strip of gold glitter ribbon and adhered it on top and bottom. Stamped the sentiment. Accented with enamel dots. Love how the enamel dots adds texture, dimension and colour to the card. I thought I will get on with making some Mother's Day card nice and early.

Thanks for stopping by!
My blog signature

Thursday, March 27, 2014

Sending Prayers!

Hey all, I am bringing to you a brand new sketch from CAS(E) this Sketch Challenge Blog.
 This sketch #70 is by Sam Simpson.


Here is my take on this new sketch.

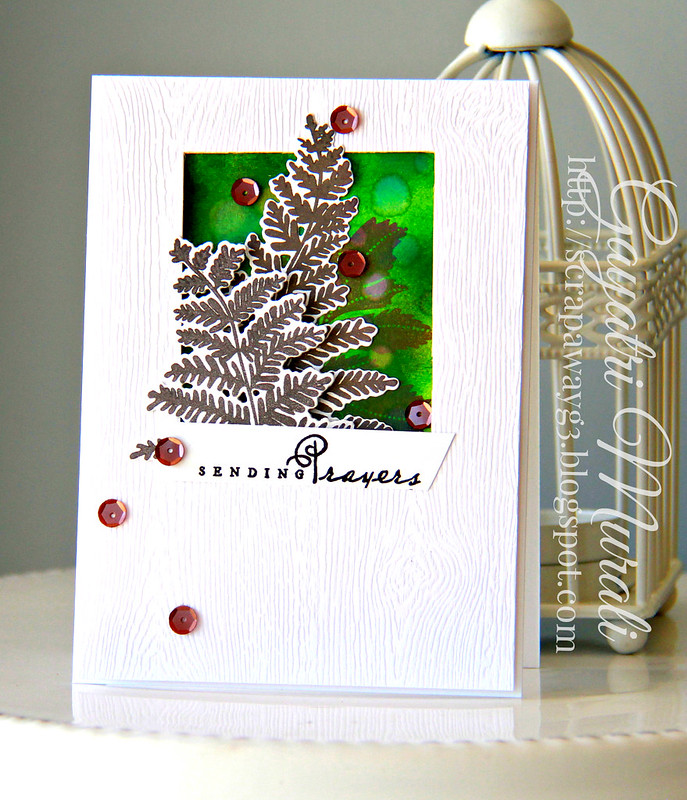
Sending prayers cards

I have die cut a rectangle of  the wood grain panel. I laid it on the card front and drew the rectangle on the card front. Removed the panel. On the card front  where I have drawn the rectangle, I sponged Shabby Shutters, Mowed Lawn and Peacock Feather Distress Inks. I then spattered some water and let it dry. Once dry, I have stamped the leaves from Meadow Greens Stamp Set from PTI using purple Memento Luxe Ink. I then die cut the ferns from the coordinating die set of the Meadow Greens stamp set and stamped the image using Espresso Memento Luxe ink. I then erased the rectangle pencil lines and mounted the wood grain panel using foam adhesives. Then glued the large stamped fern first then the smaller fern using foam squares. The sentiment is also from the same stamp set which I have stamped on a strip of white card stock and adhered. Finally, accented with some gorgeous sequins.

Love that background, green and brown combination, wood grain panel. Feels organic, right?
Want to play the sketch? Head to the CAS(E) this Sketch Challenge Blog to see more design team inspiration and linky to link your card.

Thanks for the stopping by!

My blog signature

Monday, March 24, 2014

Congrats!


Hello everybody! 
Mad Monday morning. Most chaos has settled. So time to blog. Sharing with you a card I made using Debby Hughes technique she shared at Clean and Simple Online Class. 

Congrats!

I have used beautiful stamps from The Craft's Meow for this card. The company is now closed but I love their stamp sets. I pretty much CASed her card here except I used flower instead of the butterfly which Debby used on her card and I went for silver embossing paste instead of white paste. Different sentiment as well.  
Here is a closeup!

Congrats closeup

 I have an exciting gig coming up in April. I am looking forward to sharing it with you. Yay!
Have a great day!
My blog signature

Sunday, March 23, 2014

CASE Study #183


I made cards today to calm myself down from the stress of life. In-laws recently met with motorcycle accident and is in hospital with head injury in India and my parents are here with me with my father having Interstitial Lung Disease due to welding fumes and passive smoking in his work environment. Generally feeling sad and concerned. I need some time for myself to calm down and relax. Took the time this afternoon and made two cards.
I played along CASE Study Challenge #183. Here is Joni's muse card.


I just love the diecut oval and the beautifully stamped and coloured flowers. I wanted to recreate that. So here is my take on the challenge.

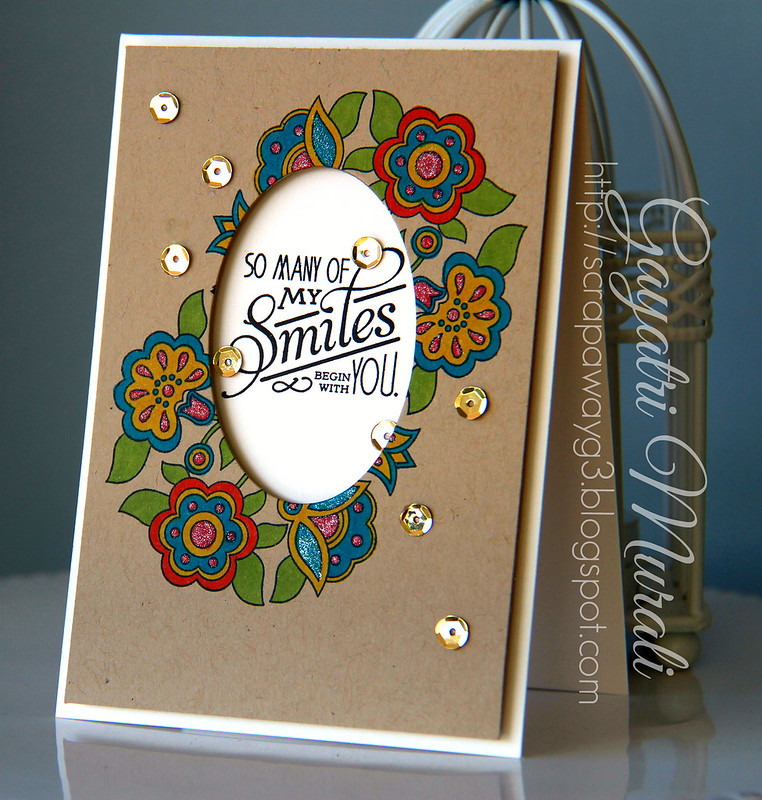
Smiles

I have used cream colour as my card base. Then die cut an oval out of kraft cardstock. Stamped the images using Memento ink and coloured using copics. I stamped the sentiment on the card base and glued the kraft panel using foam adhesives. I have brushed some of the flowers with the clear Wink of Stella glitter pen. Finally accented with Pretty Pink Posh's gold sequins.

Edited: I am also entering this card for The Simon Says Stamp Wednesday Challenge - Glitter It.

Thanks for stopping by!

My blog signature

Thursday, March 20, 2014

CAS(E) this Sketch #69

We have a brand new sketch at CAS(E) this Sketch for you!
This gorgeous sketch is designed by N@ Ali


I thought of MFT's  Four Corner Die-namics as soon as I saw this sketch. So I took a literal interpretation of the sketch and made my card.

Thanks card

My friend Louise Spiden sent me this Thanks sentiment stamp set also from MFT. Thank you so much Lou! I didn't have this set among my MFT collection.  I first stamped the sentiment in grey ink. Then die cut using one of the Four Corner die on the top and bottom of the sentiment. I then sponged some Peacock Feathers and Salty Ocean distress ink using sponge dauber. Misted some water so the colour blend. Once dry I added some glitter glue Stickles. Love the combination of blues and grey. Clean and simple with inked inlayed die. Love how it turned out.

Want to play along? Head over to CAS(E) this Sketch Blog to see more DT and GDT inspiration and linky to link your project. You have one week to play this sketch.

Thanks for stopping by!

My blog signature

Wednesday, March 19, 2014

Thank You!

I am back again! Yay! Played along Runaway Inspired Challenge #56

undefined


I picked up the colours from the photo and also used Tasnim's partial colouring from the Online CAS class to make my card.

Thank you card 1

I have sponged the edges of the card front with Mustard Seed distress ink. Then stamped the Large Flower Background Stamp from Hero Arts partially. Then traced over just a flower and couple of buds with copic black pen. Coloured the flowers, leaves and buds using the colours from the picture. Finally stamped the senitment. Love it as it is but I thought adding some enamel dots will finish off the card. so I did. Hope you like it.

Thanks for stopping by!

My blog signature

Tuesday, March 18, 2014

MFT Sketch #167

I am finally back blogging today. 
MFTWSC167

It looks like a clean and simple sketch but so many techniques can be used to make the inner panel.

Wishing you the happiest of the birthdays

 I have used a On the Diagonal stencil from MFT and distress inks to make my inner panel. I used sponge dauber to ink some colours of distress inks into the stencil. Then sprayed some water. Let the inks blend with water and smooth out. I then trimmed the panel and adhered to the card front. For the diagonal panel, I have stamped paint brush image from Jumbo Abstract Art stamp set on a strip of the cardstock and stamped the sentiment from Celebrate stamp set. To add interest, I have added shimmer using Wink of Stella over the inked area. I love shimmer.

Wishing you inside card

For the inside of the card, I adhere the strip of the stenciled panel which was trimmed off and stamped "happy birthday". By the time I made this card, outside because dark. So I had to take the photo under hallogen light. Apologise for the bad photo. I will replace it with better photo as soon as the sun shows tomorrow.

Edited: here is the new photo taken during daylight. Love this photo but the shimmer is not seen in this. So i am adding as additional photo to the ones on top.

Wishing you happiest birthday

Wishing you inside

Thanks for stopping by!

My blog signature

Saturday, March 15, 2014

Curtain Call Inspirational Challenge - Farm Fresh


You are my Sunshine card

Welcome to a brand new challenge from Curtain Call Inspirational Challenge.
This challenge is called Farm Fresh Challenge. Here is the inspirational photo for you.


We have a fabulous new sponsor, Taylored Expressions, for the Curtain Call Inspiration Challenge: Farm Fresh challenge!  The LEAD of this challenge will receive their choice of TWO PETITE SETS from Taylored Expressions!


Taylored Expressions was generous to provide me with this stamp set called Hydrangea Bouquet to use for the challenge. Thank you so much for providing the stamp set.


Hydrangea Bouquet


Here is my take on the challenge using Hydrangea Bouquet stamp set.


You are my Sunshine card

I am inspired by three elements from the photo: the colours, the wooden pallets and the big font words "Fresh Produce". I also wanted to do a modern take on the challenge. So I stamped and coloured the hydrangeas using the colours from the picture. For the wooden pallet and big font I used pattern papers. I added twine for some texture. Love how my card turned out. 

Now,you won't want to miss what the Curtain Call Crew has whipped up for Farm Fresh!


Thanks for stopping by!

My blog signature

Thursday, March 13, 2014

Birthday Wishes!

Hey everybody,

Sharing with you a card I made for CAS(E) this Sketch #68 and CASE Study #182 using die cut inlay technique. Here is the new sketch from CAS(E) this Sketch which is designed by Joni Andaya.


Coincidentally, CAS(E) Study Challenge #182 muse is Joni Andaya as well :)  So I decided to combine both the challenges. Clever hun! lol!


So here is my take on both the challenges.

Birthday wishes

I sponged a white card stock panel with Pickled Raspberry and Peacock Feather Distress Inks and spattered some water. I l then let the water dry on its own. Once dry, I die-cut the Hero Arts Palm Fancy Die from the panel. On another white card stock, I sponged some Mowed Lawn Distress Ink and die-cut the Hero Arts Fancy Die Palm. I inlayed the Mowed Lawn Palm die cut into the negative of the other panel and glued all the bits and pieces into its place.
 On a separate piece of card stock, I sponged Spiced Marmalade Distress Ink and die cut an oval then die-cut the Palm die at an angle. I once again inlayed the Pink Palm die-cut out of the initial panel into the negative of the oval. I glued all the bits and pieces into their corresponding places.
 I hope I am not confusing you! It is all sponging, die cutting and inlaying. Once I  inlayed the pink Palm into the orange oval die-cut. I stamped the sentiment from Simon Says Stamp Birthday Messages stamp set over it. I adhered this stamped inlayed oval die-cut using foam squares. Finally I accented with wood grain sequins. Here is the close up.

Birthday wishes closeup

This card looks clean and simple and involves two techniques. I enjoyed the process of making this card. Love how it turned out. Hope you like it.

Thanks for stopping by!

My blog signature

Tuesday, March 11, 2014

Uniko Studio Blog Hop and a farewell!

Hello and welcome to Uniko Studio's Blog Hop. 
Today we are revisiting Beautiful Blooms Stamp set.

BeautifulBllomsIProdPic
Beverley has also released coordinating dies for this set which is available for purchase from Uniko Studio Shop.

For the hop you should have come from the gorgeous Erika's Blog. If this is your first stop, I will provide you with a list of designers participating towards the end of this post for you. Make sure you hop and comment to enter a chance to win both Beautiful Blooms stamp set and dies. Here is my card using Beautiful Blooms stamps set.

Happy Birthday Card

I sponged the card front with Mustard Seed distress ink and then spattered with some plain water. Left it to dry. I then stamped and heat embossed the flowers and leaves fro the stamp set using Zing coloured embossing powder on vellum card stock. I then cut these out and layered them on the card front. I then stamped the sentiment from All Occassion Sentiment # 2.  Finally accented with enamel dots. Here is an angled shot of the card.

Happy Birthday Card

Your next stop is the talented Gillian's Blog. Gillian is a new designer to Uniko Studio. Make your welcome. Here is the list of all the designers participating in the blog hop.

Stacey
Taheerah

Now I am sad to say that this is my last DT post for Uniko Studio. I am stepping down as a designer with Uniko Studio as of today. I have been a designer from the beginning. So it is a very difficult decision for me to step down. But time to move on. I really enjoyed my time with Uniko Studio and made good friend with Beverley. So thank you so much Beverley for everything. All the best for the future with Uniko Studio and congrats on the good news - Twins! Double the trouble and double the cuteness. Big Hugs to you :)

 Make sure you stop by all the designer's blog and comment to enter a chance to win both the stamp set and dies. Thanks for stopping by!

My blog signature

Monday, March 10, 2014

Hello!

Good Morning!

Sharing a card I made over the weekend for Virginia's View Challenge #1 - Watercolouring.


Here is my take on the challenge.

Hello card

I used Tim Holtz's Spatter stencil with sponge dauber and distress ink to get my spatter background. For the watercolour effect, I sprayed it with water and let the colour smudge and blend a little to get the watercolour softer edge to the spatter. I then used the ray image from Wplus9's Super stamp set using black ink. To add some diemension, I added the wood veneer spiky circle with some bunched up thread under it. The die cut is from Happy Hello dies from MFT which I brushed with Wink of Stella. Finally accented with some sequins. Here is another shot.

Hello card

Thanks for stopping by!

My blog signature

Friday, March 7, 2014

The making of my craftroom


As most of you know from my Facebook that my hubby gave me a craft room for my birthday. Well I wanted to tell y'all how it all came about.
 I had pinned this DIY project from Apartment Therapy on Pinterest and showed it to my husband because I thought it was a great idea. He looked at it and said, 'Ummm, yeah!' Not much of interest shown. I showed him many pictures I found on Pinterest and I always got the same response. He must've been bored of me showing him so many pictures lol! This was about 3 weeks ago. Then a week later a couple of trades people came home. My husband had an hallelujah moment and suddenly realised it was a great idea and could be done at home. He had arranged for construction to go ahead as a surprise. So the process of making a craft room began. Here is a collage picture of the process.

Craft room collage

Although it is tiny, I love this room because everything is within an arm's reach. Mum and Dad can have the guest bedroom for themselves.  I still have to organise my supplies so that I can use the storage efficiently. I will get that done over a period of time. So excited about my space and blessed to have a supportive hubby.

Thanks for sharing my excitement.

My blog signature


Thursday, March 6, 2014

CAS(E) this Sketch #67


Second post for today. Here is my first post.

We have a brand new sketch at CAS(E) this Sketch challenge blog today for you. This fab card sketch is by gorgeous Chrissy Larson.


Here is my take on the sketch.

Wishing you happiness card

I decided to use a negative and a positive diecut for the two overlapping element on the sketch. Instead of using the negative and positive of the same tag die, I used the negative of the bigger die from Papertrey Ink and positive of the smaller tag die from Wplus9. I also layered the card front with pattern paper and trimmed the negative die cut to smaller panel. Sponged the negative diecut panel with a softer pink ink, stamped the leaves and flowers from Garden Grace stamp set from Papertrey Ink.. I also diecut using Garden Grace die and stamped the leaves and flowers both solid and outline. I then put together the card. Finally accented with the gorgeous silver heart sequins from Pretty Pink Posh shop. I don't know what I will do without sequins lol!

Wishing you happiness card

Check out CAS(E) this Sketch Challenge Blog for more design team and GDT inspiration. And we have a new design team member. She is super talented. make sure you leave comment on her blog as well to welcome her. 

Thanks for stopping by!