Sunday, May 31, 2015

Coloured glitter butterflies....


I saw this technique being used by Laurel Beard and Julie Ebersole. So I thought I will give this technique a try. The Butterflies die from the new release Penny Black was perfect for this technique. I also had this stained glass look which I wanted to achieve. 
butterflies picture
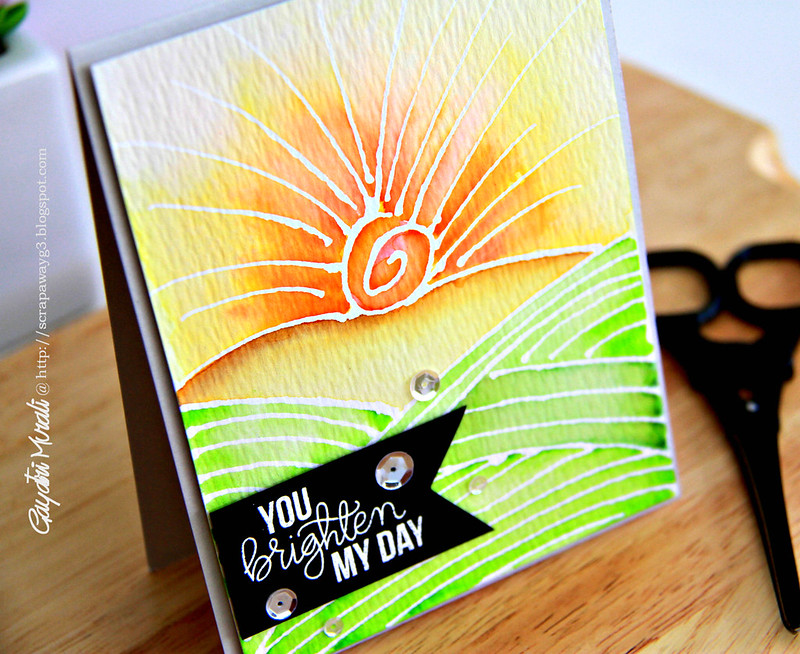
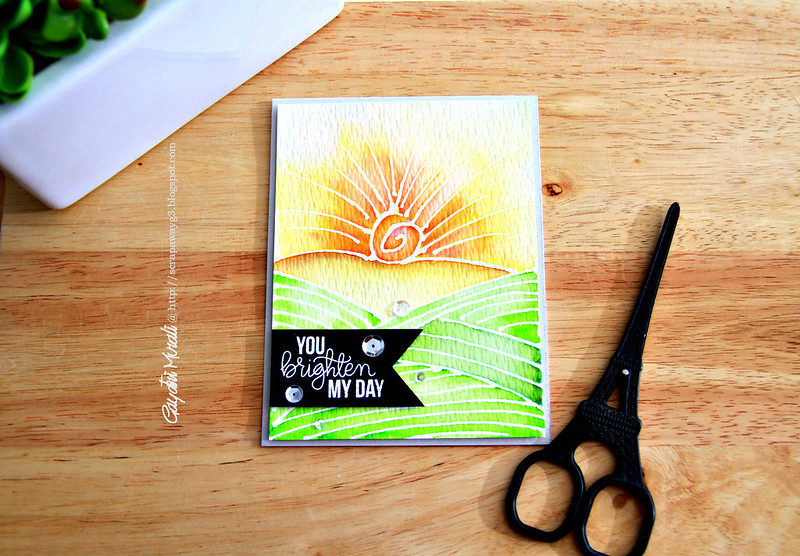
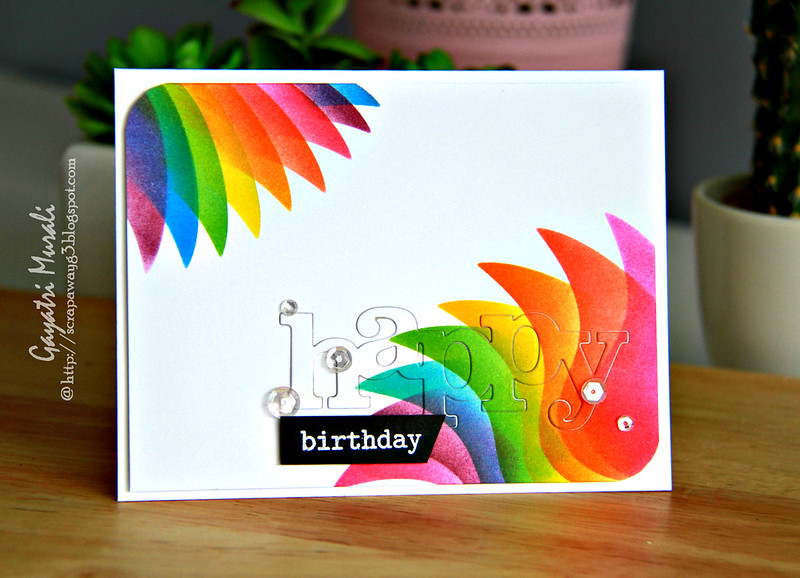
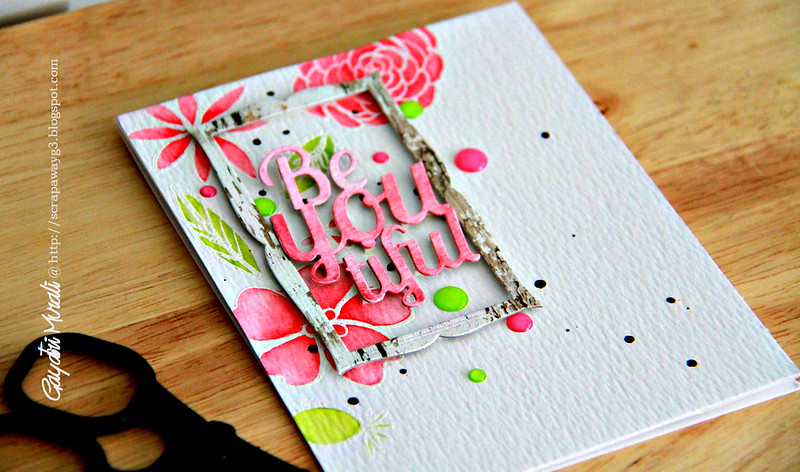
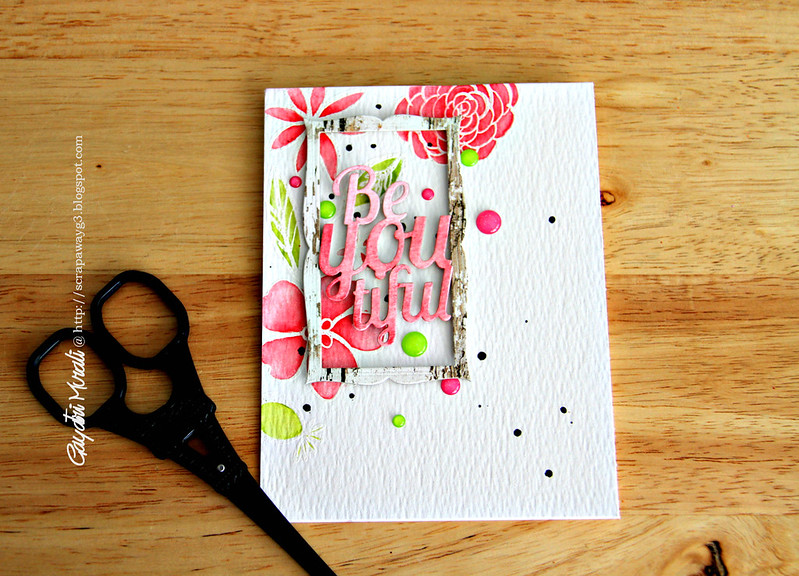
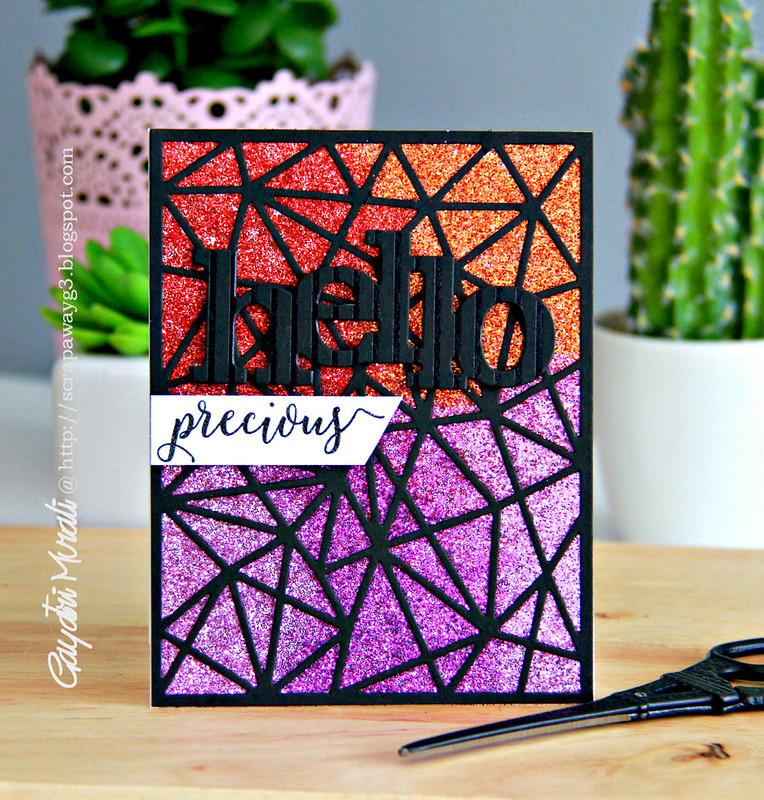
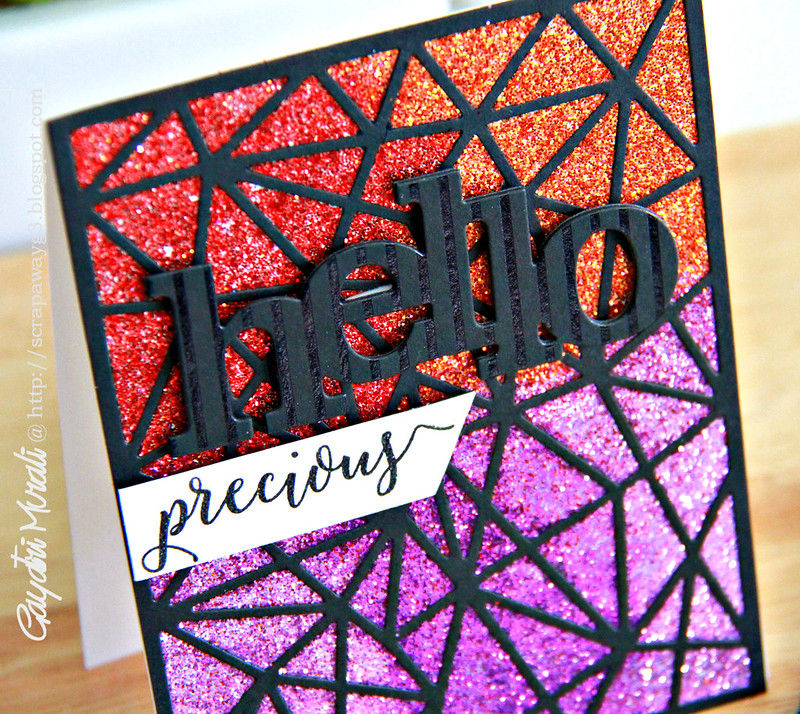
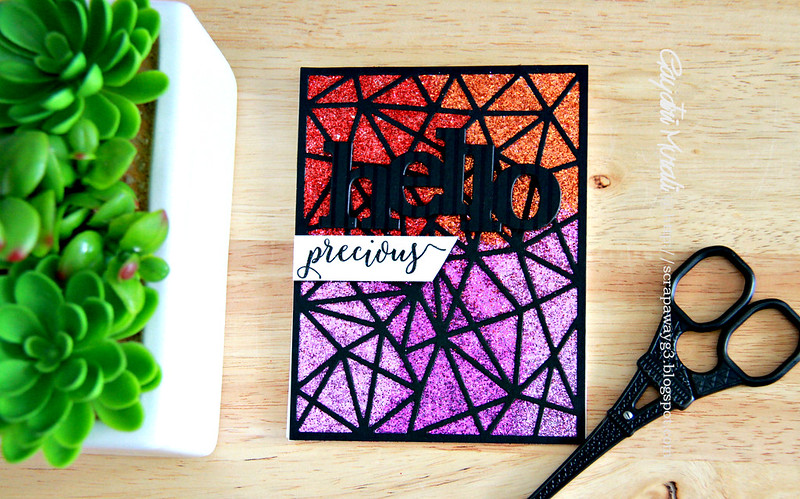
And here is my card using the die.

Coloured glitter butterfly

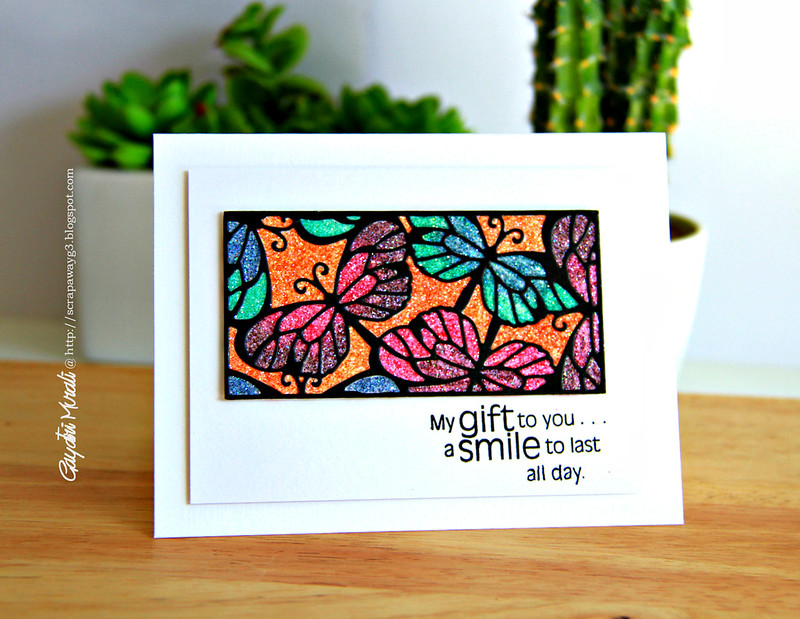
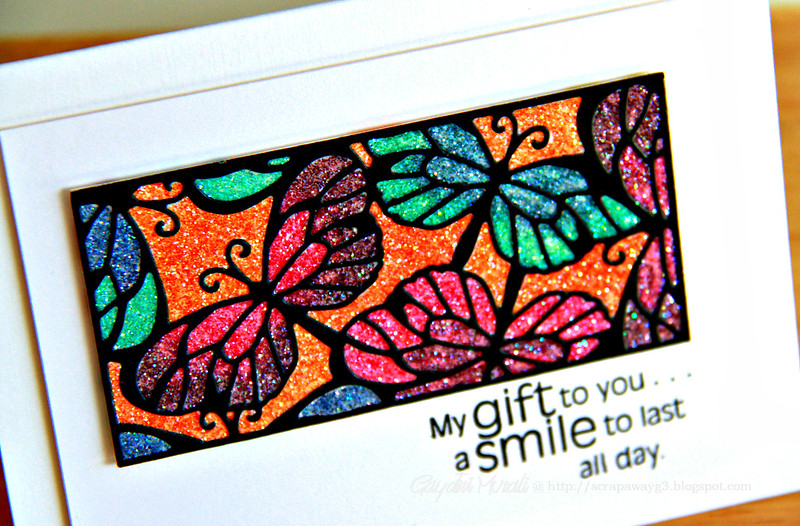
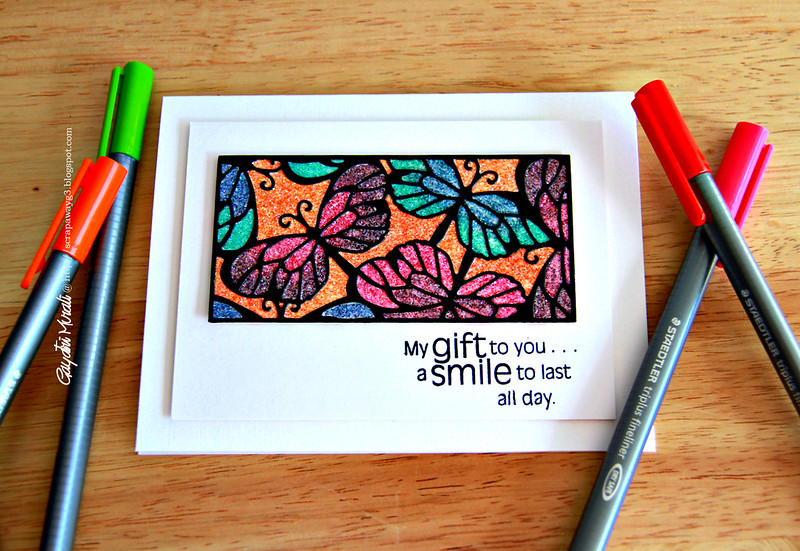
I die cut the butterflies die using black cardstock, then adhered the die on an adhesive sheet. I poured and burnished white fine glitter in the negative space. Dusted off the excess. Now I coloured the glitter with alcohol markers. Julie and Laurel used copics to colour. I am afraid to use Copic markers. I finally have a good collection and I did not want to ruin the markers.So I used Stampin' Up alcohol markers instead. The markers are still good to use and the colours turned out lovely.

Coloured glitter butterlies closeup

I then removed the adhesive sheeting and adhered the coloured butterflies die to white cardstock. Trimmed the excess, I wanted this to be the highlight of my card, so I kept everything else simple.

Coloured glitter butterflies flat

The sentiment is from Smile All Day stamp set also from Penny Black newly released.

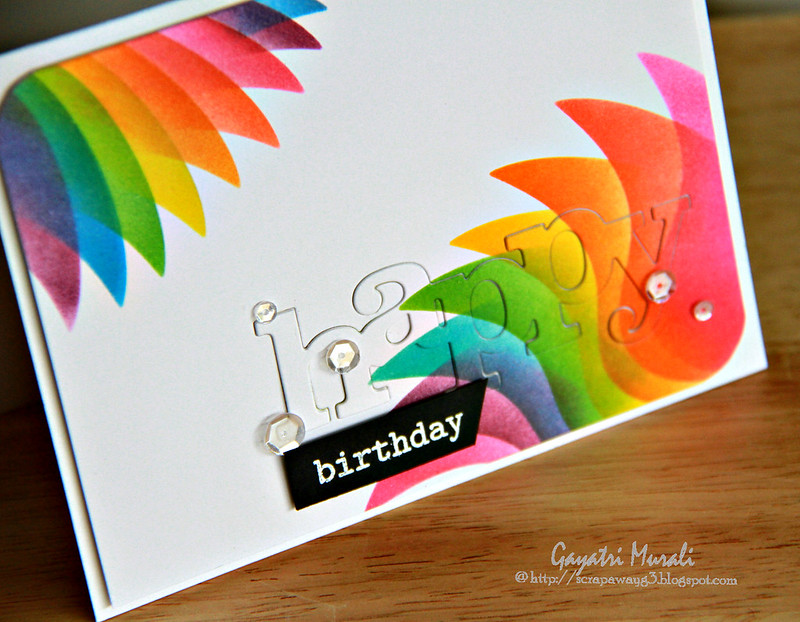
Love love the colours, glitter and gives the stained glass look. Thanks Laurel and Julie for sharing this fun technique.

Thanks for visiting my blog today.

My blog signature

Saturday, May 30, 2015

Mask-erade Day#3


Second post for today. My first post for Winnie & Walter is HERE.

I played with masking fluid yesterday using Debby's technique at Mask-erade Online Card Class.


It was so much fun. Got addicted to it just practicing making backgrounds. But I was so impressed with Debby's card on her blog that I definitely wanted to CASE her card. Here is my take on Debby's card using masking fluid and watercolouring.

Day #3 card1

The Zig Real Brush pens are great for watercoloring. I get so much control over where I want my colours to pool and where I want them washed out. Just love them. I can also blend colours with ease.

Freehand drawing with masking fluid definitely need practicing. My fluid was watery and I kind of got some big blobs but with practice, I was able to get some thin lines. 

Day #3 card closeup

 I again have to practice various patterns but imagine the possibilities of make you own background. Love the idea. I also like the idea of flicking the masking fluid and sponging inks. The white specs on the coloured background will look beautiful. Anyway, I am enjoying the Mask-erade class as you can see. Hope you are too.

Dy#3 card flat

Thanks for stopping by!

My blog signature

Pink Fresh Studio Kit!

Hello everyone,

I excited to share with you couple of my cards using the gorgeous new Pink Fresh Studio May Embellishment kit. Julie from Winnie & Walter designed the amazing stamp set for this kit and this is just fantastic. Love love the copper elements in the kit. This is the kit.


Here is my first card using this kit.

Pink Fresh Kit card 1

Like I said I love the copper elements in this kit. So I combined blue, yellow and copper along with neutral white for my card. I did some ink smooshing to get my background blue layer. Then I adhered the alpha stickers on a cardstock panel, then die cut using the smaller rectangle from Essentials: Katherine Cutaway from Winnie & Walter for my second layer.

For the smaller layers, I used vellum then a shaker pocket using the gorgeous iridescent yellow heart shaped sequins from the kit. To make this, I used the new Fuse tool from We're Memory Keepers. I am so happy I have this tool to make my own pockets :) Then I trimmed the tag from the kit to add the third layer. I love how the mesh gives beautiful texture to the layers. Finally I stamped the sentiment from Julie's stamp set in the kit on its die cut with the outer frame die cut using copper glitter paper. I just love the layers and colours in this card. Came together so beautifully.

Card #1 flat

Here is my second card.

Pink Fresh Studio card 2

For this card, I have used some Pink Fresh Studio paper from an older kit to layer on top of the scalloped die cut using Essentials: Audrey Cutaway. Then I stamped and cut the camera from The Write Stuff; Perfect Picture stamp set. I added the copper flair from the kit to the camera and added the Epoxy sentiment from the kit. This is a very simple card with a tinge of copper element.

Hello Sunshine flat

Check out the Winnie & Walter blog for more design team projects using this amazing Pink Fresh Studio May Embellishment Kit.

Winnie & Walter are giving away this amazing kit. So make sure you leave a comment on W&W blog to enter a chance to win this kit.

Thanks for stopping by today!

My blog signature

Thursday, May 28, 2015

Mask-erade day #2


Sharing couple of cards using masking technique for Mask-erade Online Card Class.


I love Jennifer's technique using a big die, die cut as mask to stamp. She uses both negative and the postive of the die cut to make two cards. I really loved how her cards looked. So here is my version of Jennifer's technique.
This is the negative as the mask.

Negative masking card

And this one using the positive as the mask.

Positive masking card

I have used the biggest die from Wplus9 Heart Stax die set to die cut my mask. I then adhered the positive die cut on one panel and the negative on the panel. I used More fresh Cuts stamp set also from Wplus9 to stamp using second generation stamping using distress inks and colouring with waterbrush.  I then simply stamped the sentiment from Strictly Sentiments 5 from Wplus9 using Versafine Black ink. Finally accents with Sparkly Clear sequins from Pretty Pink Posh. Love the soft watercoloured look.  Here are both the cards together.

Cards together

Thanks for stopping by today.

My blog signature

Wednesday, May 27, 2015

Mask-erade Day #1


I signed up for the Mask-erade online class


I played along day #1 of the class. I have always loved Laura's rainbow cards using masking technique.
Her cards are amazing! Swoon! Drool! lol! So far I have been a bit scared trying out her technique but after watching her video at the class, I gave it a try today. Here is my card.

Happy Birthday card2

I am so thrilled with how it turned out. I LOVE this technique. And how quick and easy to create and give such a huge impact.You will see more rainbow coloured card using masking technique from me :) Thanks Laura for sharing the technique and for the fantastic video as well.

Happy Birthday closeup

The die cut and sentiment is from Winnie & Walter. The die is called In A Word: Happy Cutaway and sentiment is from The Big, the Bold and Happy stamp set. I then used Sparkly Clear sequins from Pretty Pink Posh.

Happy Birthday flat

I have another card share for day #1 but for now this is it. I am feeling much better today. Fever is under control and sneezing bouts have stopped. Throat is buggered but as long as my eyes are not watering and I can focus, I can get around doing work. Hate not able to do anything. Anyway, I am on the road to getting better.

Thanks for stopping by today!

My blog signature

Monday, May 25, 2015

I am over at Winnie & Walter blog today


Today I have showcase style #2 of the Inlaid Die Cut technique.
Here is a sneak peek of my card.

Friend card closeup2

Check out Winnie & Walter Blog for more details and photo tutorial.

Thanks for visiting my blog today.

My blog signature

Sunday, May 24, 2015

No line copic colouring! First time!


Hello! Welcome back. 

I have a special card to share with you. I played with Penny Black's new release stamp set today and attempted no line copic colouring for the first time. I am pretty happy with how it turned out. Here is the card.

Way Cool! card 1

I stamped this cute image of the boy kicking the soccer ball from Way Cool stamp set from the new release Penny Black using second generation Flannel Gray memento ink. Then coloured with copic markers. Because the stamped image is second generation grey, the outline is so light that it blends with the colours. I have used copic fineliner to highlight some areas like the facial features, the ball, boots, lace etc. Here is a closeup!

Way cool closeup

This is a one layer card. I liked it as it is and so I did not add any pattern papers or embellishment to the card. Not bad for the first time attempting no line copic colouring huh!

This is the Way Cool stamp set from Penny Black I have used on my card.

way cool! picture

Thanks for stopping by my blog today.

My blog signature

I am over at A Blog Named Hero!


Good morning everyone,

I am over at A Blog Named Hero today sharing a card using some new stamp sets from Hero Arts and this month's collaborative partner Wplus9.

Here is a sneak peek of my card.

Cool Cat flat

Check out A Blog Named Hero Blog for more details and photos of my card.

Thanks for stopping by!

My blog signature

Saturday, May 23, 2015

Watercoloured shabby chic card for Pin-Sights Challenge


Good morning everyone,

A quick post this morning to share my card for Ellen Hutson's Pin- Sights Challenge.

Banner-PIN-sights

6cd0f441096a0954043262c7d3015728

This is my take on the challenge.

Pink and green card1

I used Bohemian garden stamp set from Essentials by Ellen to white heat emboss and watercolour.  Then added some spatters with black Me. Huey. I also die cut the Be You-tiful die by Essential by Ellen using watercolour paper, then brushed pink watercolour to give an ombre effect. When dry, I stacked glued the die cut with two more die cuts. The frame is from Taylored Expression Frame in a Frame die set. I die cut using woodgrain pattern paper from My Mind's Eye and couple more from cardstock. Stacked glued them to give stability and adhered on the card front using foam adhesives. I then glued the sentiment die cut inside the frame.

Pink and green card closeup

Finally accented with pink and green sparkly enamel dots from Doodlebug. 

Pink and green card flat

Pastels are not my forte. My eyes just does not want to see pastels. I tried to tone down my colours and this is how much I could get to. lol! I love it. Hope you do too :)

Thanks for stopping by!
My blog signature

Tuesday, May 19, 2015

Runway Inspired Challenge #84


Hello there,

Bringing you a new Runway Inspired challenge  - Custo Barcelona!


To be honest, this one bummed me. I love the colourful pattern on the shoes and sleeves of the outfit. That's it! So my interpretation of this challenge is using those colourful patterns. Here is my card.

Hello gorgeous card

I have used the new Cover Model: Multifaceted Cutaway from Winnie & Walter. I die cut using the black cardstock. Then adhered the die cut on adhesive sheet. Then added glitter picking the colours from the sleeves and shoes. It turned out just beautiful and glittery. The colours blended well and they colours were great together. Now all the glitter made me very happy! I then adhered this panel to the card front by peeling off the sheet on the other side of the adhesive sheet.

Hello precious closeup

For the sentiment, I used In a Word: Hello cutaway also from Winnie & Walter. The smaller sentiment is from My Precious stamp set which I stamped on a strip of white cardstock and added below to the big hello.

Hello precious flat

Check out the Runway Inspired Blog for more design team inspiration. 
Want to take up a challenge? Come and play along.

My blog signature

Sunday, May 17, 2015

Another neon card!


Hello everyone,

Sharing with you another neon card with you today.

Best Wishes 1

I wanted to use stencil in a different way. Not sponging, no embossing paste, no spraying..... So I ventured into mixed media style. Then again I wanted my background to look bright and fresh. I picked a pattern paper with script on it, then did a light wash of gesso. Once gesso was dry, I sprayed some water first. Followed by pink neon Mr. Huey and let the colour spread around. I dried this layer and repeated another layer of pink neon. Followed by a mix of green and yellow neon Mr. Huey. Again let it dry. Once dry, I spattered some black Mr. Huey.  At this stage, I am loving the fresh colourful look. Now I took the Patina stencil from Penny Blackplaced it on the pattern paper randomly and just drew the outline of the flower petal with a black sharpie. I went with rules of third. I love the black outline of the flowers layered on the pink and green neon colour wash. This became the background for my card.

best wishes closeup4

I like with the printed acetate sheet from We're Memory Keepers. This one I have used to layer is white polka dots. This layer tones down the bright neon colours. I then added a white tag. On the tag, I layered die cuts from Penny Black die called Nature's Song in black and white glitter paper. Finally the sentiment is from Come Rain or Shine stamp set also from Penny Black. 

Best wishes flat

I absolutely love the background. Simple to do and makes an impact.

Thanks for visiting my blog.

My blog signature