Monday, June 29, 2015

A Baby Card!

Hello dear friends,

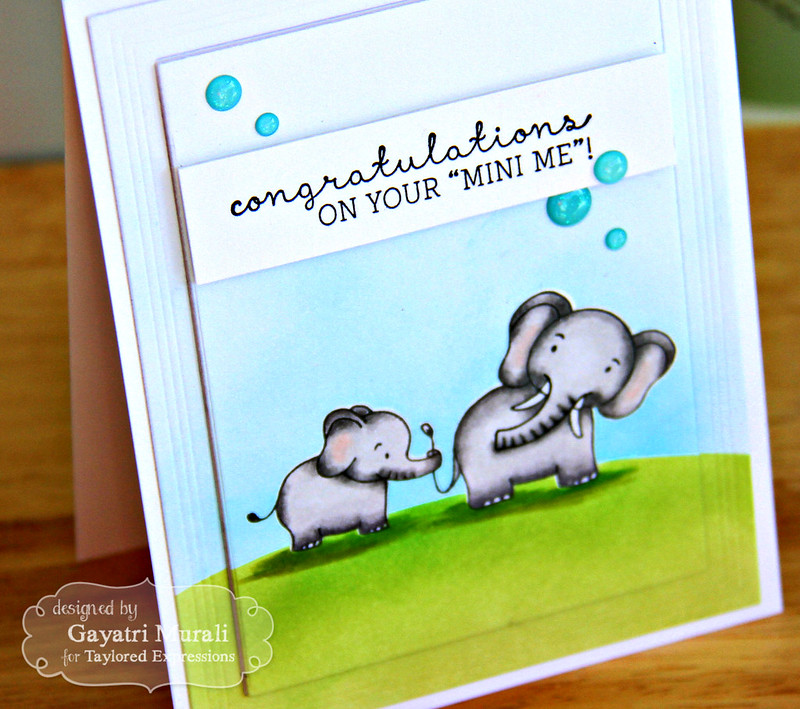
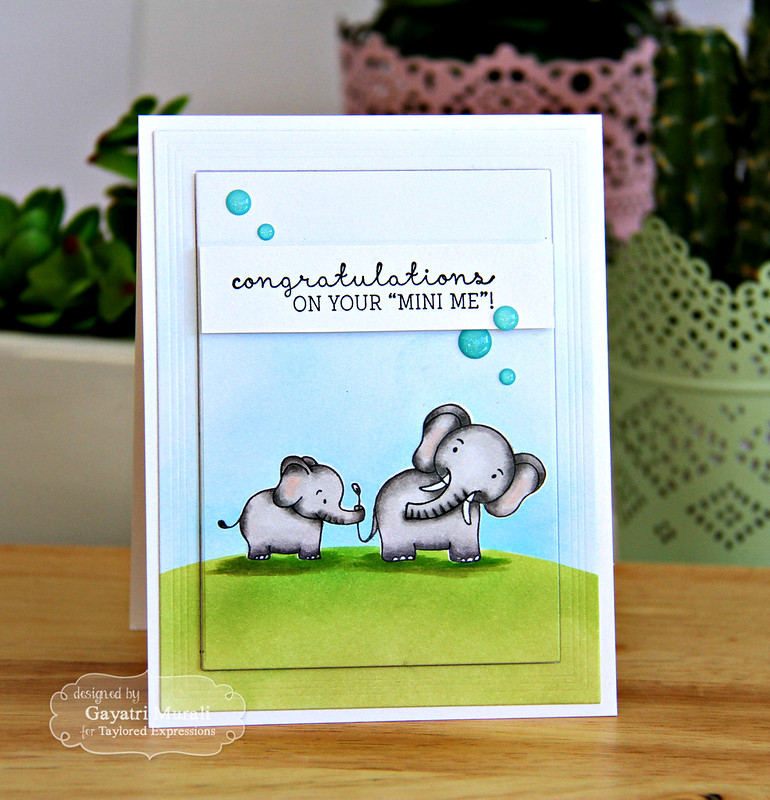
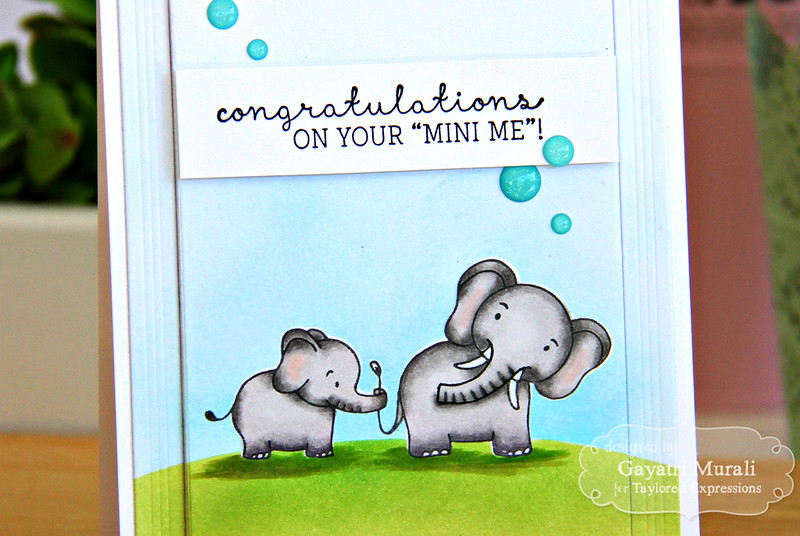
How was your weekend? Hope you had a great relaxing weekend. Mine was busy as ever. Last weekend before school closes. I cannot wait for the winter break and have a relaxing holiday. Monday is mad also as ever until afternoon. I generally craft in the afternoon on Mondays. This afternoon I wanted to colour. I coloured couple of cute elephants to make a baby card.

Mini Me

The elephants are  from Mama and Me stamp set from Taylored Expressions. This is such a cute set with some really good sentiments. I stamped and copic coloured the elephants. I sponged the sky and grass using Tumbled Glass and Mowed Lawn distress ink after masking the elephants. I then removed the mask. 

Mini Me closeup

To add some dimension, I die cut the panel using the frame die from Frame in Frame Cutting Plate from Taylored Expression.  This gave me a frame as well as the inner panel. I adhered the frame to the card base using liquid glue and the panel using foam adhesives. You can see the dimension on the closeup photo below.

Mini Me closeup1

The sentiment is also from the same stamp set which I stamped on a white strip of cardstock and adhered using foam adhesive. Doodlebug's Sprinkles brings the card together. I also used copic markers to ground the elephants.

Thanks for stopping by my blog today!
My blog signature

Friday, June 26, 2015

I am over at Winnie & Walter today


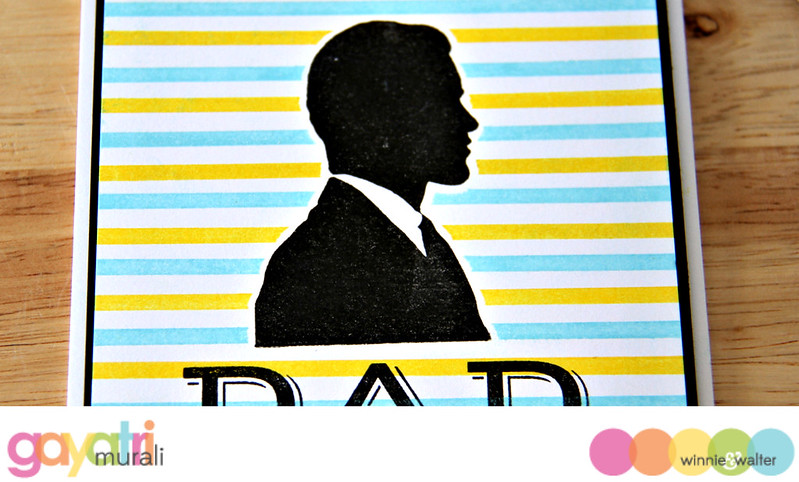
Yes, I have a dapper card to share at Winnie & Walter Blog.
Here is a sneak peek of my card.

Dad Sneak Peek

I have used masking technique and a lot of stamping.
 More details and photos on Winnie & Walter Blog.

Thanks for stopping by!

My blog signature

Thursday, June 25, 2015

Custom make your own card background.


Hello dear friends,

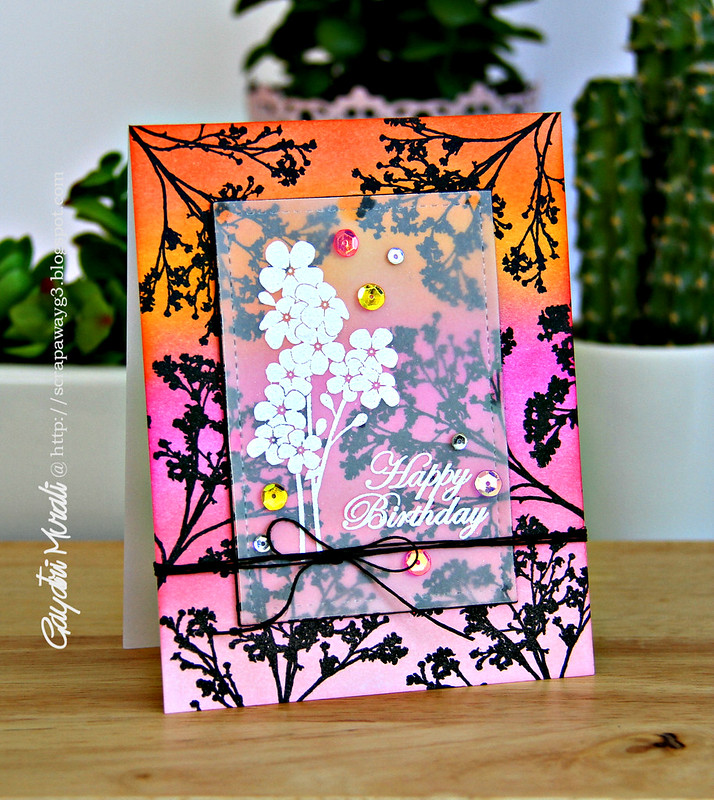
I have a very colourful and vibrant card to share with you today. One of my favourite technique to do is to custom make my own background for my cards. This makes my happy because I use techniques or stamp or both and the result is very unique every time. The process itself gives me great pleasure and results are amazing. Of course, there are times when things don't turn out the way you wanted but this card turned out better than expected. Here it is.

Happy Birthday card

This is how I did my background. I sponged Spun Sugar, Worn Lipstick, Picked Raspberry, Spice Marmalade and Ripe Persimmon  distress ink in that order on to my card panel. Distress inks take a little time to dry. I wanted the panel to be dry dry because I wanted to stamp on it. And you get a really clean crisp image when the distress inks are really dry. Of course you can zap it with heat gun. Anyway, I used the image from Sprigs stamp set by Penny Black to stamp with Versafine Black Ink. This is a pigment ink, so this ink also takes sometime to dry as well. Make sure you don't smudge the ink. I loved the contrast of black against the coloured background.

I then used the stitched rectangle die from Stitched Duo 2 die from Pretty Pink Posh to die cut the centre rectangle from the panel. I also die cut three more rectangles out of black cardstock and one using vellum cardstock. Now, I  stacked and glued the three black rectangle then the stamped rectangle on the top. The stamped frame negative is adhered to the card base. I then inlaid and glued the stacked rectangle panel back in place. This panel has a bit of dimension  although it is inlaid back in its place.

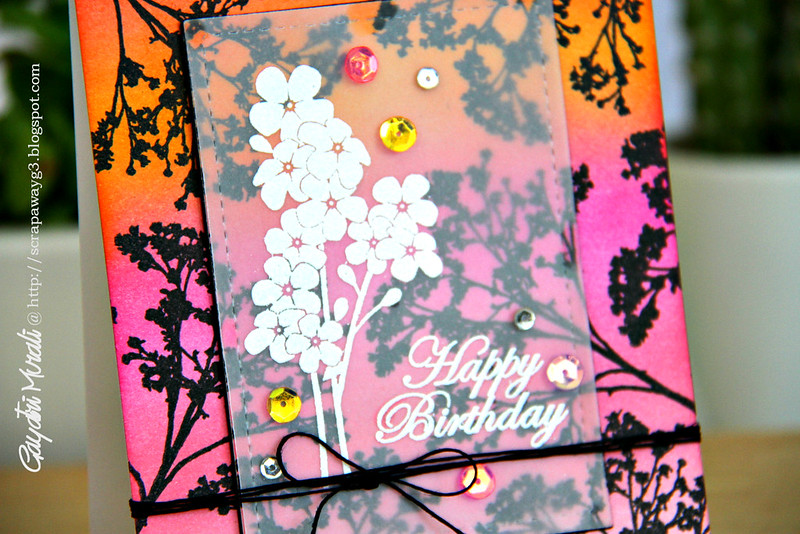
On the vellum rectangle die cut, I stamped and white heat embossed the flower bouquet image and sentiment also from the same Sprigs stamp set. I added tiny drops of glossy accent behind the heat embossed area and also on the four corners of the vellum panel and adhered it on top of the inlaid panel on the card front.You can hardly see the glossy accent behind the vellum.  I then used Strawberry Burst and Sunshine Glow iridescent sequins and Metallic Silver  4mm sequins from Pretty Pink Posh to accent and bring all the colours on the card together. Then used black twine to tie around into a bow. Here is a closeup of the card.

Happy Birthday closeup

I absolutely love the background. To customize the background for another card, I do the same process but just change the colours. Or heat emboss the stamped images to get texture. So have fun customizing your card background and make it unique.

Thanks for stopping by my blog today.

My blog signature

Wednesday, June 24, 2015

My very first card for Simon Says Stamp.

Oh hello there!

My very first card for Simon Says Stamp Wednesday Challenge is here.

wed-newchallenge-header

This week the challenge is Anything Goes


We are showcasing Simon Says Stamp Exclusive Products this week. You don't have to use them to join in but if you have some we would love to see them used.
Here is my take on the challenge using Simon Says Stamp Exclusive products.

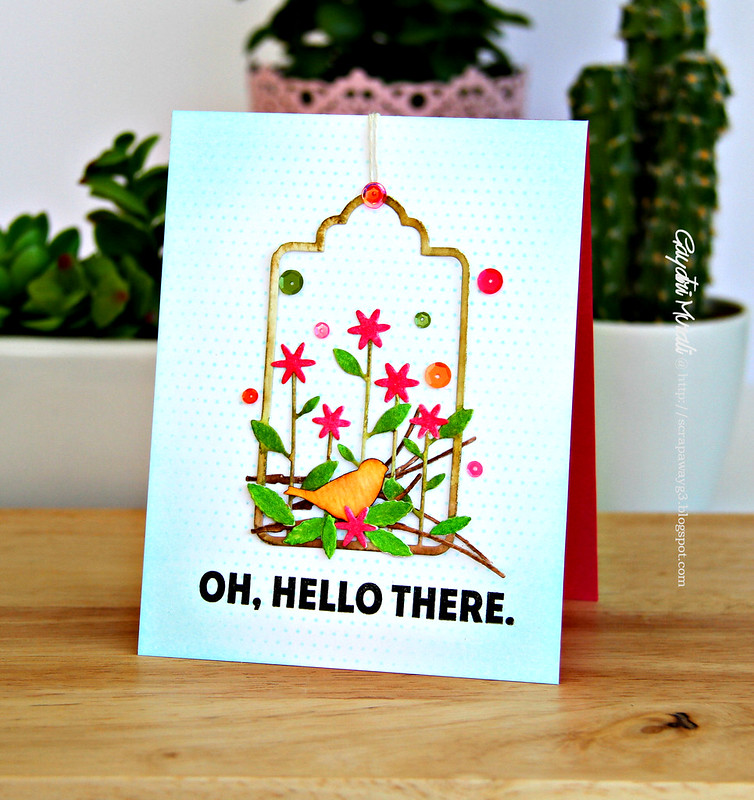
Oh Hello there card

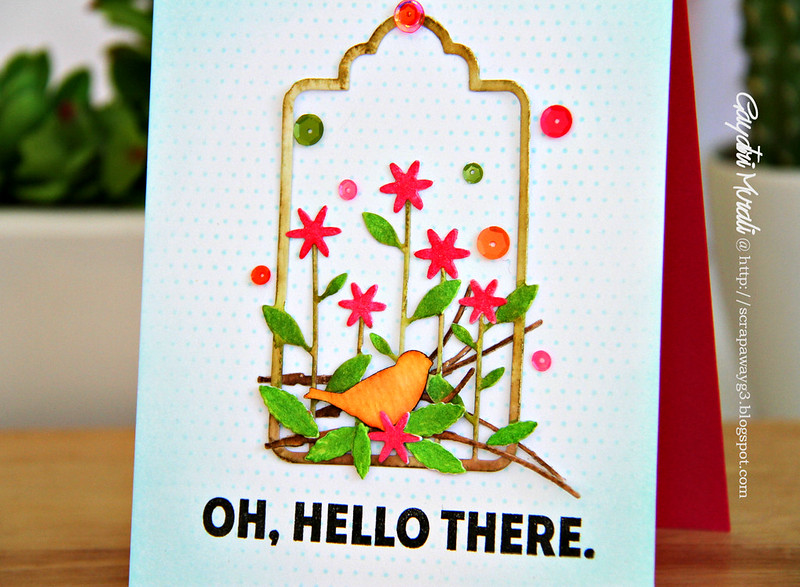
I have used Simon Says Stamp Tiny Dot stencil and sponged Sea Glass ink on white cardstock panel. I then sponged the edges of the panel also with the Sea Glass ink. The focal point is made using Garden Stems Tag and Song Bird Branch dies. I die cut them using watercolour paper. Watercoloured using Zig Real Brush Pens. Then layered and glued them on the panel. I brushed the flowers and leaves with Pink and Green Wink of Stella pen for shimmer. I attached a twine to the top of the tag to give the hanging effect. The sentiment is from To Thine Own Shelf stamp set from Simon Says Stamp. Here is a closeup of the card.

Oh Hello there closeup

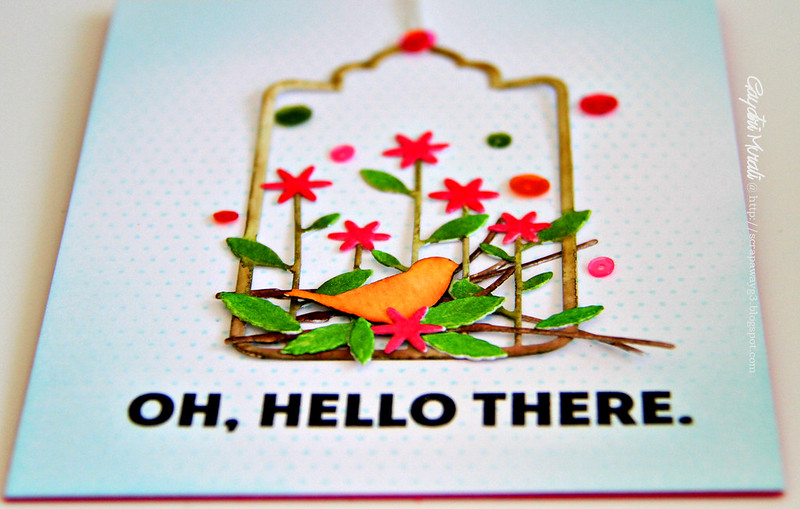
And finally I have added some iridescent sequins from Pretty Pink Posh. You can see the dimension and layering of the die in this photo below.

Oh Hello there flat 

As always Simon Says Stamp will be giving away $50 voucher to shop at the fabulous Simon Says Stamp Store
50dollar_voucher_600px

So now it's YOUR turn, Happy Crafting


Do you use Instagram?  If so please add  #ssswchallenge to your challenge entry uploads so we can see them on there too!


You have until Wed  8am Ohio time. 1pm UK time, 2 pm CET to join in
No backlinking allowed, Only 5 new creations will be eligible in the prize draw

word-verif


My blog signature

Hero Arts Tic Tac Toe Challenge!


Me again! Hello!

In this post I like to share a card I made for my solo post at A Blog Named Hero. 

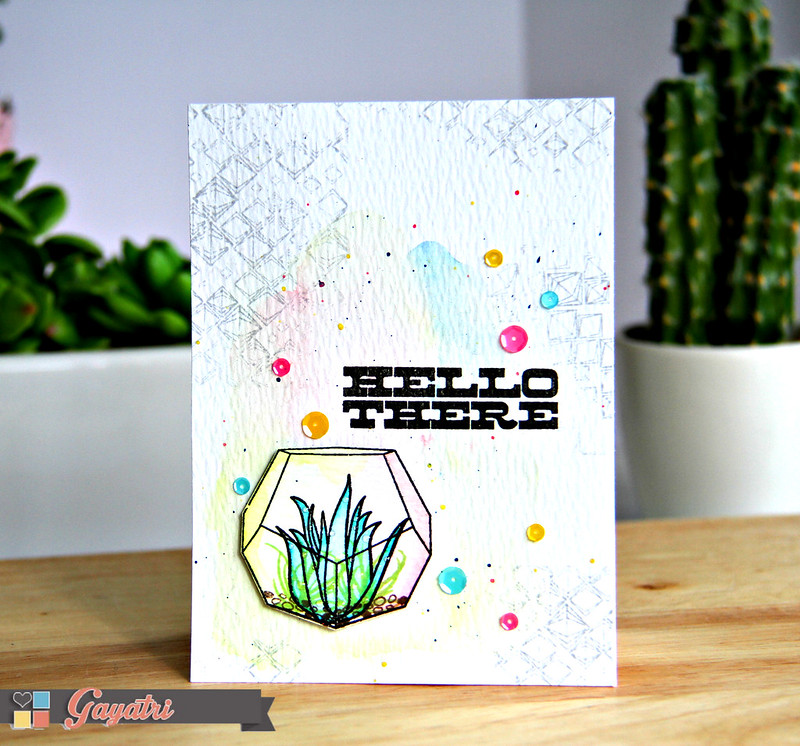
Hello there 1

I Played along Hero Arts Monthly Challenge - Tic Tac Toe.

tictactoe_board

I have used the first column on the left - circles, background stamp and watercolour. 
I have explained my design process at A Blog Named Hero Blog. So head over there to read more details.

If you like to share my excitement on my great news, click HERE!
Thanks for stopping by my blog today. 

My blog signature

I have a great news to share!

Good morning!

Two weeks ago I added my name into the linky at Simon Says Stamp Wednesday Challenge Design Team Call. I have been playing the challenge on and off when ever I get the time. A big fan of Simon Says Stamp. By the time I put my name in there, there were more than 150 entries. And when the call closed, there were 425 entries. Among the entries were many many talented designers. To be honest, I did not for once think, I will be selected. So when I received the email from Simon Says Stamp that I am selected for the design team, I was in shock. I was about to go to bed and I thought I was hallucinating lol! You know it happens when you are really exhausted at bed time. So I refreshed my email page and still found the email. Hahaha! So it is true then :) I read her email couple of times and then accepted. With such excitement I could not fall asleep immediately lol!
 I am extremely thrilled to join Simon Says Stamp Wednesday Challenge team.


Cannot wait to start sharing my projects for the challenges. Join me and play Simon Says Stamp Wednesday challenge. 

Thanks so much for sharing my exciting news with me :)

Hugs!

My blog signature

Tuesday, June 23, 2015

Featured - CAS Muse!


Hello, It is me again,

I am sharing an exciting news. Sveta Fotinia is introducing Clean and Simple style to her followers through her blog. I have been featured as a CAS Muse at My Scrap Ru Blog. it is an honor. Thank you Sveta! 
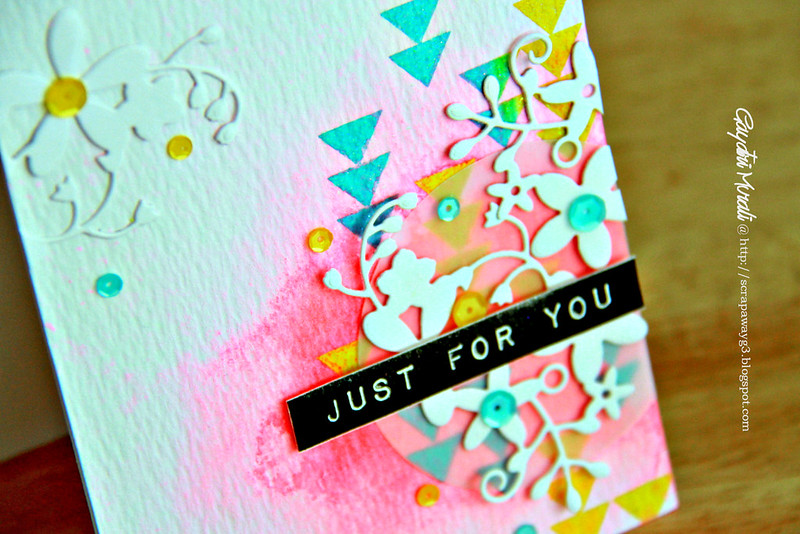
 Here is a sneak peek of my card for the challenge.

Just for you closeup

There is an interview as well as a sketch challenge. Check it out, HERE.

Thanks for stopping by my blog once again :)

My blog signature

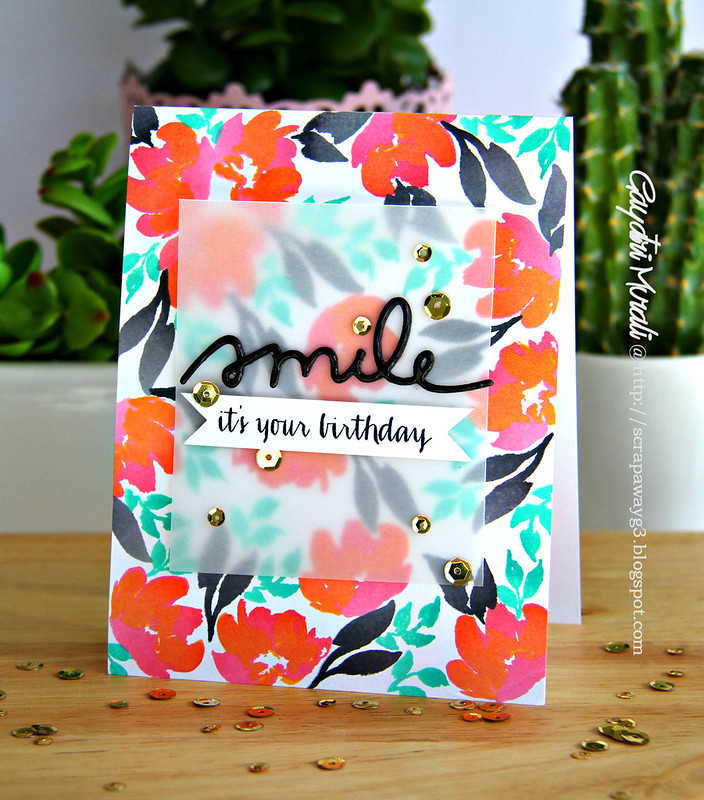
Smile, it's your Birthday!


Hello again,

A quick post today sharing a card I made using the new Wplus9 goodies that arrived last week.

Smile card 2

 Watercolouring is massive at the moment. I love the technique as it is very forgiving. No need to have a clean and crisp image. More softer the image, the better it looks. But then this stamp set called Watercoloured Anemones from Wplus9 comes along and you can stamp watercoloured images without watercolours or brush. How cool is that? I love such stamp sets. To somebody like me who is a beginner at watercolouring, this set is perfect to achieve the professional watercolour look without having to do watercolouring. Yay!

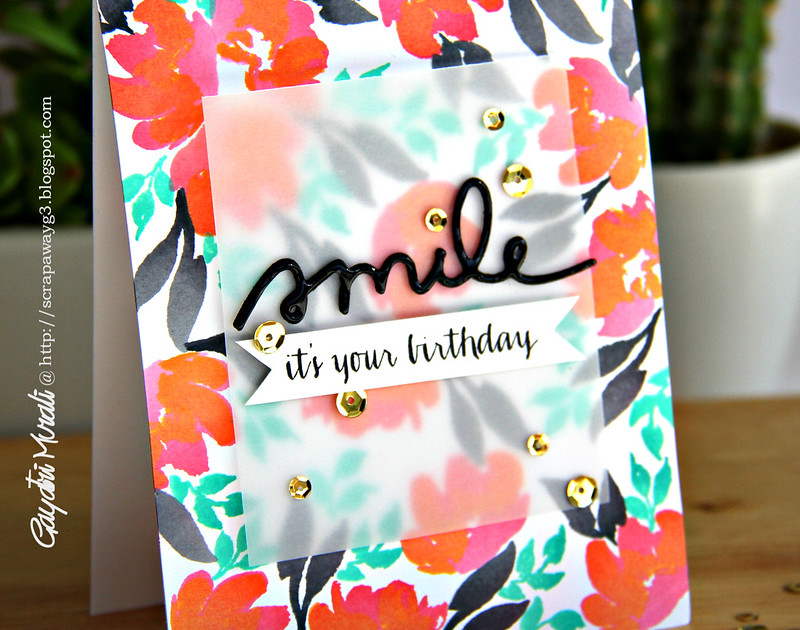
So I stamped the flowers and leaves from Watercoloured Anemones stamp set and created the background on the card front. I then die cut the "Smile" from Flower doodle dies three time with black cardstock. They are stacked and glued with glossy accent which I also applied generously on the top to get the glossy finish to the die cut. The smaller sentiment is from Strictly Sentiments 5 stamped on a strip of white cardstock, trimmed fish tail edges and added to the die cut sentiment.

Smile closeup

Thanks for stopping by today.

My blog signature

Monday, June 22, 2015

June Pin Sights Challenge


I am back today with a card I made for this month's Pin Sights Challenge by Ellen Hutson.
Here is the challenge mood board.

June

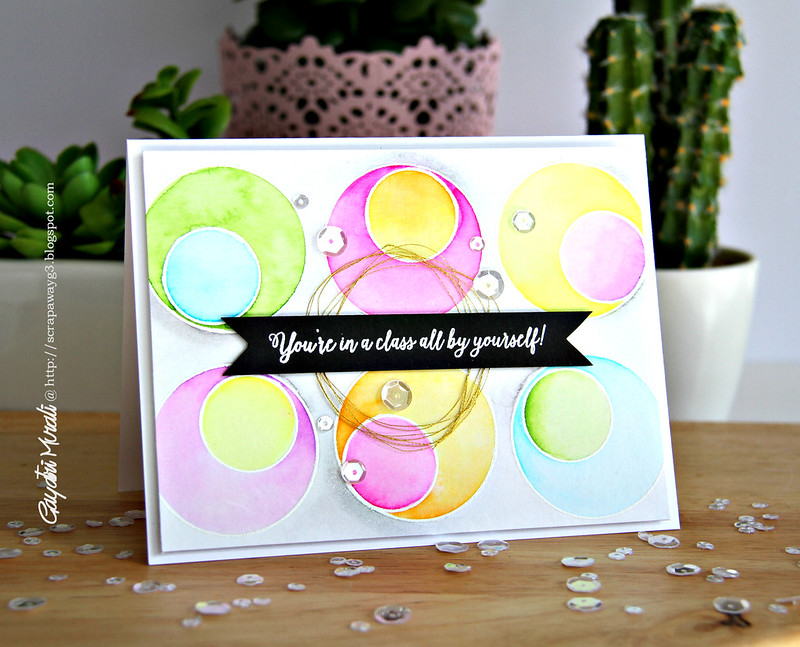
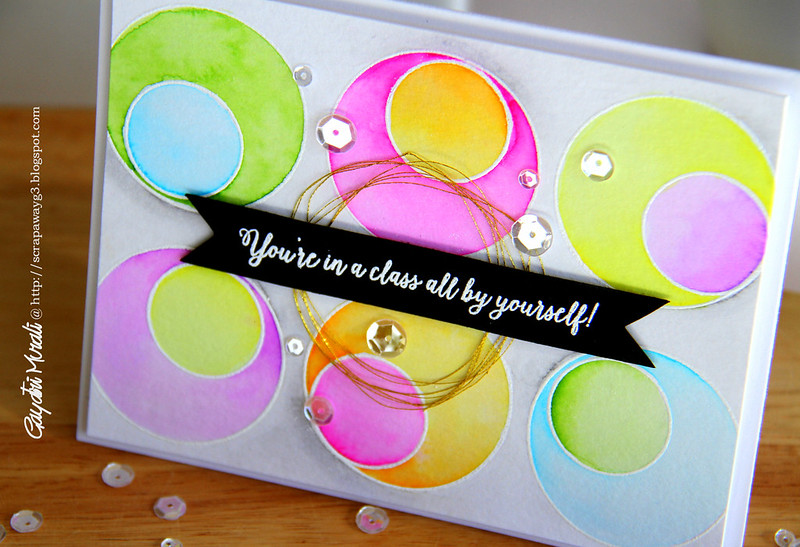
I loved the open paint cans lined up next to each other. Tried to recreate that pattern but I wanted to add a bit more than just coloured circled next to each other. I chose Bokeh Dots stamp set by Ellen Hutson to make my card because I wanted to use the two outline circle images in the set. I stamped the large circles next to each other in two rows. Then the smaller circles again white heat embossed inside the large circles offset at different sides. Watercoloured using Zig Clean Brush Pens. Here is my finished card.

For pin Sights challenge1

The sentiment is from Amazing Women stamp set also from Ellen Hutson is white heat embossed on black cardstock. I cut the edges into fish tail and adhered on the watercoloured panel with some gold thread and foam adhesive. Finally Sparkly Clear sequins to embellish and bring the card together.

Pin Sights challenge closeup

The colours are gorgeous inside the circles and makes a great impact.

Thanks for stopping by my blog today.


My blog signature

Saturday, June 20, 2015

Get well soon cards!


Oh! Hello everybody, Glad to be back blogging after four days. Life became busy over the week. Although I crafted, I had no time to blog plus the weather is very overcast with periods of rain which means no natural light to take photos either. It felt like I haven't blogged forever!!!  Finally I managed to take some decent photos my cards today. Thought I will share them with you.

I wanted couple of get well cards to give couple of my friends who are having health issues. So I went ahead and made a a set of five cards. Sharing only three today with you.

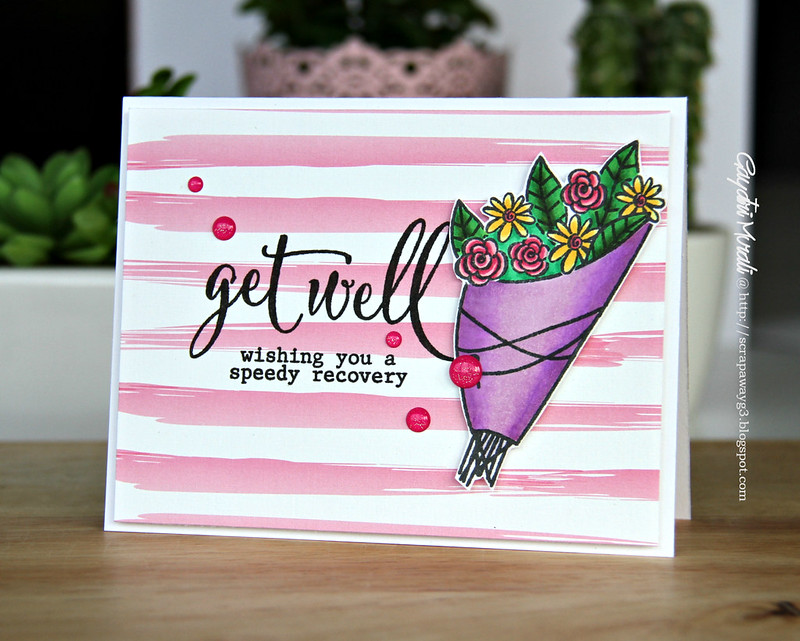
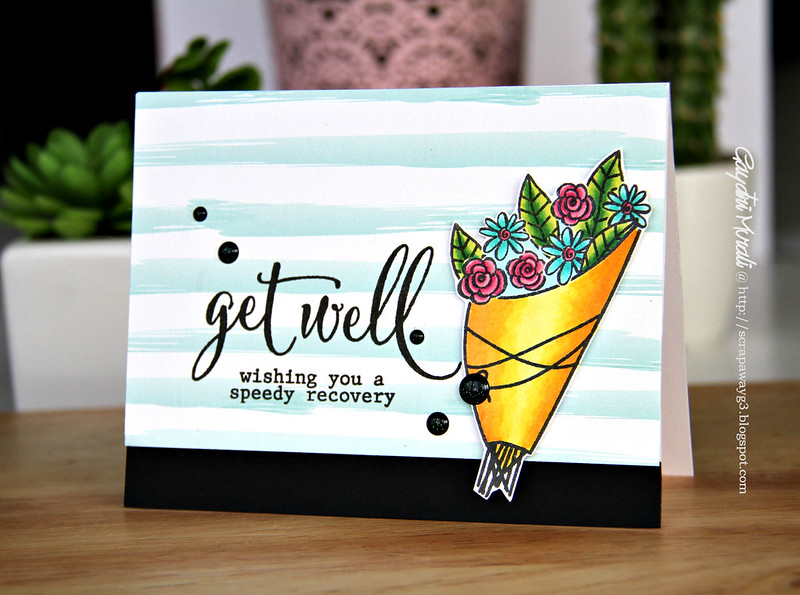
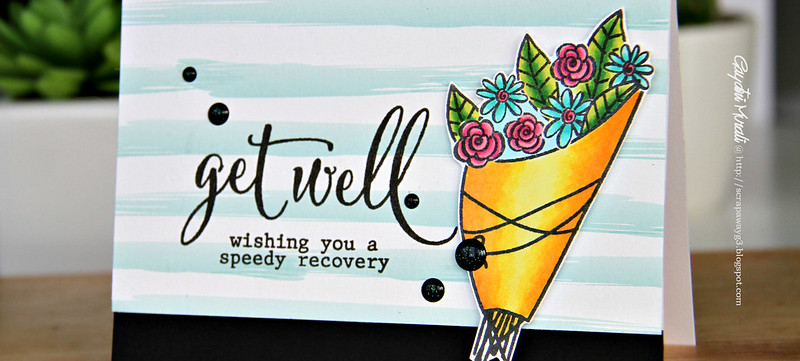
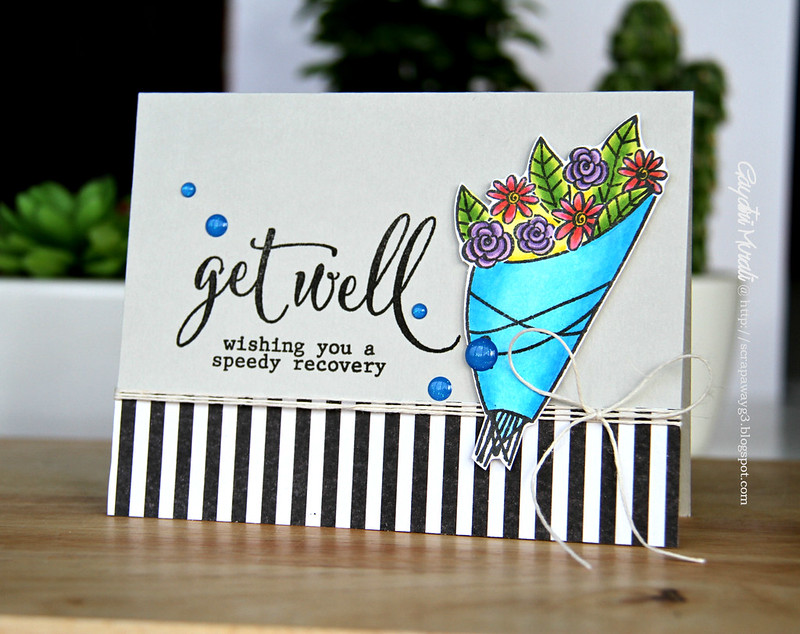
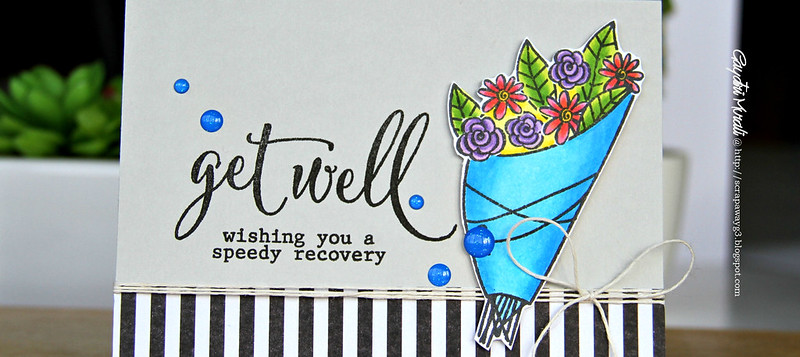
I have used Avery Elle's Get Well stamp set to make my cards. To start with I simply stamped five bouquets on white cardstocks and coloured them with copic markers. I then hand cut them all out. So now I have five different coloured bouquets to make cards with. The use of different pattern papers and layout on the cards makes a set off five cards.

Get well Purple bouquet card

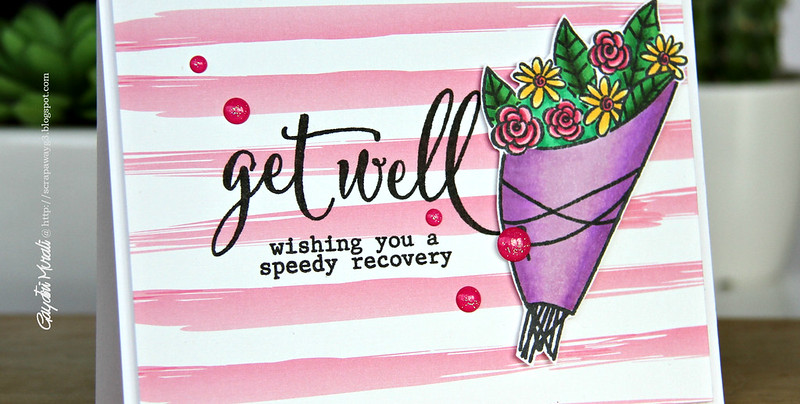
The sentiment is also from the same stamp set. Love how big and bold the main sentiment is with the smaller sentiment below. I have used Doodlebug's Sparkles to accent my cards.

Get well purple bouquet closeup

Here are the rest two of the cards and closeups.

Get well yellow bouquet card

Get well yellow bouquet closeup

Get well blue bouquet

Get well blue bouquet closeup

I will share the last two tomorrow. 

Thanks for stopping by my blog today.

My blog signature

Tuesday, June 16, 2015

Runway Inspired Challenge #86

Hello and welcome to a new Runway Inspired Challenge.


To be honest, I was struggling with this outfit. I love the outfit. It was the pattern and the dark shades that got me. Combining patterns and darker colours together was a struggle. I almost gave up and asked Jen for more time to get a card done for this challenge. Just after I did that, I had a brain wave and made this card.

Thanks a bunch

Hennah Elements is one of my favourite stamp set from Altenew. That is because the images in this set are beautiful and the outline of these images are nice and thick. These images make a statement when stamped on coloured cardstock in black. So I stamped the images from Hennah Elements on a purple cardstock panel covering the entire panel. The panel was beautiful with the pattern which coordinated with the purple of the skirt from the outfit.

Then I stamped the large flower twice, small flower one and a few leaves on white card stock. I coloured using copic markers. The flowers in the teal blue and leaves in red. They were all cut out by hand.

The base of the card is black. I adhered the purple panel at an angle with bits of gold foil cardstock sticking out on either side. Trimmed the excess off. The flowers and leaves are clustered and adhered using foam adhesives for dimension. I brushed shimmer on the flowers using Wink of Stella. The sentiment is from Label Love stamp set also from Altenew.

Thanks a bunch closeup

Check out Runway Inspired Challenge blog for design team projects on this fabulous outfit. Come and play along with me.

Thanks for stopping by my blog today!
My blog signature

Monday, June 15, 2015

I am over at Winnie & Walter!


Yes, I am over at Winnie & Walter Blog today sharing a watercolour card.
Here is a sneak peek of the card.

Always for you closeup up1

Check it out! 

This is my second post for today. My first post is a super CAS card.

My blog signature