Showing posts with label MFT. Show all posts

Wednesday, December 7, 2016

You're a Deer Friend!

This is second post for today. HERE is my first post!

Hi all and welcome to another week on the Simon Says Stamp Wednesday Challenge
Thank you for joining us for the Anything Goes Challenge and we hope you will all join us again this week too.
We will be back soon with the name of the lucky winner of the $50 Voucher
This week the challenge is

Ice Inspiration


and the lovely Jenn Shurkus has made us this gorgeous mood board to give us some inspiration!

This week we are showcasing My Favorite Things Products.  You don't have to use them for the challenge but if you have them we would love to see them used.
As always Simon Says Stamp will be giving away $50 voucher to shop at the fabulous Simon Says Stamp Store
MFT is one of my favourite company. Wish I had all the budget to get everything they release every month :) Anyway, it was hard choice to choose the stamp set to play with for this inspiration challenge. Finally I settled on Deer Friends stamp set to play with. 
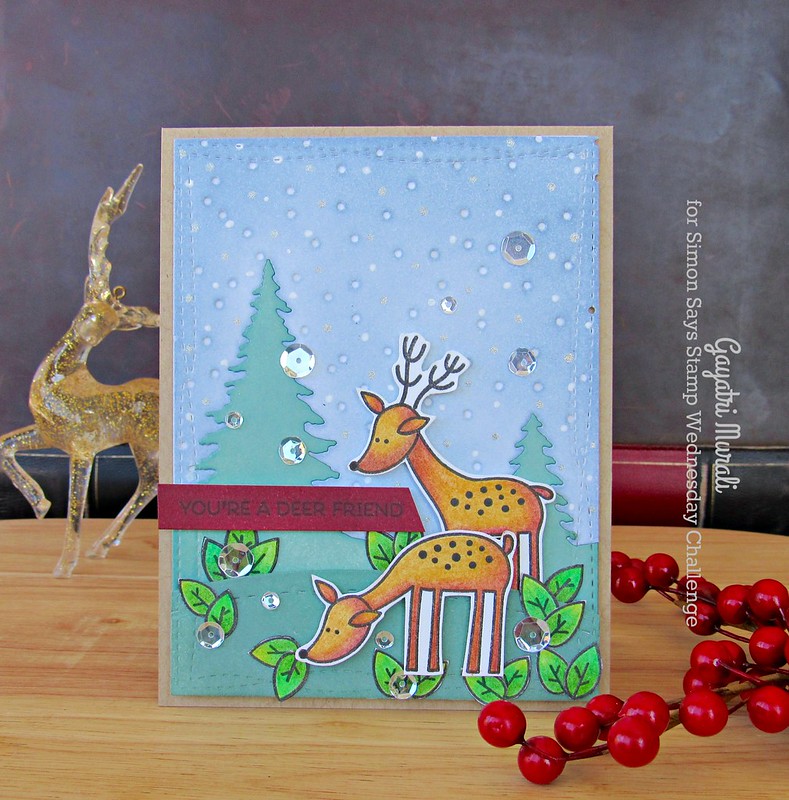
You're a deer friend1
I stamped and coloured the deers and leaves from the stamp set using PrismaColour pencils. I then hand cut them all. Wish I had the coordinating dies. My eyes went out of focus like crazy trying to cut them out. One of the perks of being in 40s I guess. I will here on get the coordinating dies for sure Lol! 
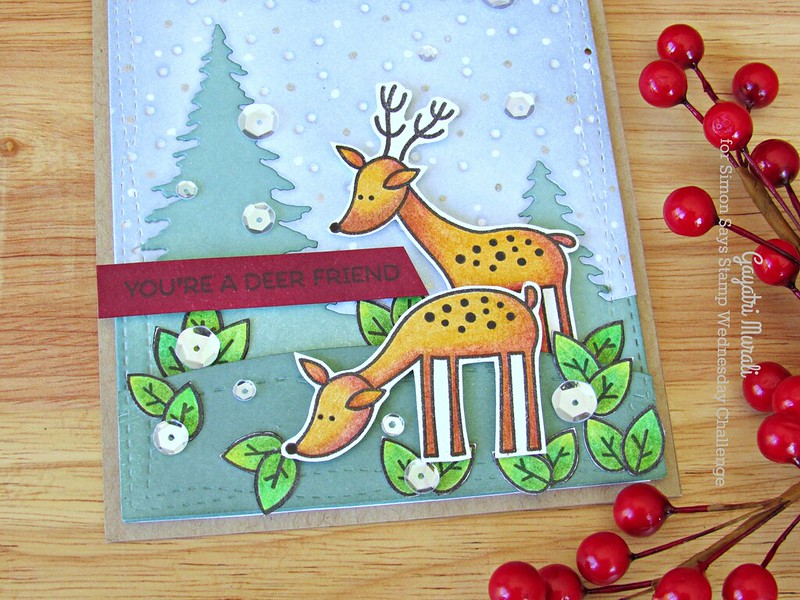
You're a deer friend closeup1

For the background, I used Simon Says Stamp Soft Snowfall die. I die cut using white cardstock and sponged the sky part of the die with Barely Blue Simon Says Stamp ink. Then the bottom part with Laurel Green Simon Says stamp ink. I then put the top and bottom of the die cut together and die cut using MFT's Wonky Stitched Rectangle die set. I used the largest die in the set. I also die cut another panel using the same wonky stitched die and die cut a slope layer using SSS slopes and Hills die. 
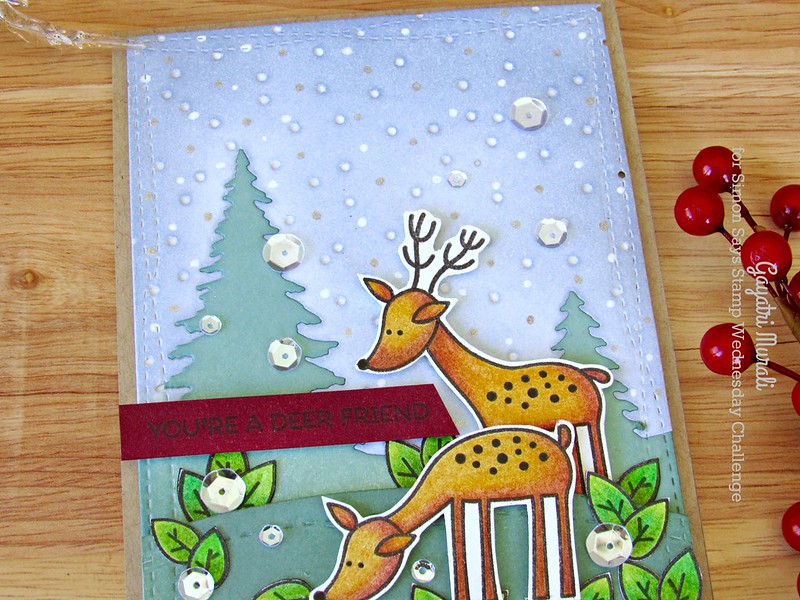
You're a deer friend closeup2

To assemble the card, I used kraft card base. Adhered the background panel using craft foam, the slope layer using foam adhesives. Then I adhered the deers and the glued the leaves. I added more snow dots on the background using Sakura gelly roll white and sparkle pens. For the sentiment, I black stamped the sentiment from Deer Friends stamp set on a strip of card stock sponged with Merlot SSS ink. In the hindsight I would have white heat embossed the sentiment to make it pop. Finally I embellished the card using PPP Sparkly Clear sequins.
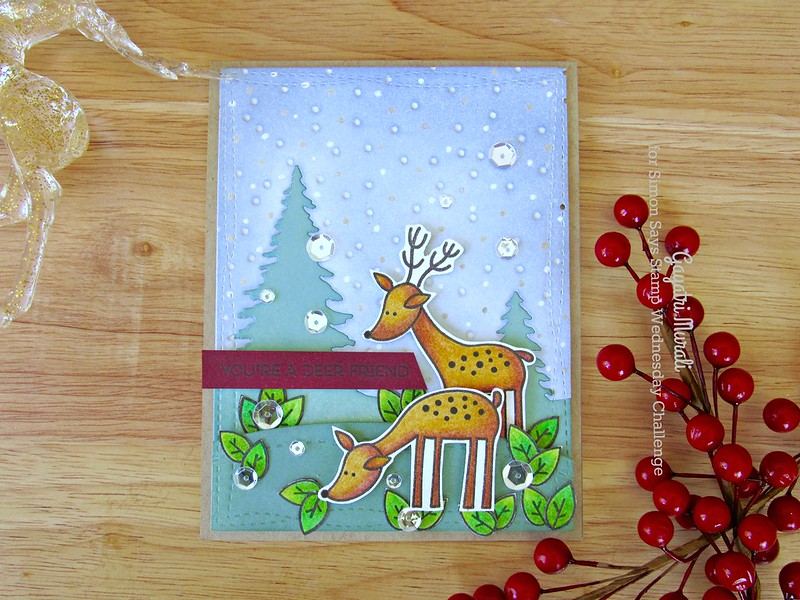
You're a deer friend flat1
I absolutely LOVE the colour combination. Muted colours yet pretty. I love it. Hope you do too. All the supplies I used to make this card is listed below.
So now it's YOUR turn.  Happy Crafting

Do you use Instagram ?  If so please add  #ssswchallenge to your challenge entry uploads so we can see them on there too !
There are fabulous Give Aways and inspiration from fabulous designers on a daily basis over on the Simon Says Stamp Blog , if you haven't subscribed by email you may want to so you don't miss out


You have until Wed  8am Ohio time. 1pm UK time, 2 pm CET to join in
No backlinking allowed, Only 5 new creations will be eligible in the prize draw


Card Supplies:


Thanks for for stopping by blog.

My blog signature

Thursday, July 21, 2016

Happy Birthday Pop Up Card!

Hey crafty friends,

Sharing an pop up card using the some new My Favorite Things products

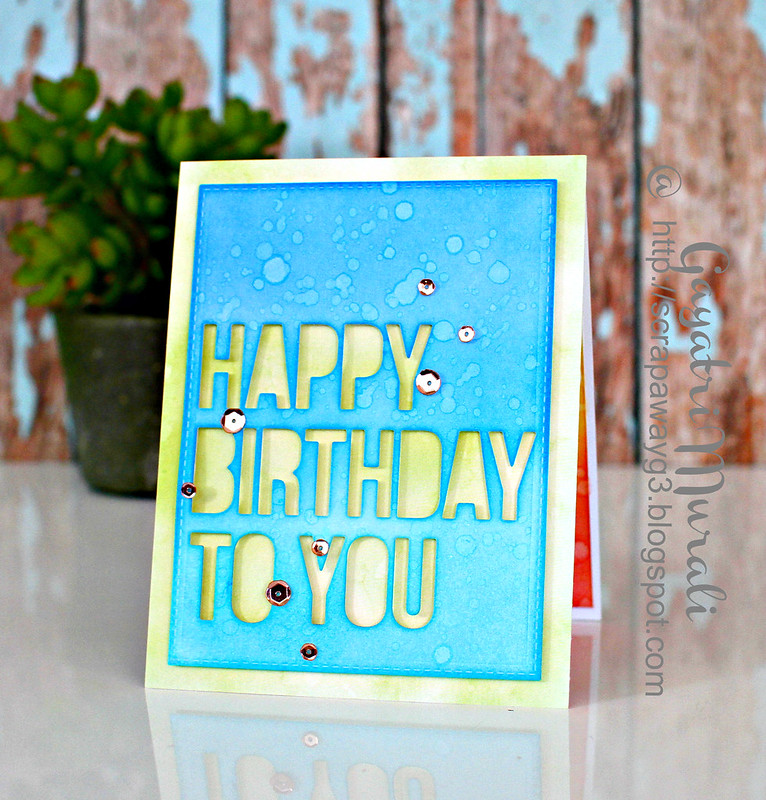
Happy Birthday to you#1

For the card front, I have used a pattern paper from Watercolor Wash Brights paper pad. The panel is die cut using the stitched rectangle die from Blueprint Sketch 29, sponged with Mermaid Lagoon, Salty Ocean and Peacock Feathers distress ink and die cut using die namics Happy Birthday to You. This panel is adhered using foam adhesives and embellished with Rose Gold sequins.

Happy Birthday to you inside

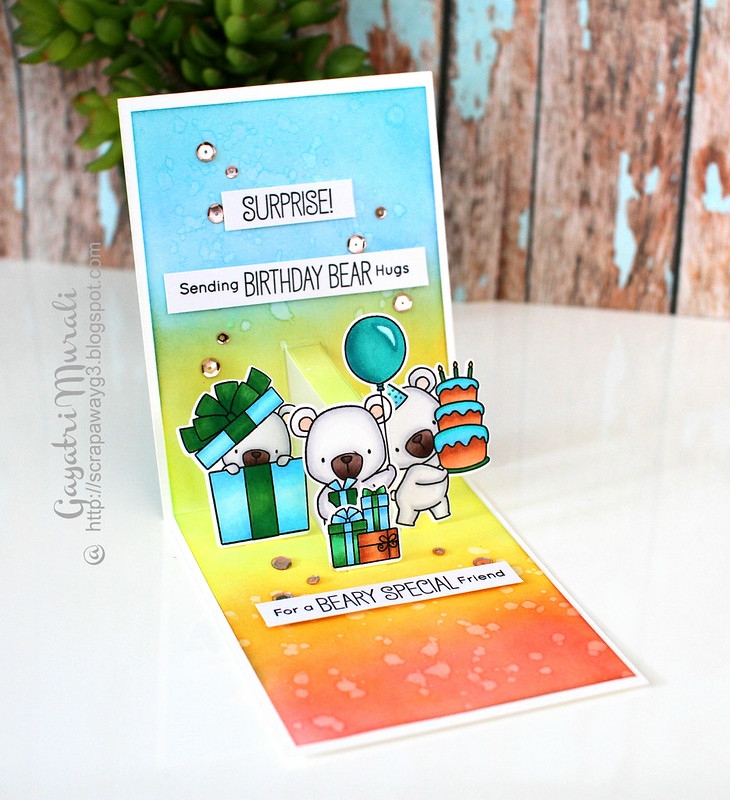
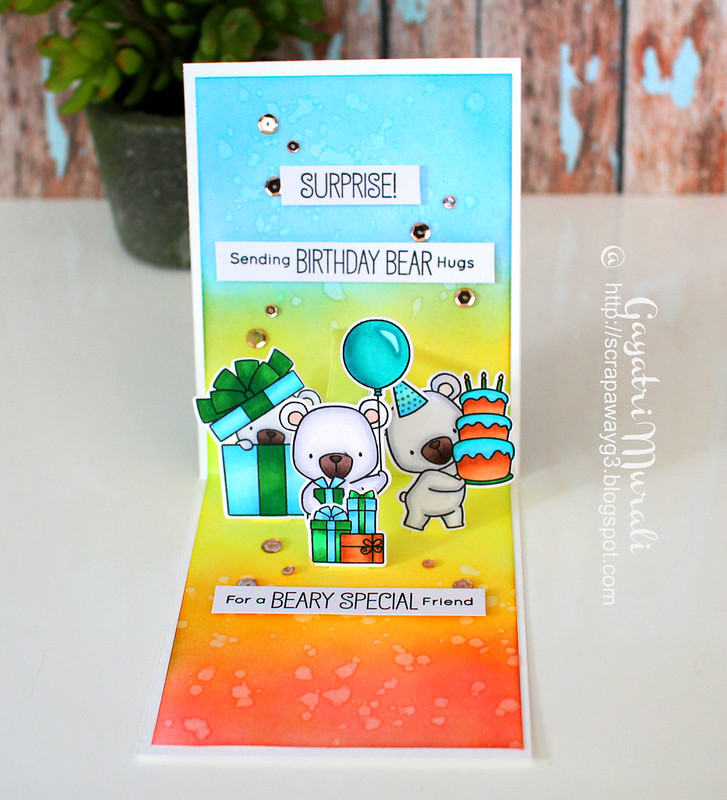
On the inside, I trimmed a card stock about half an inch smaller than the card front and scored in the middle. I sponged Abandoned Coral, Spiced Marmalade, Squeezed Lemonade, Salty Ocean and Peacock Feathers distress inks. Spattered with clean water and dabbed them to get some texture. Then I used the die namics Pop Up Elements Narrow to die cut three pop up elements.

Happy Birthday to you inside 1

The images on the pop up elements are from Beary Special Birthday stamp set. I have coloured them with copic markers and die cut using the coordinating die namics.  The sentiments are also from the same stamp set which I have stamped on white card strip and adhered using foam adhesives.  Finally embellished with Rose Gold Sequins.

I am loving the interactive die namics from MFT. So much easier and fun to make interactive cards. All the products I have used on my cards are available at both MFT store as well as Simon Says Stamp Store.

Thanks for stopping by my blog today!
My blog signature

Wednesday, June 29, 2016

Guest Designing at My Favorite Things Blog - Day #3


This is my second post for the day. My Simon Says Stamp Wednesday Challenge post is HERE!

Hello everyone,

Welcome back! This is the final day of my guest designing at My Favorite Things Blog. I have couple of cards shared at the MFT blog, one of which I am sharing here with you.

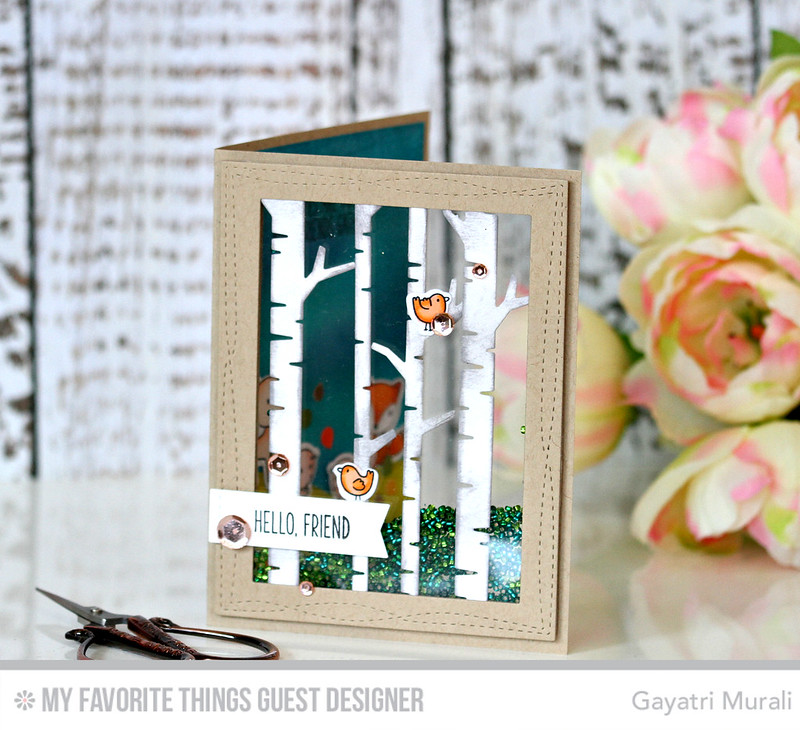
I was inspired byKimberly Crawford’s Peek a Boo window card. So I wanted to recreate it with my own twist to it. My twist is: I have added a shaker component to the window!

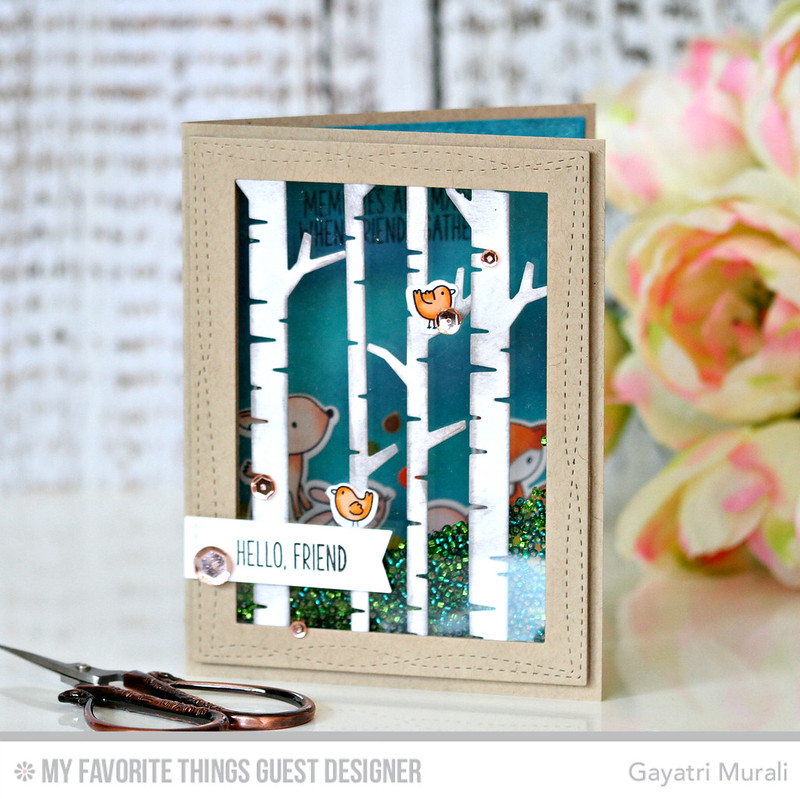
Hello Friend


I started with making the window shaker element for the card. I die cut the die namics Birch Treewith Smooth White cardstock. Sponged Hickory Smoke distress inks to give a bit more realistic birch tree look. I die cut a Wonky Stitched frame using two Wonky Stitched Rectangle die namics and Kraft cardstock. I adhered a clear acetate sheet behind the Wonky Stitched frame then the birch trees die cuts. I also adhered couple of birds stamped, copic coloured die cut from Sweet Forests Friends stamp set. I also created another frame using Stitched Wonky Rectangledie namics and adhered acetate sheet behind it.

Hello Friend #1

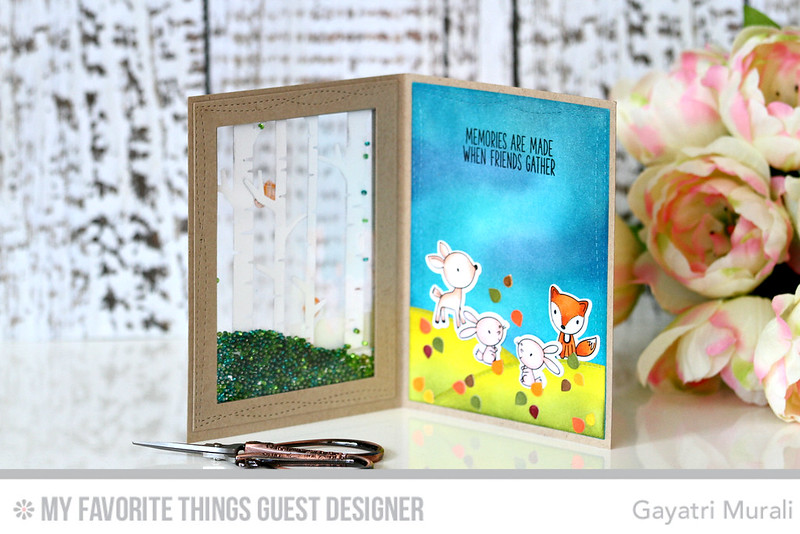
On a Kraft card base, I die cut a window on the card front using the second rectangle die namics. I adhered the birch tree panel I created on the card front using foam adhesives. After adding the Woodland Seed Beads, I adhered the second Stitched Wonky Frame panel behind the card front giving the window shaker box. I love this. So cool!

Hello Friend #2


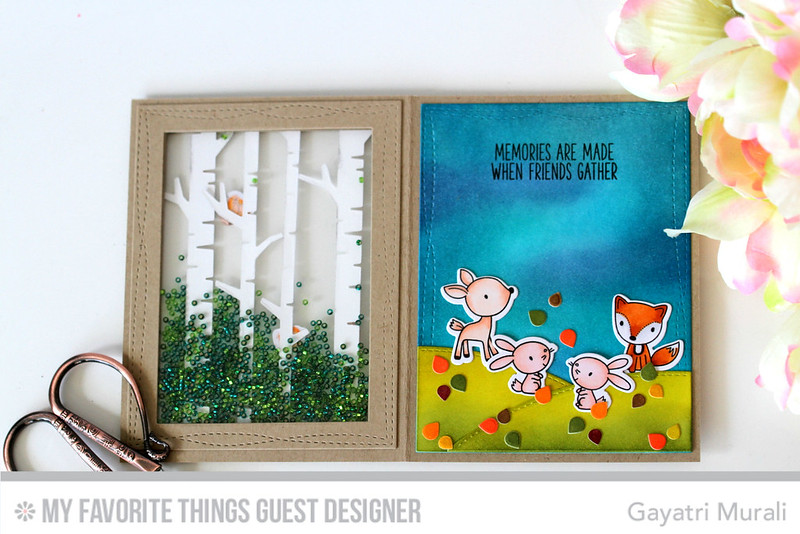
On the inside of the card, I die cut the largest Stitched Wonky rectangle die namics using SmoothWhite cardstock, sponged Faded Jeans and Peacock Feather distress inks on the background. Then I die cut the die namics Stitched Valley using Sour Apple cardstock, sponged Mowed Lawn distress ink and adhered on the bottom of the panel. I also added stamped copic coloured and die cut fox, deer and bunnies images from Sweet Forest Friends stamp set. The Birch Tree die namics also has these cute little leaves dies. I die cut them using Smooth White cardstock, sponged  autumn colours using distress inks and adhered them randomly on the landscape. Finally, I stamped the sentiment from the Sweet Forest Friend Stamp set on the top of this panel using Black LicoriceHybrid ink. For the front, I stamped the sentiment also from Sweet Forest Friend on Smooth White card strip, die cut using one of the dies from dienamics Blueprints 29 and adhered using foam adhesives. Finally embellished with Rose Gold sequins from Pretty Pink Posh.

Hello friend flat #1

Hope you like my card. Head over to My Favorite Things Blog to see the other card. I throughly enjoyed working as Guest Designer for MFT blog and very thankful for the opportunity!

Thanks for stopping by my blog today!

My blog signature

Friday, June 24, 2016

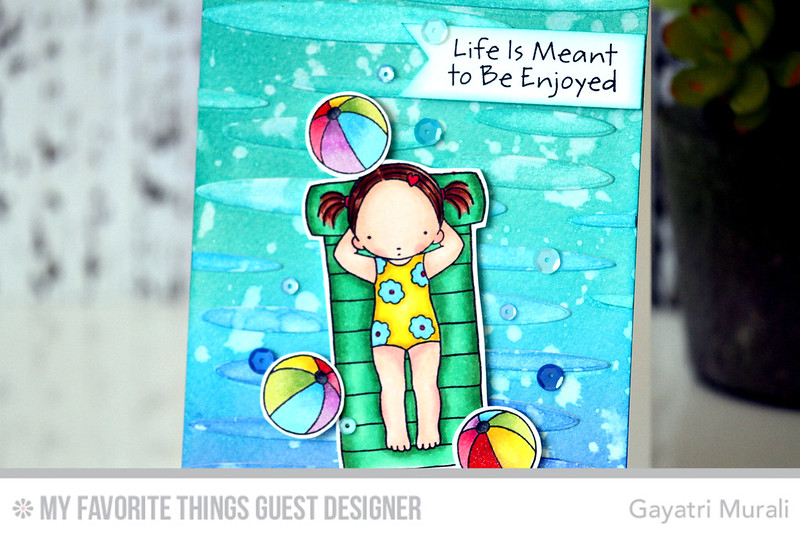
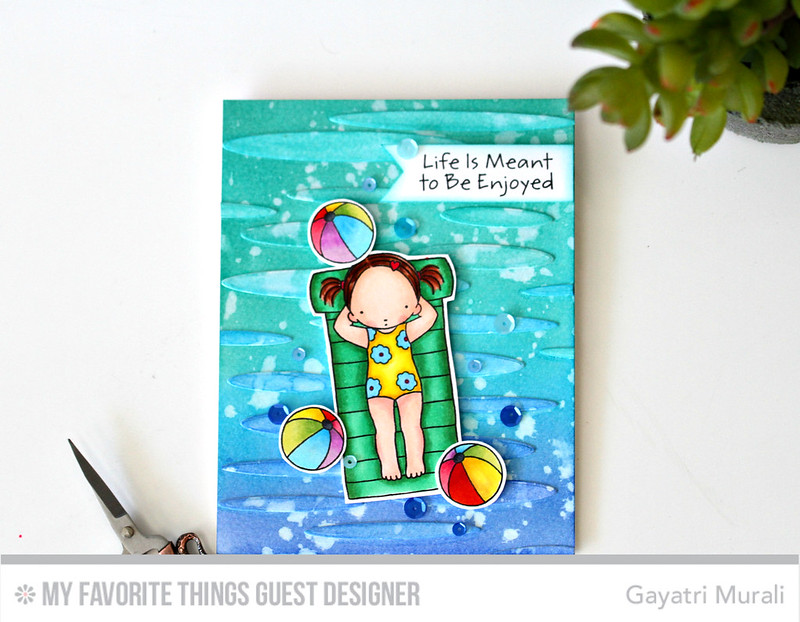
Life is meant to be enjoyed! Day #2 Guest Designing at MFT


Hello and welcome back! This is my second day of guest designing at My Favorite Things Blog.
I am sharing two more cards at the blog using Pure Innocence stamp sets. Here is one of the cards I shared today.

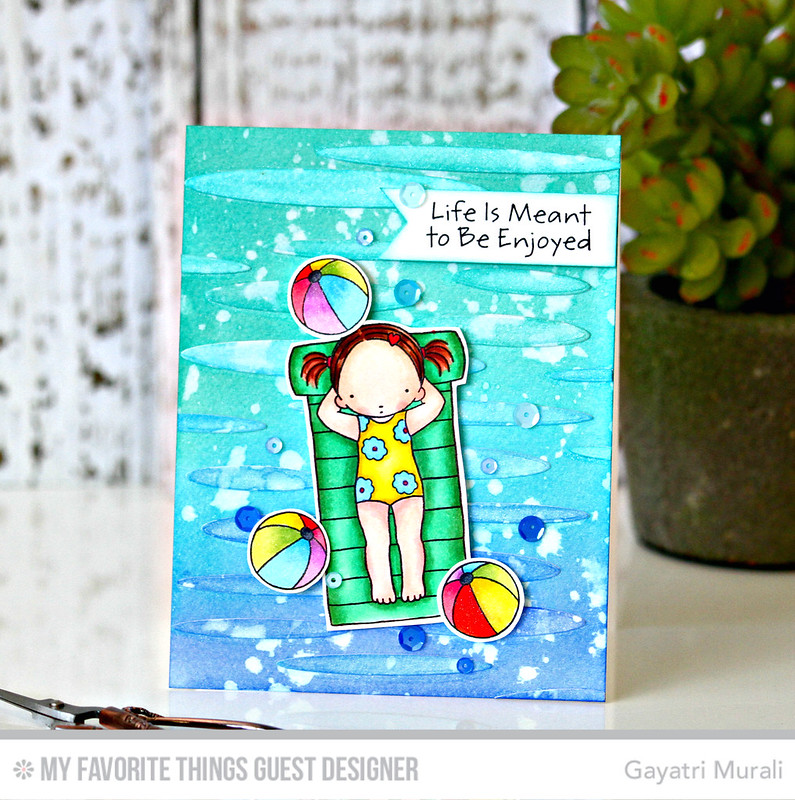
Life is meant to be enjoyed

I started with stamping and copic colouring the images from Pure Innocence Fun in the Sun stamp set. Then I hand cut them out as I don’t have the matching die. If you have the matching die, die cut the images using them. I used one of the flowers from the Sweet ForestFriends stamp set to stamp and add pattern to the girl’s bathers.

For the background, I trimmed two Tim Holtz watercolor paper to the size of the card front. I sponged Peacock Feather, Evergreen Bough and Blueprint Sketch distress inks on both the watercolour papers.  I spattered clean water on both of them and dabbed the water off with a cloth to get texture on the panels. One panel I adhered on a Smooth White card front. I ran the second panel into my die cut machine using the Oval Shadows die namics.  I adhered these oval shadows randomly to achieve waves, extra dimension as well as texture to the card front. I brushed clear shimmer using Wink of Stella clear shimmer pen. 

Life is meant to be enjoyed closeup

I adhered the images from the Fun inthe Sun stamp set using foam adhesives. The sentiment is simply stamped on a strip of Smooth White cardstock, trimmed fishtail end and adhered. Finally embellished with Pretty Pink Posh Cobalt, Aquamarine and Ocean Spray sequins.

Life is meant to be enjoyed flat

Check out MFT Blog for the second card. Hope you like this one.

Thanks for stopping by today!

My blog signature

Thursday, June 23, 2016

Oink! Guesting at My Favorite Things Blog!


Hey everyone,

I am super thrilled to share that I am guest designing at My Favorite Things. Yay! I am a big fan My Favorite Things designs. So when I was asked to guest design. I was not only thrilled but honoured. Thank you so much for the opportunity and generosity. I thoroughly enjoyed creating many projects using the newly released products. Today I am sharing couple of cards at MFT Blog. I am sharing one of the card here. Check out MFT blog for the other. Hope you like them.

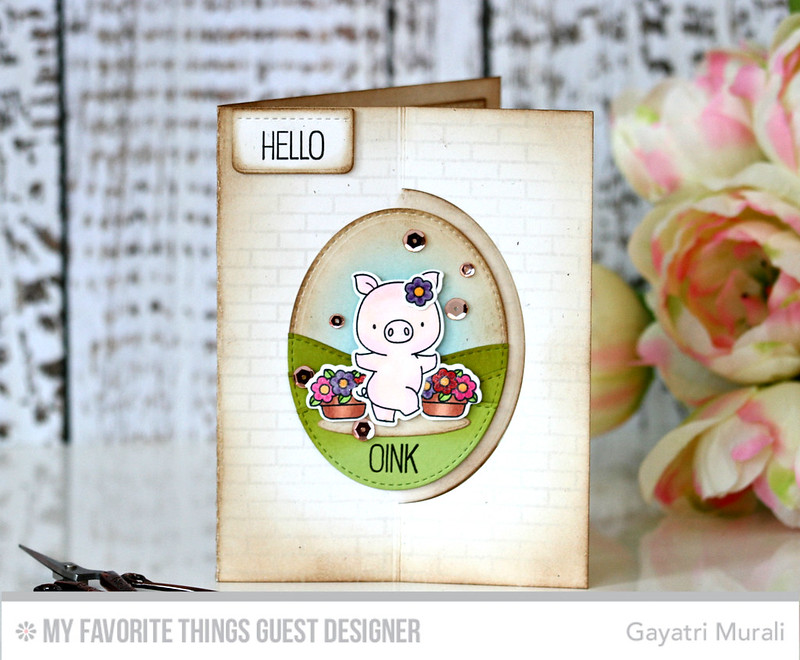
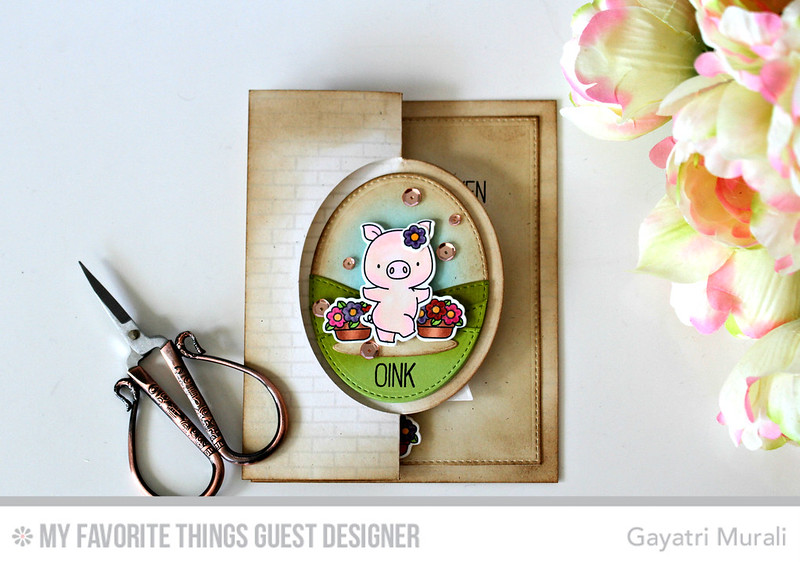
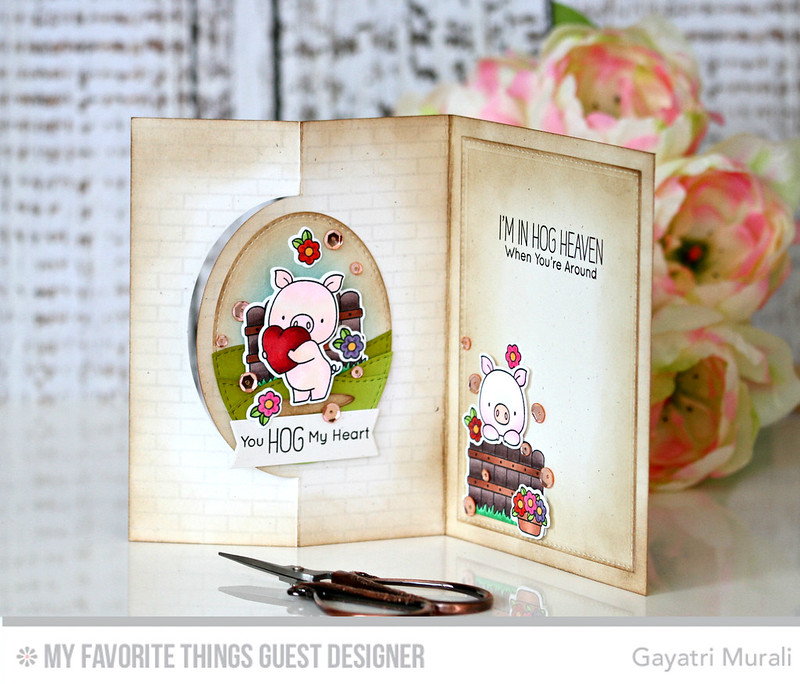
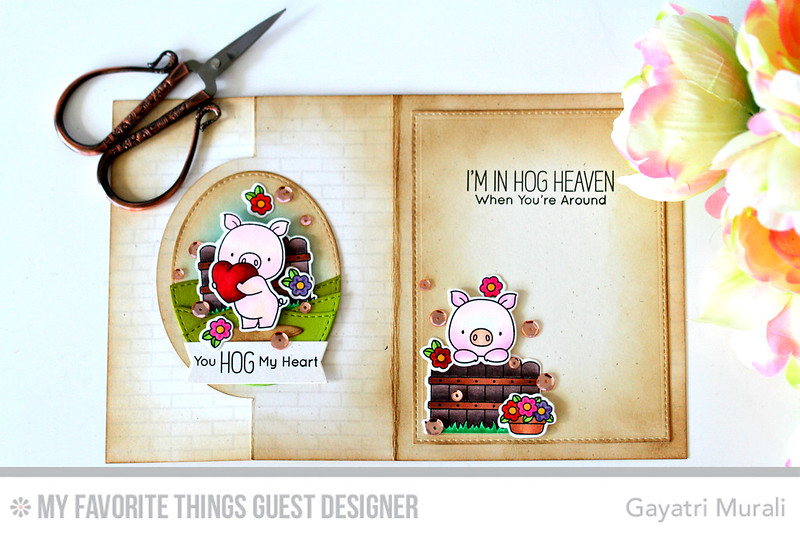
This is one of my favorite card so far this year. I created a swing card using die namics Flop Card - Oval and Hogs Heaven stamp set and coordiating dies.

Hello Oink!

I created a side open card base with Primitive Cream card stock. On the entire card base, including the insides and back of the card, I stamped the Small Brick Background stamp using Natural Premium Hybrid Ink. I sponged distress inks on the edges on all four sides of the card base, and then I used the Flop Card – Oval Die-namics to make the flop card front.
I stamped all the images (some twice) from the Hog Heaven stamp set on Smooth White card stock with Black Licorice Hybrid Ink, and then I coloured them all with markers. Using the coordinating Die-namics, I die cut them and then die cut a few of the Oval Shadows Die-namics using Primitive Cream Card Stock. Next, I sponged the edges with distress inks.
Hello Oink side #1

For the focal point on the card front, I die cut the stitched oval die from the Flop Card  – Oval Die-namics using Primitive Cream Card Stock and then sponged distress inks on the edges and centre of the oval. To create the landscape layers, I used Sour Apple Card Stock and the Stitched Snow Drifts Die-namics and sponged distress ink on them. Then I layered them on the oval die cut and trimmed off the overhang with scissors. Next, I adhered the oval shadow, two potted flowers, and the dancing hog using foam tape, and then I stamped oink using black ink and adhered the finished oval to the front of the flop element.
Finally, I stamped the sentiment on Primitive Cream card stock using Black Licorice Hybrid Ink, die cut it using one of the dies from Blueprints 29, applied distress inks to the edges, and adhered it to the card front.
Hello Oink Inside
For the focal point on back of the swing element, I did a similar process except I used the fence image, the hog with the heart, and few of the tiny flowers. Next, I stamped the sentiment on Primitive Cream Card Stock using Black Licorice Hybrid Ink and die cut it using one of the flags from Blueprints 29. Finally, I adhered the finished oval to the back side of the flop element.
For the inside of the card, I die cut the stitched rectangle from Blueprints 29 from Primitive Cream Card Stock, sponged distress ink on the edges, and adhered it on the inside of the card. Then I adhere a few more images from the Hog Heaven stamp that I had coloured with markers and die cut. Finally, I embellished the card with Rose Gold sequins.

Hello oink inside flat
I thoroughly enjoyed making this card! It was totally outside the box for me as I generally do not make such detailed cards. A bit of adventure, but I love how it turned out.
Check out MFT Blog for the second card and how I made that one. The second card also has an element which is outside the box. Hope you like that one.
You can find all the supplies I used on my card at MFT Store.
Thanks for stopping by my blog today!
My blog signature