Showing posts with label Tips and Technique. Show all posts

Friday, December 5, 2008

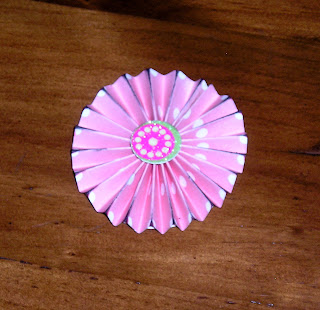
Flower from paper-Step by Step.


I received an email today asking how I made the flower in my Basic Grey layout.
So I thought I will do a step by step guide.


Step 1.


I have taken a strip of paper. The length and width of the paper is up to you.
Wider the paper, the bigger the flower.
The longer the paper, the denser the flower.


Step 2.


Make a concertina fold with the strip of paper as shown above.


This is how it looks when you finish folding.

Step 3.


Join the ends of the folded paper using double sided tape.

Step 4.


Use a double sided adhesive foam dot and hold the centre in position.

Step 5.


Decorate the centre using a smaller flower or a button. The edges can be inked or sprayed with Glimmer Mist to give shimmer as an added interest.

So now, there is always a matching flower for your layout.

Thanks for stopping by

Hugs

Gayatri.

Thursday, November 20, 2008

Masking Technique...


Some of you had asked me about the masking technique I have been using in my layouts. Its the opposite of stamping.


Description:

1. Take your desired shape out of scrap paper. Any shape- circles, squares, tags, negative of alphas or even roughly torn scrap paper.

2. Place it where you want to mask. Example, I have used a tag cut out of a pattern paper and placed it on a white scrap paper. I want the inside of the white paper to be blank to write in it. But you could place your mask where you want to in the layout.Even over the ribbon, flower, photo etc., Basically, you are covering the area you want to be untouched and working around it.

3.Then use your desired color ink and dabb around the mask. I have used makeup sponge and distress ink from Tim Holtz.

4. Remove the mask piece and here is the awesome effect around the masked area.

I use it mainly to distress, produce extra layer without adding another piece of pattern paper.


In "Pretty in Pink" layout, I used the negative of a diecut flourish and dabbed the ink to get the flourish on the layout.


There are endless ways to use this technique.

So have fun.


Here are some photos to show you how it is done.


hugs

Gayatri

Edge Distresser!


I had mentioned in one my posts about Heidi Swapp Edge Distresser.
Here is the picture of it.
Just run through the edges of the paper and the paper gets frayed to give the distress look. You can ink the edges too if you want.
Perfect for heritage or distress look or even to help the paper pop up in the layout.
Not expensive and easy to use.
So check it uout with your local shop.
And have fun with a new look to your layout.

Hugs

Gayatri