Sunday, November 30, 2014

Sale at Winnie & Walter


Check out the free stuff, Wow!
 Take advantage of the sale and get you favourite Winnie & Walter stamp sets.


My blog signature

Saturday, November 29, 2014

Christmas Card Series - Set #8


Dear friends,

I have a shaker Christmas card set to share today. This is my 8th set in my Christmas card series this year. I am so thrilled sharing my card sets this year. Hoping next year I will be more organised and have some graphics and a format. Today's set does not have tutorial as I got carried away and made all my  cards watching television. Then realised that I had not taken photos while making them. So very sorry. But this shaker card is easy that I will write down the instructions for you.

Here are all the four cards together.

shaker cards

I have used the Christmas Tree Cutout die namics from My Favorite Things to die cut my white card panels to make the shaker panel.
Here is the first card in the set.

red striped merry christmas card

Supplies:
Cardstock: Smooth White cardstock from MFT
Pattern papers: North Pole 6 x 6 paper pad from Kaisercraft.
Specialty paper: Vellum and acetate cardstock.
Dies: Christmas Tree Cutout from MFT
Stamp Set: Holiday Botanicals from MFT
Accessories: Sequins and Silver star from Pretty Pink Posh, Rhinestones from Simon Says Stamp, foam adhesives, tape adhesives, cuttlebug, silver embossing powder, heat gun, powder tool, tiny star confetti from stash and Shimmer  clear sparkle Spritz from Imagine Crafts.

Instructions:
1. Make a card base using white cardstock
2. Trim the red diagonal striped pattern paper from North Pole paper pad to the card front size and adhere to the card front.
3. Trim white cardstock to 3 1/2" x 4 3/4". Spritz the clear sparkle on the panel and let it dry. LOVE the shimmer this gives to the white panel.
4. Diecut the Christmas tree using the die.
5. Trim the acetate to the panel size and adhere on the inside of the panel.
6. Add foam tape around the tree. Add the sequins from Pretty Pink Posh coordinating to the pattern paper.
7. Cover with pattern paper trimmed to the size of panel. Shaker box is ready.
8. Stamp and silver heat emboss the sentiment on vellum and trim to size.
9. Wrap the vellum sentiment around the shaker box and secure at the back,
10. Adhere this shaker box to the card front.
11. Add the big silver star from Pretty Pink Posh on top of the Christmas tree and add the rhinestone to its centre. Card is finished.

Here are some closeups.

Red striped merry Christmas closeup2


red striped merry christmas closeup1

Now change the pattern paper on the back of the shaker box and on the card front to make three more shaker cards. It is that simple. By using the pattern papers from the same collection or paper pad, it is easier to coordinate papers and thereby the sequins as well. Here are rest of the three shaker cards.

Blue merry christmas card2


nordic merry christmas card2


b&w merry christmas card

 This set is very easy to make as the only stamping that is done is the sentiment. Again, prepare by trimming, diecutting, spraying and embossing the sentiment. Then it is easy to assemble sitting in front of the television.

If you like to see my other card sets in my Christmas Card Series, here they are: Set #1, Set #2, Set #3, Set #4, Set #5, Set #6 and Set #7

Don't forget to follow my Christmas card Pinterest Board.

Follow Gayatri's board My Christmas cards on Pinterest.

Thanks for stopping by! 

Happy Thanksgiving to all my American friends!
My blog signature

Wednesday, November 26, 2014

Sneak Peek of a new Challenge at StampNation.

Hey everybody,

StampNation has weekly challenges to play along.


Here is DT sneak peek of this week's challenge. Can you guess which is mine?


StampNation is an awesome online community with hundreds of tutorials, videos, gallery full of inspiration, challenges, discussions, discount and much more. Click here to register at StampNation. I am sure you will enjoy the online community experience.

Thanks for stopping by!

My blog signature

Tuesday, November 25, 2014

Set of reindeer cards


Just a random post sharing some more Christmas cards I made some time ago.

Season's greetings


Joy triangle card1


Joy star card2

The Reindeer is die called Leap of Joy from Penny Black. Then sentiment diecut is from Papertrey Ink. Banner and sentiment on the banner is from Simon Says Stamp. Pattern papers from my stash I have been hoarding for a while lol! Sequins are from Pretty Pink Posh.

Thanks for stopping by! 

My blog signature

Sunday, November 23, 2014

25 Days of Christmas Tag with Tracey McNeely

This is my second post for today. This is my Christmas Card Series - Card #7 post.

Today I am participating in Tracey McNeely's 25 Days of Christmas Tags as design team member of Curtain Call Challenge.


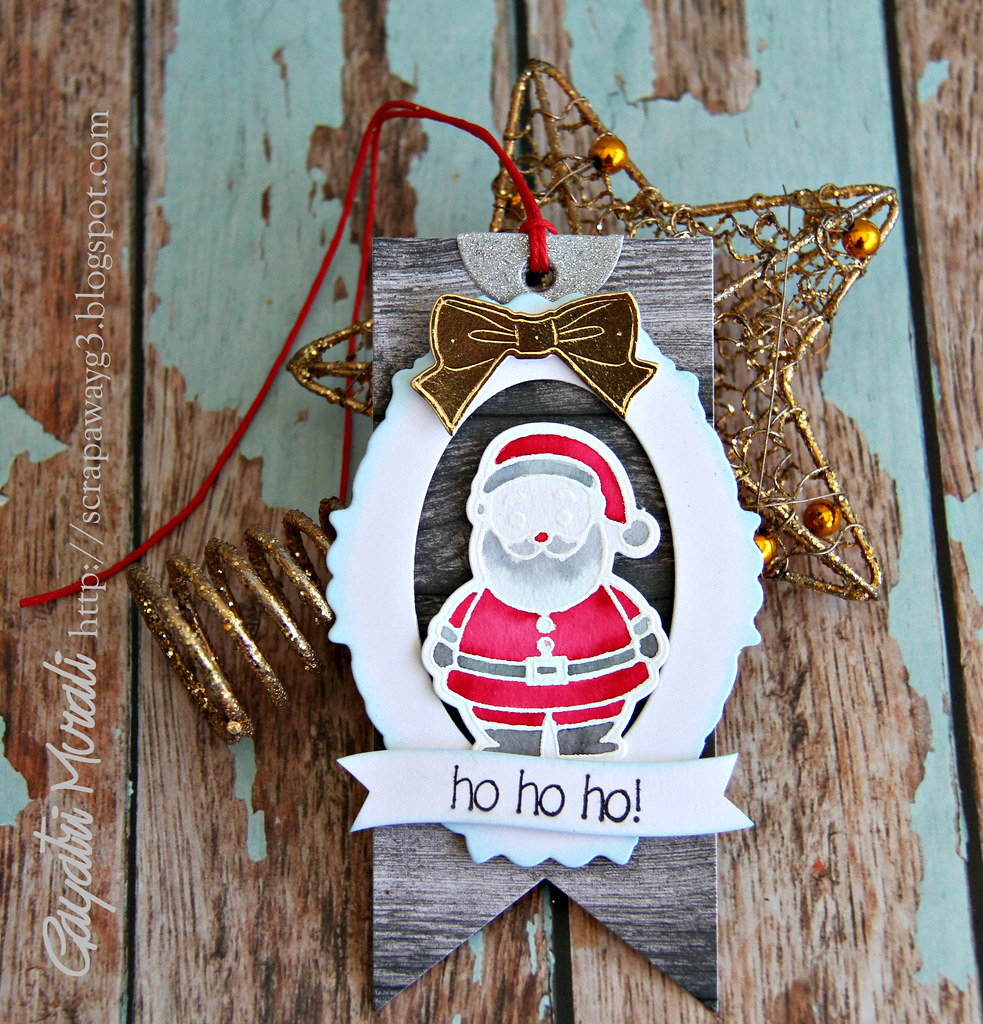
Here is my Christmas tag.

H ho ho! Card

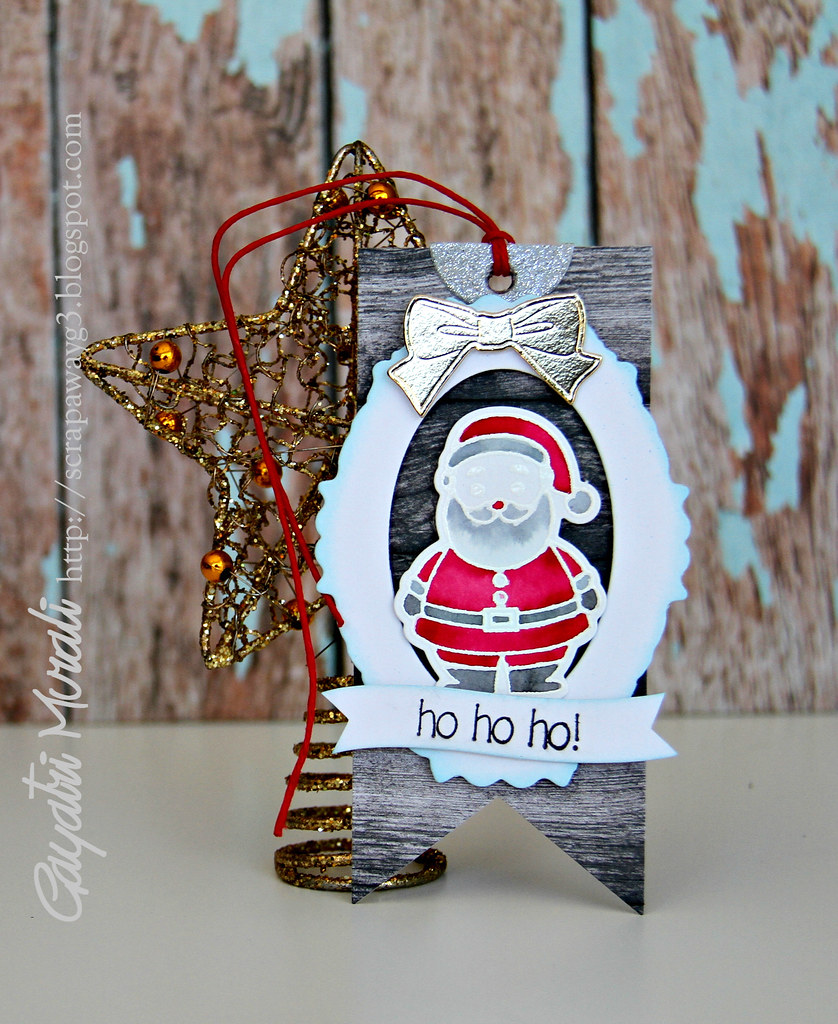
I have used fish tail banner die from Paper Smooches to die cut my main tag using white cardstock as well as woodgrain pattern paper. I have glued the woodgrain die cut on to the wite cardstock die cut for stability.

I then die cut the frame using PTI silhouette die and sponged blue ink on the edges. The Santa is from Cute Christmas Characters from Clearly Besotted for Simon Says Stamp. I have white heat embossed the santa on watercolour paper, then watercoloured it. When dry, I used the coordinating die to die cut the santa. The gold bow is die cut using Taylored Expression die. The sentiment is from the Cute Christmas Character stamp set which I have stamped on to one of the tiny banner die cut from Simon Says Stamp. I trimmed off the folding banner edges and cut of fish tail ends with scissors to be able to fit on the tag. This sentiment strip is also sponged with blue ink on the edges.

Ho ho ho flat

I wanted to move away from the traditional looking tag to something totally different. I decided to rummage through my leftover diecut box to pick the diecuts to use on the tag. Except for the santa, others were left overs. It is a good feeling to reuse :)

There are plenty of prizes to be won through Tracey's 25 Days of Christmas Tags.
These are some fantastic prize sponsors: 


Make sure you leave a comment to enter a chance to win a prize from one of these fab sponsor.

Thanks for stopping by!

My blog signature

Christmas Card Series - Set #7

Welcome back to my Christmas Card Series. This is set #7.
I have a simple looking colourful card set today. I have gone for non traditional colours once again.
Here is my first card sample from the set.

Merry Christmas yellow1

I have used the crystal images from Christmas Crystal stamp set from Hero Arts to stamp white heat emboss and watercolour using Peerless on watercolour paper. I then cut them all out.

PIC 1

I then used Diamond Stickles to coat them. Once dry, the glitter on the crystals are very pretty.

Pic 2

I have used DCWV  black glitter paper to die cut my sentiment from Merry and Bright die from Essentials By Ellen. Save the tiny dots of all the "i". It is easy to loose them. :)

PIC 3

I then adhered the crystals using foam adhesives. Some of them overlapping as shown in the pictures below.

PIC 6

I added Pretty Pink Posh's sequins to accent the colours of the crystals.

PIC 7

Finally adhered the sentiment using glossy accents.

PIC 9

The finished panel is mounted on the card base using foam adhesives. Here are the rest of the three cards.

Merry & Bright 1

Happy Christmas

Christmas Wishes1

And all four cards together.

Crystal card set

If you like traditional colours of Christmas, then use red and green colours instead of the colours I have used. Mount on kraft card base instead of grey base. You will get a gorgeous new set of traditional Christmas card. Hope you like this set.
Check out my gallery on Pinterest just for my Christmas cards.

Follow Gayatri's board My Christmas cards on Pinterest.

Thanks for stopping by!

My blog signature

Friday, November 21, 2014

Tag You're It with Tracey's 25 Days of Christmas Tags

Dear friends,

I have new Tag You're It Challenge #11 today.
This challenge's inspiration is this Maureen Merritt's gorgeous card.


Tracey McNeely asked Tag You're It Design Team to play along with her the 25 Days of Christmas Tags she has been hosting. As part of the team, I am play along using Maureen Merritt's tag card as the inspiration.


I love Maureen's tag card. Love the die cut background and layered tags. Inspired by these, here is my tag card.

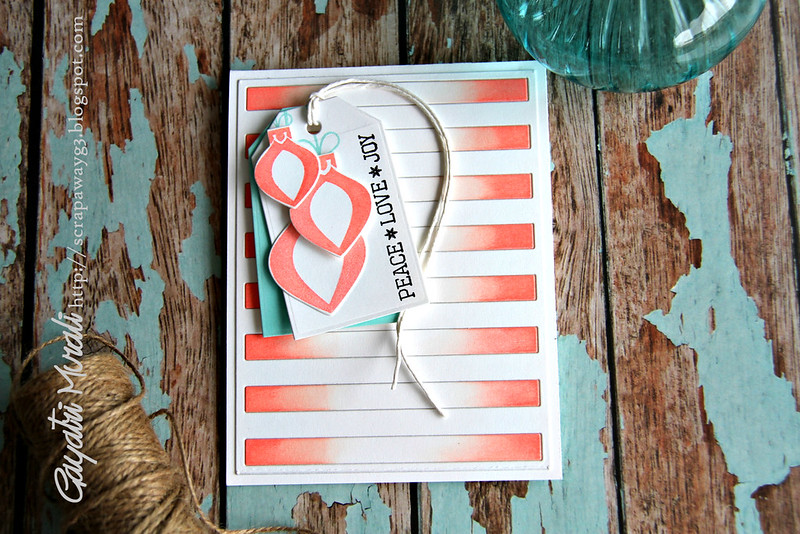
Peace Love Joy 1

I have used the horizontal cover die from MFT to die cut my background panel. I then sponged some Fresh Peach ink from Simon Says Stamp on the negative strips from the diecut panel and popped it right back in place and glued the entire diecut down to the card front.

Peace Love Joy flat1

For the layered tags,  have used tags from MFT again which I die cut  twice from white cardstock.  I inked one tag completely with Mint Julep ink from Simon Says Stamp. On the second tag I have stamped the sentiment and layered the ornaments from Ornamental Style stamp set from Clearly Besotted.  I brushed Wink of Stella clear shimmer on he ornaments for the festive look on the Christmas card. I love the coral and mint colour combination. So trendy for a Christmas card.

Now I also made a coordinating tag as well

Peace Love Joy tag

For the coordinating tag, I did exactly the same process except revered the colours. I coloured the layered tag with coral and the ornaments with mint.  You can see the shimmer on the ornament on this tag picture.

Peace love joy tag flat

Here are the tag card and tag together.

Peace Love Joy card and tag

Hope you like my take on TYIC tag card. I am very thrilled with how they turned out especially the colour combination.

Peace love joy card and tag flat


Be sure to check out Tracey's Blog and also Tag You're It challenge blog to see more design team inspirations.

There are plenty of prizes to be won through Tracey's 25 Days of Christmas Tags.
These are some fantastic prize sponsors: 


Make sure you leave a comment to enter a chance to win a prize from one of these fab sponsor.

Come and play along Tag You're It Challenge.

My blog signature