Showing posts with label Birthday cards. Show all posts

Saturday, January 10, 2015

Pretty Pink Posh 1st birthday celebration blog hop!


Hey folks,

 Pretty Pink Posh is celebrating its FIRST birthday. Hooray! 


What a milestone for Paulina? Three cheers and congratulations to Paulina for her hard work. I am lucky to be part of her journey as design team member. It has been a pleasure and privilege to work with Paulina's Pretty Pink Posh. She is a wonderful person to work with. Not to mention the gorgeous sequins and dies in her shop.  

For the past two days, Pretty Pink Posh has been celebrating the 1st birthday with blog hop featuring some very talented designers. Today is the third day of the hop with some more talented designers in the list featuring Pretty Pink Posh's new die release.

There are three dies released today - Peek A Boo, Stitched Duo 3 and Pocket Border Die.


   I have used the lovely curved tag die from Stitched Duo 3 die set to make my card.

celebrate card1

I have used both the tag die cut and its negative on my card. I used the negative as a window and the tag with the gorgeous stitched detail as the focal point. I have sponged the tag with distress inks - Broken China, Salty Ocean and Dusty Concord. Thats one beautiful curved tag. Did I mention that before? I then sprayed the tag with Tsukineko's Sparkle shimmer. Then spattered with some water, Frost spray from Tsukineko and white Mr. Huey to give more texture on the background. The tag looks beautiful. I then stamped and coloured the girl with the cupcake from Cake & Wishes stamp set from Penny Black using copic markers. Brushed the skirt and the cream on the cupcake with Wink of Stella. Birthday celebrations need lots and lots of sparkle and shine :) I cut this image out by hand and adhered on the tag using foam adhesive.

Celebrate closeup

I then nested this tag inside the negative panel which I had already adhered on the white card base using foam adhesives. The sentiment is from Penny Black Celebrations die set which I die cut a few in green cardstock to coordinate with the girl's top and one with black cardstock. I stacked and glued all of them with the black die cut on the bottom to give shadow effect. I then added a gold sheer bow. I think is card is perfect for birthday celebrations. 

Now since this is a blog hop, you should have come from the talented Elena Roussakis's blog.
 Here is the full list of the blog hop for you.


There is no birthday celebrations without giveaways. Paulina is generous and is giving away plenty in prizes.


There are sequins pack, all the PPP dies, Big Shot, gift certificates and surprise prizes are well. Also check out Pretty Pink Posh Blog for discount code to Pretty Pink Posh Shop. So make sure you comment on all the blogs in the hops for a chance to win some of these fabulous prizes. Have fun and get inspired.

Your next stop is to the gorgeous Nicole Gavaldon's blog.

Thanks for stopping by! Happy Hopping!


My blog signature

Monday, December 29, 2014

Couple of pink girly birthday cards


Hey everyone,

Hope you enjoyed Christmas with presents, fabulous food and company :)  And are you still having a great holiday season? I am enjoying the holidays with every one at home, relaxed, great food and watching TV. Wish life was like this all the time :)

Today I have couple of birthday cards for you. These ones are very girly and pink lol! I am starting to stock up on my birthday card collection for next year. So these are the first cards :)

I have used Penny Black stamp sets called Cake and Wishes on both my cards.

cake & wishes picture

Here is the first one.

Pink Girly card2

I heat embossed the image on watercolour paper and coloured using Gansai Tambi watercolours. I then trimmed off 1/4" of an inch from the vertical side. I stamped the sentiment also from the stamp set. The pink glitter tape is from American Crafts which I adhered on the card base and the watercolour panel using foam adhesives. I have used a blue baker's twine to tie in the blues on the image with the rest of the card. And added fish tail banner cut glitter tape on the top right. Here is a closeup!

Pink girly card2 closeup!

For the second card, I have used this girl with cupcake image from Cake and Wishes stamp set.

Pink girly card 1

The process is pretty much the same except I have changed the layout of the card and used die cut from Celebrations die set also from Penny Black. Here is the closeup of the coloured image.

Pink girly card1 closeup

I love these super cute images from the Cake and Wishes stamp set. There are two more images on them which I plan to use similarly. Hopefully soon and share with you.

Thanks for stopping by!

My blog signature

Wednesday, August 6, 2014

Guest Designing for StampNation (Week #1)


Hi, Hey and Hello dear friends,

This is my first week guest designing at StampNation. First, thanks so much for having me at StampNation, Catherine!


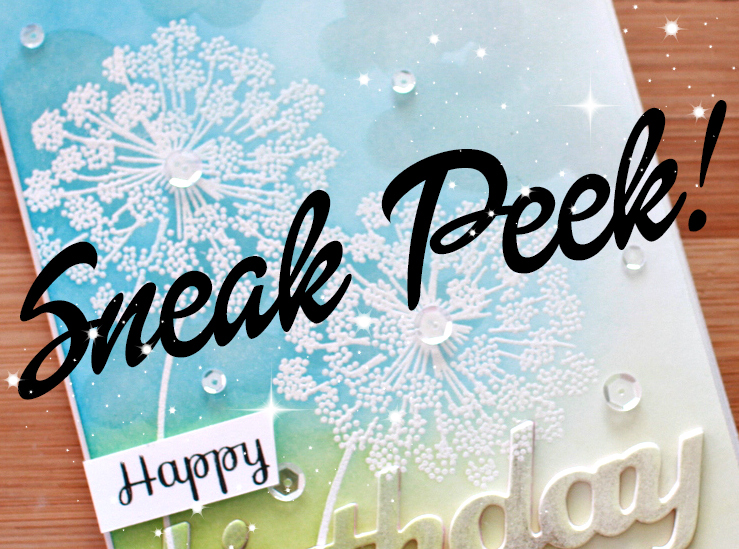
Week #1 challenge inspirational photo is fresh and green. I love it. So plenty of blues and greens. We are heading into Spring in Australia, so this is such a great start to Spring. This is my bigger sneak peek of my project for the challenge


I am so thrilled and excited to play along this challenge. StampNation is an exclusive community of papercrafters. This website is a mini inspirational source for papercrafters. There are so many videos, tutorials, challenges, chat about everything paper crafting. It is heaven I say! If you like to know more about StampNation, check out Catherine's video HERE. Catherine is the founder of StampNation. She also has plenty of video tutorials which are independent of StampNation. Here is the link to Catherine's videos on You Tube. Subscribe and enjoy!

Thanks for stopping by!

My blog signature

Friday, August 1, 2014

Guest Designing for StampNation

This is my second post. Here is my Curtain Call Inspiration Challenge Post.

Hello my dear friends,

I have a special news to share with you today. I am honoured to say that I am guest designing this month for the fantastic online stamp community called StampNation. Yes! I am so excited. Yay!
This fantastic and thriving online community is founded by Catherine Pooler. She is a very talented stamper who not only enjoys the hobby but is also a great teacher. She does some amazing videos which can be seen HERE. Subscribe to her videos at You Tube and enjoy some great technique videos.

StampNation is an exclusive online community where stampers around the world share and participate in challenges, learn techniques through videos from design team members, chat on the latest trend, techniques and hot new products available and more... There are so many tutorials, written and videos for visual crafters. The gallery is full of inspirational projects which motivates you to create. I cannot stop telling you how amazing this online community is. For more details CLICK HERE

Here is a sneak peek of my card for the first weekly challenge at StampNation.


Thank you so much for having me this month, Catherine! I cannot wait to start.

Thanks for stopping by!

My blog signature

Sunday, June 15, 2014

A quick birthday card...


Happy Sunday! 

I am enjoying the beautiful winter sunshine today. The mornings are freezing but as soon as the sun comes out, it is warm and beautiful. It is going to last for another day before rain comes back. So making the fun use of the lovely weather. So a quick post sharing one of the birthday cards I made. This one came together very quick.

Birthday card

I have used pattern paper from Heidi Swapp and some extra diecuts from my collection. I love my box of extra die cut collection. I made a few cards using them. The only stamping I did was the Birthday. I love the pop of yellow on a pretty much pastel/neutral background. 

Well, have a great weekend. See you tomorrow :)

My blog signature

Sunday, January 26, 2014

Stenciled Class Day #1 - Card #2


Second post for today using inks and sponging technique using stencils.
 Here is the first post.

Birthday card

I love the tone on tone as card background. So I sponged MFT damask stencil using black ink on grey cardstock. I then trimmed the panel and adhered to the card front using foam adhesives. For the second panel, I used the same MFT damask stencil with versamark and heat embossing. Then brushed some gesso around the heat embossed damask. Once dry I sponged distress inks. Trimmed the panel and mounted using foam adhesives. The sentiment is from Hero Arts mounted using foam again with a bunch of thread under it. Love it! Enjoying the stenciled class. Off to see what is in store for the second day.

Blog-Siggy-in-gold

Thursday, August 2, 2012

Neon Flower and leaves.


Afternoon everybody

I played with neon inks from Hero Arts today. And this is the end product.
 Supplies:
Cardstock: True Black from PTI
Pattern Paper: Dot and Stripes from Echo Park
Stamp sets:Blossom Arts and Many Birthday Messages from Hero Arts
Inks: Hero Arts Neon Ink and Green Hills Mid Tone Shadow Ink also from Hero Arts. Archival jet Balck Ink. ColourBox Frost White Ink
Accessories: Heant gun, white embossing powder from SU, Pearls from my stash.

Aren't the colours gorgeous and bright? I love how easily the inks blend and for the green I used Hero Arts Mid Tone Shadow Ink Green Hills and blended with yellow neon ink for the leaves. Love  the flower and leaves against the black background. 

I am submitting it it for the A Blog Named Hero Challenge #9-Freestyle
.

Thanks so much for stopping by!

See you soon:)

Pin It

Tuesday, July 31, 2012

A unique birthday card

Hi everybody,

Life became very busy over the weekend. Things settled a bit today but still lots ot do. So I am sharing a card I made for PC submission call but didn't get picked up.Here is the card.


This card is inspired by Typography. Here is a picture that particularly inspired me.


I am inspired by the lines and used it for my card layout. Not the colours. I used my own colours and sentiments to make my card. And you also see the lines are not exactly the same but somewhere closer to the picture. All you will need is a rough layout and you can make it your own:)

I love how my card turned out and hope you do too.

I am hoping to craft this afternoon. So hoping to share something with you soon:)
Thanks for stopping by!

Ta!

Pin It

Sunday, July 22, 2012

Ribbon Technique Challenge


Third post for today! First time I have post three in a day! Must say I had fun crafting all afternoon.
  I have a card for Papertrey Ink's Stamp a Faire Ribbon Technique Challenge.
I really liked Erin's technique and I have used Swiss Dot Ribbon on my card below

Supplies:
Cardstock: Stampers Select White from Papertrey Ink
Stamp Set: Beautiful Butterflies from Papertrey Ink
Inks: Archival Jet Black Ink
Accessories: Beautiful Butterflies dies, Swiss Dot Riibbons in Hawaiian Shoes, Sweet Blush, Hibiscus Burst and Spring Moss. Raspberry Fizz button and Lime Green Baker Twine

Love the layers of ribbon behind negative of the diecut, which not only adds colour, also texture and pattern. Awesome technique. Thanks so much for sharing Erin.

Thanks so much for stopping by!
Hoping to do more challenges tomorrow.
 Very sleepy now. So goodnight from Australia.


Pin It

Marbleized Tie n Dye Technique.


Hello everybody, 

I found some time this afternoon to play using a techniques tutorial shown at Stamp-a Faire at Papertrey Ink. T his tutorial is called Marbleized Tie n Dye.
Well, I went through my husband's vanity and did not find shaving cream! Found only shaving gel! What a disaster? I am not going to buy a shaving cream. So I decided to try using the gel. To my surprise, it did work. I loved the marble effect. So cool and looked like modern art. Wow!
 I made a set of cards using the marbleized panels


 I have used Sweet Blush and Aqua Mist reinkers to get my marbleized effect.


 I love the silhouette Life and Larger than Life images on the marbleized background.
 

This panel here was my trial panel and I love the subtle effect on it. Great technique. I have to try using with other colour combinations. After all I will have to buy shaving cream lol!

Thanks so much for stopping by!

Have a great weekend!

Pin It

Wednesday, June 6, 2012

Colour Q #140


Good Morning,

It is Wednesday already! This week is only two workng day week for kids. Tomorrow and Friday is Pupil Free day!!!! And it is a rainy winter's week as well. Great week to put on the heater and get cosy :) After two days of suffereing from migraine and neckpain, today has been good. 
So I am able to share a card I made for ColourQ #140


This is my take on the colour challenge.


Supplies:
Cardstock: Stampers Select White from Papertrey Ink
Stamp Sets: Trendy Trees and Pretty Peonies from Papertrey Ink
Inks: Real Red, Tempting Turquoise, Kiwi Kiss and Pacific Point from Stampin' Up!
Accessories: Circle punch and Cutterbee scissors.

I love the Trendy Trees Graphic Design. Just awesome.  I love this card and hope you do too:)
Thanks so much for visiting and have a great week.
Dr Phil seems interesting today. So signing off now to watch the show:)

See you soon.

Ta!
Pin It

Sunday, June 3, 2012

Birthday card


Hello Sunday! Woke up as usual at 6.00am, took Charlie for his nature calls. Everybody still asleep and all was quiet. With a cup of coffee, I decide to craft. I wanted to make a birthday card for our friend's son's first birthday party. So here is the card.


Supplies:
Cardstock: Stampers Select White, Spring Rain from PTI. Textured cardstock from Bazzill
Stamp sets: Fly Away and Train Tracks from Papertrey Ink
Inks: Archival jet Black Ink
Accessories: Up Up and Away clouds die, Fly away die and Numbers dies from Papertrey Ink, Sun dei from MFT, Clouds impression plate from Taylored Expressions and Glitter paper from Kmart.


I thoughly enjoyed making this card because no pressure, no deadlines, no sticking with any colour combo or sketch.  Although I perform better with all of the above lol! Anyway, hope you like it.
Now to get ready for the party :)

See you soon.
Ta!
Pin It

Tuesday, April 17, 2012

Crafting with Chaitali


Chaitali invited me to join a fun Iron Craft Challenge (I came up with this title lol!) based on Iron Chef. Chaitali's idea is that we both use the same sketch and same stamp sets and see what we come up with.

She chose the stamp sets and I, the sketch. Chaitali's choice of stamps are Rosie Posie, Stitches and Swirls and Birthday Inside Out all from Papertrey Ink.I drew my own sketch.
 Here is my sketch


This is my take on the sketch and stamp sets:


I have embossed Stitches and Swirls stamps on the background, white on white. Here is the close up of the white embossing on white cardstock.


Supplies:
Cardstocks: Stampers Select White from PTI
Stamp sets: Rosie Posie, Stitches and Swirls and Birthday Inside Out all from PTI
Inks: Poppy Parade, Kiwi Kiss, Crumb Cake from SU, Archival Jet Balck Ink and Frost White from Colour Box Ink
Accessories: Rosie Posie die from PTI, red pearls from Kaisercraft.White embossing powder, heat gun.

Now, check out Chaitali's take on the Iron Craft Challenge :) You will love it. She has used masking technique. Just awesome :)

I  am amazed by how similar yet different both the cards turned out :) Had great fun. Thanks for inviting me, Chaitali!

I am driving back home today. A 10 hour drive in a jam packed car - big sigh!  I miss Charlie, my Cocker Spaniel Pup and my craft supplies :) Had a great holiday but cannot wait to get back home.

Thanks so much for stopping by! see you soon.

Ta!

Pin It

Monday, February 20, 2012

Happy Birthday!


You will know this layout, if you are in Australia and watch TEN TV channel. They use colour blocking in creative way. This layout comes when they announce the next program or schedule for the evening. I did modify it. I love love the animation and the bright and bold colours of blue and yellow with black. I haven't worked out how to incorporate the animation into the card. Maybe an interactive card is the way to go but for now, inspired by TV, I made a birthday card.

Colour Blocking

I told you, it is bright and bold. But I love it. I am a bright girl. Find it hard to do muted colours. I love that I think of sketches/layouts for cards when I see TV, catalogues, billboards, TV ads, clothes etc. My husband and kids thinks I am crazy lol! Anyway, here is the supply list

Supplies:
Cardstock: Tempting Turquoise and Basic Black from SU, Golden Harvest from PTI
Stamp sets: Wonderful Words Additions,Modern Basics from PTI, Little Critters from CAS
Inks: Stazon Black Ink
Accessories: Circle punch, Fine tip black pen, MFT alpha dies.

Thanks for stopping by!

Pin It

Monday, January 9, 2012

Birthday card set


I made these some time ago. I love the bright fun colour combination. 

Birthday card

Birthday card
 
And here is the full set.

Birthday card set

Supplies:
Cardstock: Delightful Daffodils and Tempting Turquoise from SU
Pattern Paper: from Papertrey Ink
Stamp set: Inside Out Birthday from Papertrey Ink
Accessories: Stripe Embossing folder from SU, Up Up and Away dies from Papertrey Ink, Buttons also from Papertrey Ink. String from stash.


Today is one of those concerned mother day! 
1.We rescued a baby bird last evening but the bird did not make it this morning :( Aditi, my daughter was crying when she found out. Dealt with that.
2. Then my son's friend is travelling by himself by train (6 hours journey) to stay with us for 3 days. First trip by himself and he was upset 10 minutes into the journey and wanted to get down! Frantic phone calls by the train crew!!!! Spoke to the boy and settled him. Poor thing he is only 12 years. He looks big and grown up but still kid at heart. 
3. Then Charlie my puppy had to go to creche today to get used to te environment as he has to stay there for 4 days end of this week and he was all stressed out. Poor thing, there were lots of big dogs barking and Charlie is not used to it. Finally got him his blanket, toys and one of my tee shirts. Then he settled.
  Now you can see why I said my day is a "concerned mother" day! Just too much to handle in a matter of 4 hours in the morning! Anyway, all is fine now. One more hour till the train arrives. Then I will have three tween boys to look after :) Food is all stocked, games to play, movies to see and trips planned. I am organised I think!
 
Thanks for visiting and listening too :)
Have a great day!

Pin It

Thursday, December 8, 2011

Happy Birthday!

Here is birthday card I made this morning for a little girl.


 All products are from papertrey Ink except the cardstock which is from Gina K. 
I used CR84FN44 challenge colours to make this card.


 If you like to play along then here is the link to the challenge.

Thanks so much for stopping by! Have a great day!

Luv!
Pin It