Friday, October 30, 2015

Premiering Winnie & Walter October New Release Day #4

Hello and welcome back once again to Winnie and Walter's October new release.
Today is Day #4 of premiere. Hope you are getting inspired by the gorgeous cards using the new stamp sets, cutaways and creative screenings so far. If this is your first time here, then here are Day #1, Day #2 and Day #3 premiere posts.

Today we are premiering three stamp sets called Happiest of Holidays with Evelin T Design, Merry and Bright with Evelin T Design and Mini Scenery: Do You See What I See?, one die set called Essentials: Noelle Cutaways and one stencil called Scenery: Do you See What I See? creative screenings.

I love them all but first two stamp sets are pretty. They are predominantly holiday sentiment stamp sets with little images to go with it. The hand written fonts of the sentiments are lovely and sentiments are nice and big as well.

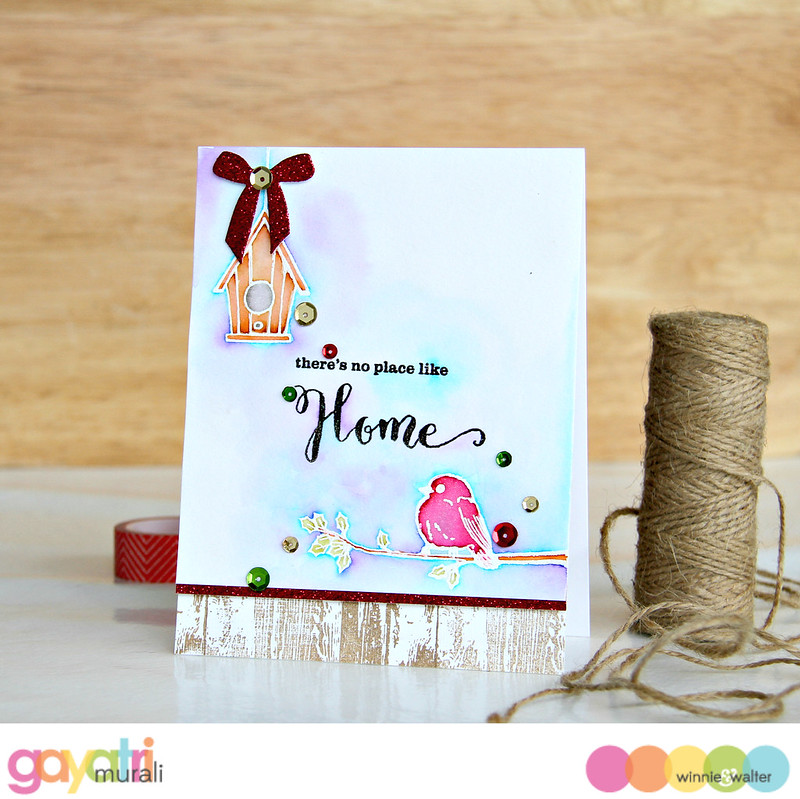
My first card for today is using Happiest of Holidays with Evelin T Designs stamp set.

Home card #1

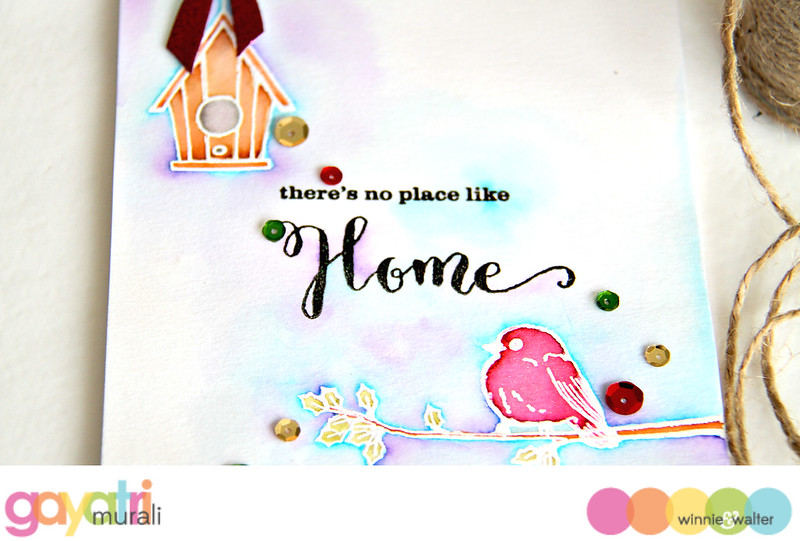
 I love the birds and cages in the set. I decided to watercolour them. I stamped the images in versamark and white heat embossed them on watercolour paper. I then used Zig Clean Brush pens to watercolour the images and the background. Once the paper is dry, I stamped and heat embossed the sentiment also from the same stamp set. I then trimmed off half and inch from the bottom of the panel, added a strip of red strip of glitter paper to the bottom. On the bottom of the card front, I stamped the Mini Scenery - Multigrain image with brown ink, then mounted the watercolour panel to the top of the card front using foam adhesives. I then embellished with Pretty Pink Posh Classic Christmas Sequins mix. I also added a red glitter bow from Essentials: Noelle Cutaway to the top of the birdcage. Here is a closeup of the card.

Home closeup
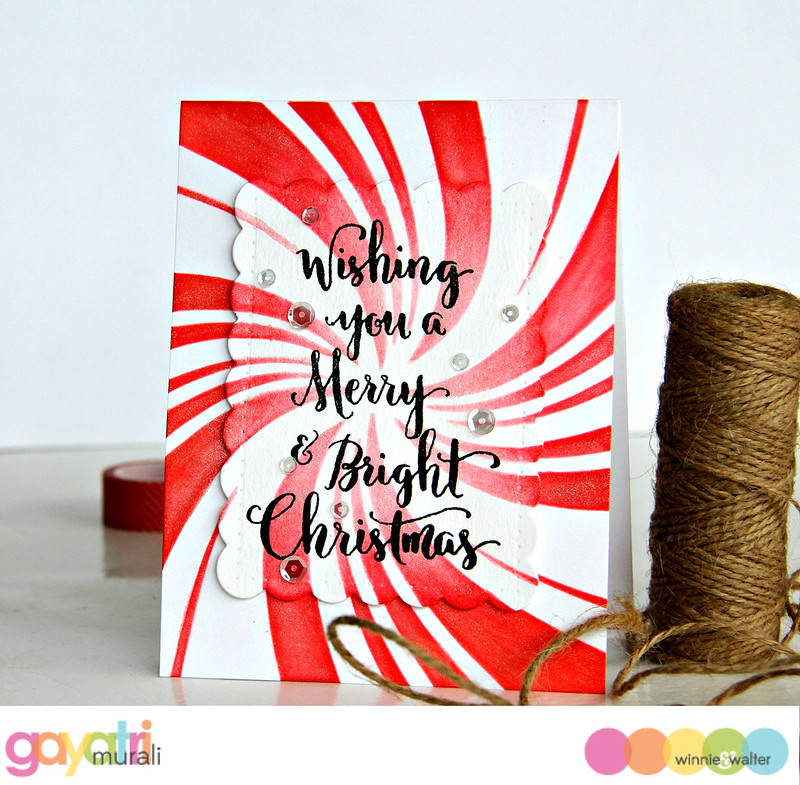
Second card show cases Merry & Bright with Evelin T Design stamp set. I love the big, bold handwritten sentiments in this set. Just gorgeous!

Wishing you a Merry & bright Christmas
I started with sponging distress inks in ombre colours from pink to red on Peppermint Creative Screening. I then die cut a scalloped panel using the die from Esssentials: Noelle Cutaway and repeated the sponging technique. Once the inks are dry, I black heat embossed the the big bold sentiment on the panel. The panel is lined up to the card base and adhered using foam adhesive to give dimension. I brushed all the red sponging area with Wink of Stella clear shimmer. Oh my! the card looks so shimmery under the light. Just beautiful! Who does not like shimmer? huh? I embellished the card with Sparkly Clear sequins from Pretty Pink Posh.

Are you liking what you are seeing? If you want to see more inspiration, check out Winnie & Walter Blog for more from the design team. Make sure you write down your list to buy :) If you want these new sets and dies premiered today, then leave a comment on Winnie & Walter Blog to enter a chance win. More details are on Winnie & Walter Blog.

Tomorrow is the release! Happy Shopping everyone!
Have a lovely weekend!

My blog signature

Thursday, October 29, 2015

Premiering Winnie & Walter October New Release Day #3

Welcome back to Day #3 premiere of Winnie and Walter's October New Release!


Hope you are enjoyed Day #1 and Day #2 premiere so far. If you are coming here for the first time, then here are the Day #1 and Day #2 posts.

Today we are premiering four new stamp sets called In Bloom: Hollie's Festive Florals, Let it Snow, Our Town and Mini Scenery: Madison, couple of dies called In Bloom, Paulina's Greenery Cutaways and Take a Bow Cutaways. and couple of stencils called Scenery: Madison Creative Screenings and The Peppermint Effect Creative Screenings.

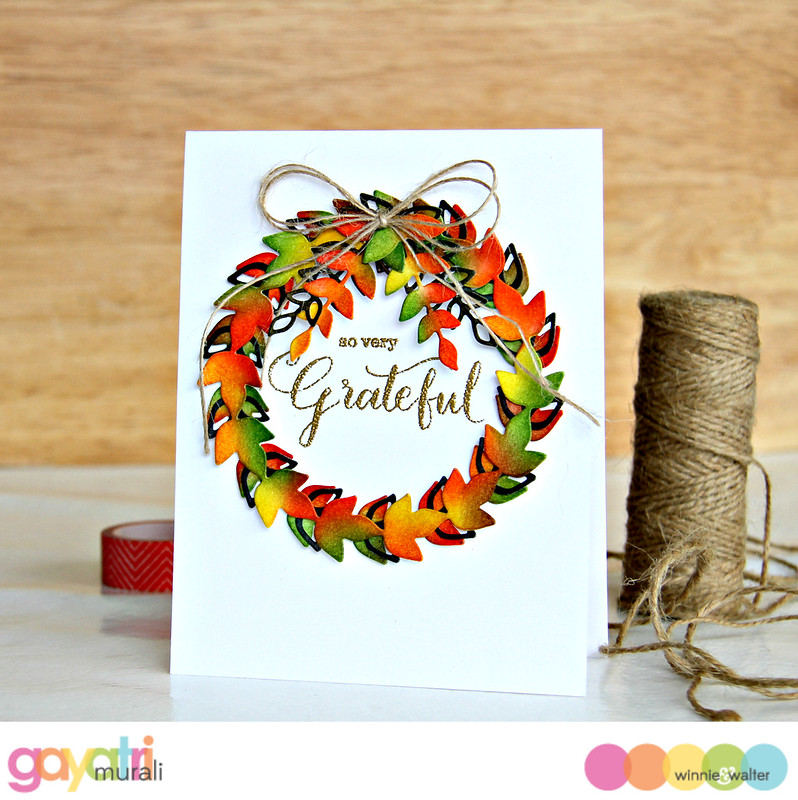
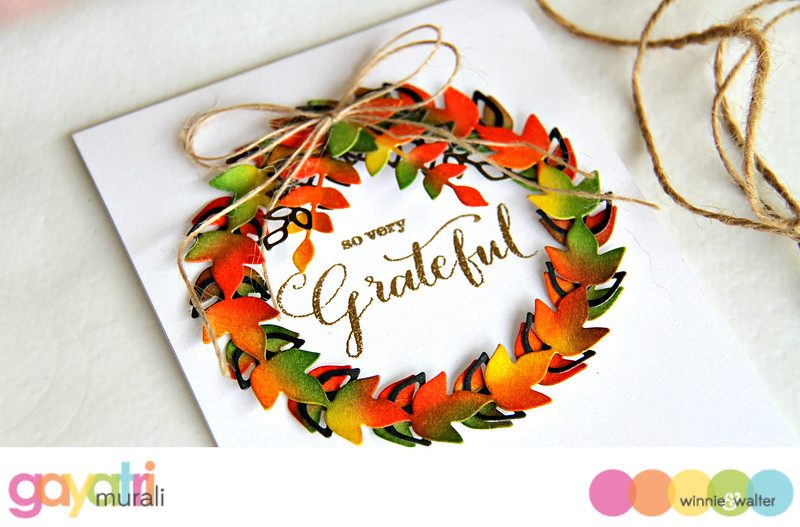
I have card using In Bloom: Paulina's Greenery Cutaway. I love this wreath die. It comes in both outline as well as solid with two different leaves set again both solid and outline. The size of the wreath is big to be the focal point on the card. That is what I have done on my card below.

So very Grateful!

I die cut two solid wreath and leaves, one outline wreath and two outline leaves. I used sponged dauber to sponge distress inks in the colour of fall on the solid die cut pieces. I mixed and blended the colours well. The colours I have used are Spiced Marmalade, Ripe Persimmon, Mustard Seed and Gathered Twigs. I sponged the outline die cuts with Black Soot and Gathered Twigs.

ON the card front, I gold heat embossed the  sentiment from a new stamp set premiered tomorrow.  Then, I simply glued the solid wreath on the card front, then the layered the outline wreath followed by the solid wreath. I did not stack them over each other but staggered them. I also curved the leaves for added dimension. I then added the leaves on the top centre of the wreath and added a big double bow with jute twine. Here is a closeup of the card.

So very grateful closeup #1

I have let the big layered wreath and the colours be the star of the card. Hope you like it.

Are you liking what you are seeing? If you want to see more inspiration, check out Winnie & Walter Blog for more from the design team. Make sure you write down your list to buy :) If you want these new sets and dies premiered today, then leave a comment on Winnie & Walter Blog to enter a chance win. More details are on Winnie & Walter Blog.

I will see you tomorrow with more Winnie & Walter goodness :)
Have a lovely day!

My blog signature

Wednesday, October 28, 2015

Simon Says Anything Goes

This is my second post for today. My first post on Winnie & Walter's Day#2 Premiere is HERE!

Hi all and welcome to another week on the Simon Says Stamp Wednesday Challenge. Thank you for joining us for the  Wrap it Up Challenge and we hope you will all join us again this week too

wed-newchallenge-header

This week the challenge is Anything Goes!

We are showcasing Lawn Fawn Products this week. You don't have to use them to join in but if you have some we would love to see them used

As always Simon Says Stamp will be giving away $50 voucher to shop at the fabulous Simon Says Stamp Store
50dollar_voucher_600px

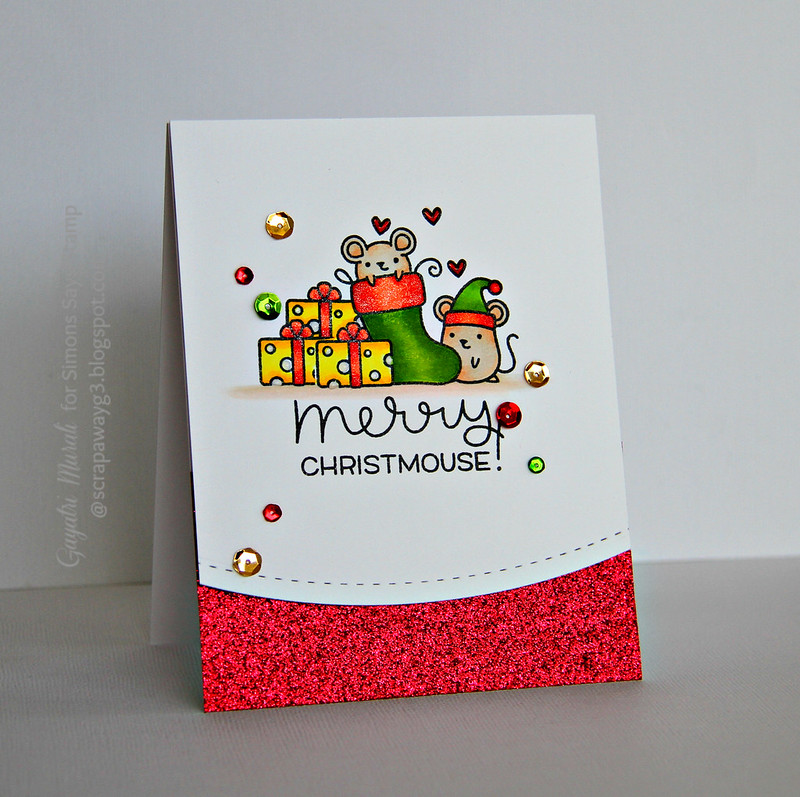
This is my take on the challenge using Lawn Fawn stamp set.

Merry Christmouse card #1


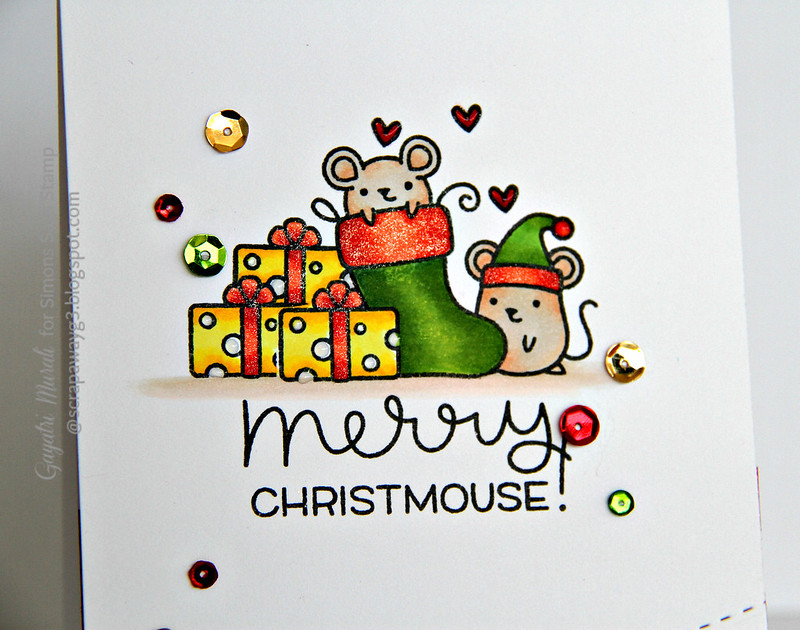
I have used the  STAMPtember exclusive stamp set from Lawn Fawn called Merry Christmouse! I masked and stamped the images from the stamp set in the middle to form a cluster. I then coloured the images using copic markers. I brushed Wink of Stella clear shimmer pen on red colours to add sparkle to the card. I grounded all the images by colouring with brown copic markers. Below this I stamped the sentiment. To add more sparkle to the card, I die cut a stitched curved edge to the bottom of the panel using Simon Says Stamp Sitiched Slope and Hills die. On the bottom of the card front, I adhered red glitter paper then adhered the top panel  using foam adhesive. I then embellished with Pretty Pink Posh Classic Christmas sequins. Here is a closeup of the card.

Merry Christmouse closeup #1

So now it's YOUR turn, Happy Crafting

Instagram

If you use instagram add  #ssswchallenge to your challenge entry uploads so we can see them on there too!


You have until Wed  8am Ohio time. 1pm UK time, 2 pm CET to join in
No backlinking allowed, Only 5 new creations will be eligible in the prize draw

word-verif

My blog signature

Premiering Winnie & Walter October New Release Day #2

Welcome back to Day #2 premiere of Winnie and Walter's October new release!


I hope you enjoyed Day #1 showcasing three new stamp sets and five new cutaways. If this is your first visit, here is the link to day #1 post.

Today we are premiering two new stamp sets called Comfort and Joy and Mini Scenery: Multigrain, two new cutaways called Cover Model: The Leaf Effect Cutaway and True Multifaceted Star and three new creative screening/stencils called Scenery: Into the Woods, Multifaceted and The Leaf Effect. You can see the pictures of all of them at Winnie & Walter Blog.

Today I have couple of cards to share showcasing some of today's products.
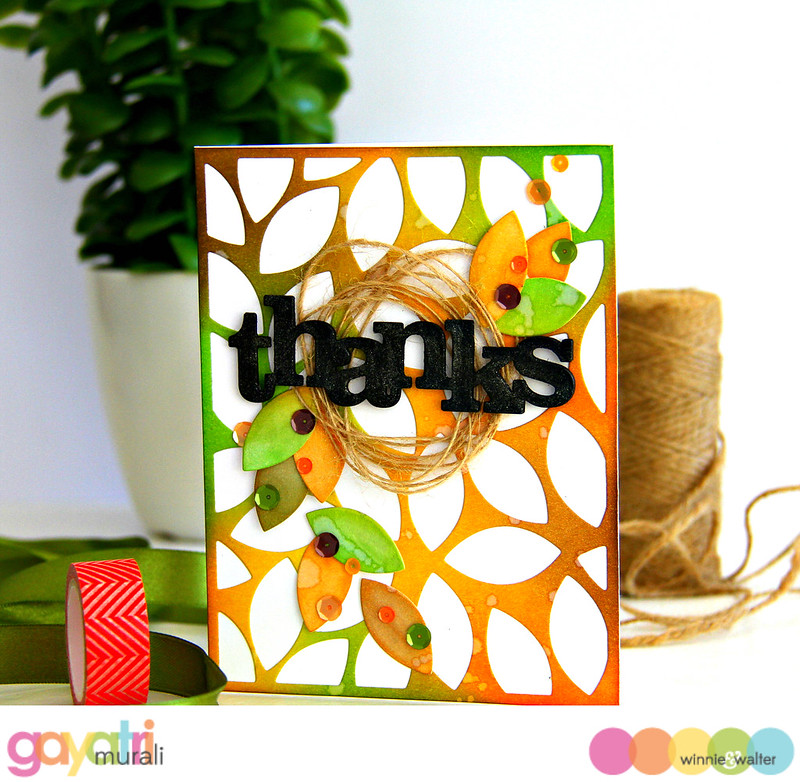
First card showcases Cover Model: The Leaf Effect.

Thanks leaf card

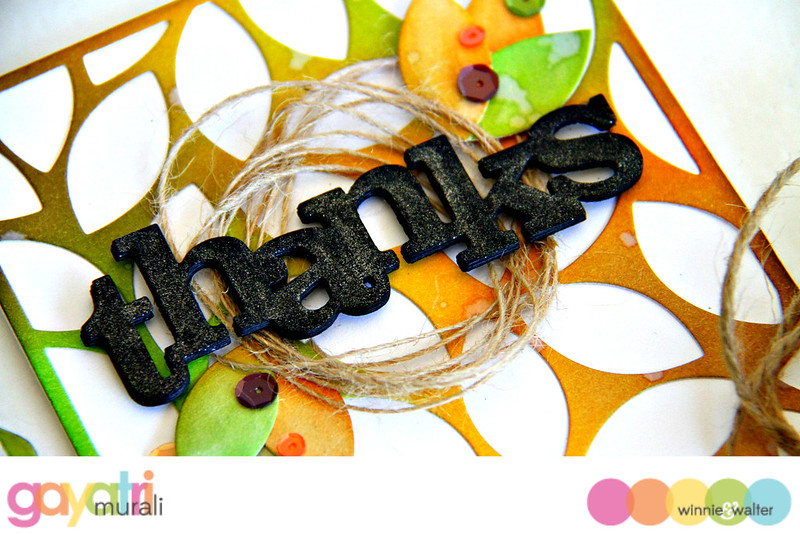
I started with sponging a white cardstock panel with Mowed Lawn, Mustard Seed, Crushed Olive and Gathered Twigs. I went back and forth to get an even blend. Then I spattered some clean water to get the spatter look on the panel. Once dry, I die cut the panel with Cover Model: The Leaf Effect Cutaway. I adhered the die cut on a white card front flush using liquid glue. For the focal point, I die cut five of the In a Word: Thanks premiered yesterday using black cardstock, stacked glued them, brushed the top using Wink of Stella Clear Shimmer pen. I adhered this on the card front with bunched up jute twine behind. Then I added a few leaves from the die cut to frame the die cut sentiment. Finally embellished with Pretty Pink Posh's Autumn Harvest sequins mix. Here is a closeup of the card.

Thanks leaf card closeup

My second card, features Comfort + Joy stamp set and Mini Scenery: Multigrain stamp sets.

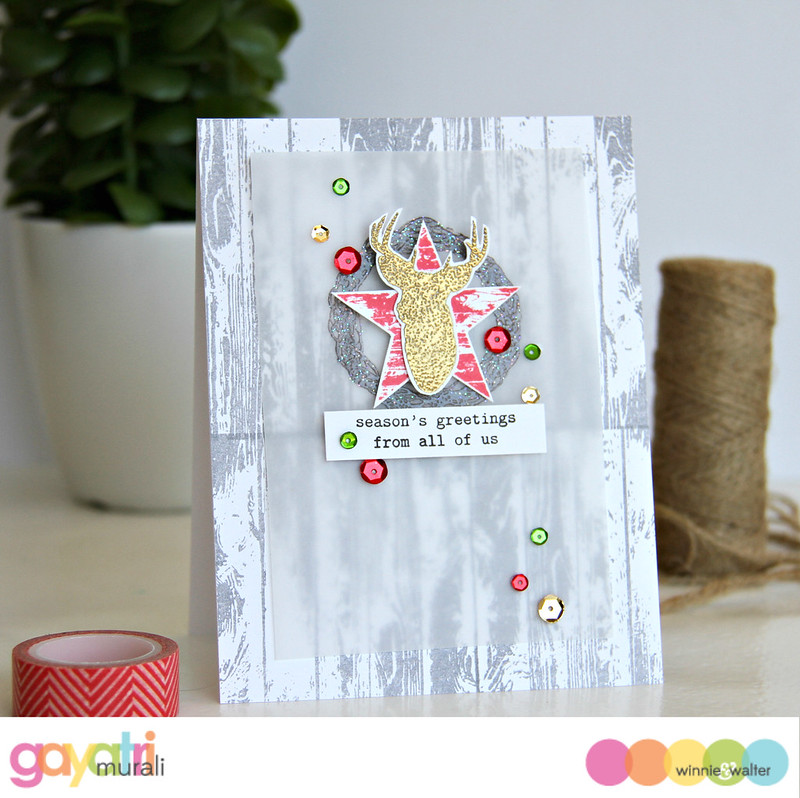
Season's Greetings from all of us

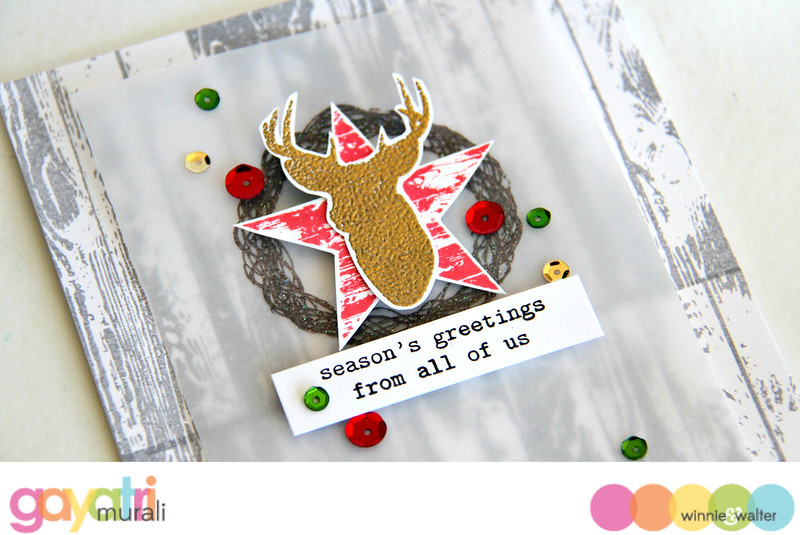
For this card, I stared with stamping the background with Mini Scenery: Multigrain stamp using Flannel Gray Memento Luxe ink.  Then I stamped the star from the Comfort + Joy stamp set and cut them out. I also stamped, gold heat embossed  and cut out the reindeer from the same stamp set. I layered the reindeer over the star using foam adhesive. On my vellum overlay, I stamped and heat embossed the wreath using Espresso Memento Luxe ink. I layered the star and reindeer over the wreath. The sentiment is from Comfort + Joy stamp set which I simply stamped on a strip of white cardstock and adhered under the focal layer. Finally embellishing with Pretty Pink Posh's Classic Christmas sequins mix. Here is the closeup of the card.

Season's Greetings from all of us closeup

Are you liking what you are seeing? If you want to see more inspiration, check out Winnie & Walter Blog for more from the design team. Make sure you write down your list to buy :) If you want these new sets and dies premiered today, then leave a comment on Winnie & Walter Blog to enter a chance win. More details are on Winnie & Walter Blog.

I will see you tomorrow with more Winnie & Walter goodness :)
Have a lovely day!

My blog signature

Tuesday, October 27, 2015

Premiering Winnie & Walter October New Release Day #1

Hello everyone,

Welcome to Winnie & Walter's October new release premiere! This release going to be HUGE and AWESOME! Today is day #1 of the premiering the new products. Make you self a cup of coffee or tea and enjoy!


On day #1 we are premiering three beautiful stamp set and five new word dies. The stamp sets are called In Bloom: Anna's Flora, In Bloom: Elsa's Flora and In Bloom Renee's Leaves. The dies are called In a Word: Home, In a Word: Joy, In a Word: Merry, In a Word: Peace and In a Word: Thanks Cutaways.

The stamp sets are beautiful with lots of floral and leaves outline images. These are the perfect for watercolouring, colouring with copics, noline colouring.... I LOVE them so much. A must have in you collection of floral stamps. The Cutaways are big, bold and perfect on any card.

I have couple of cards to share using today's premiered products. My first card uses In Bloom: Renee's Leaves and In a Word: Thanks Cutaway. I used Autumn/Fall colour to make my card.

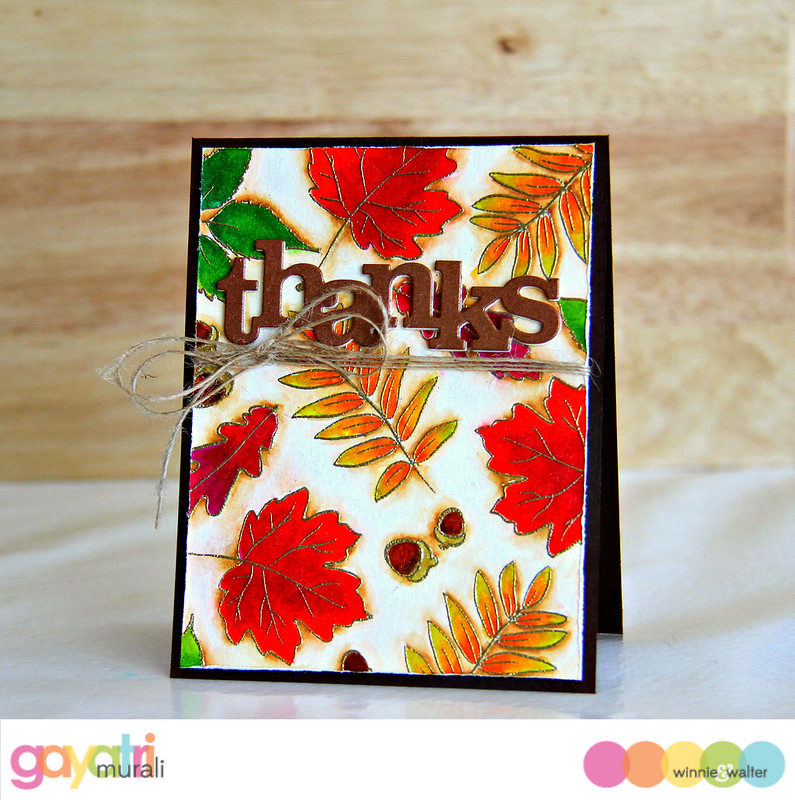
Thanks card

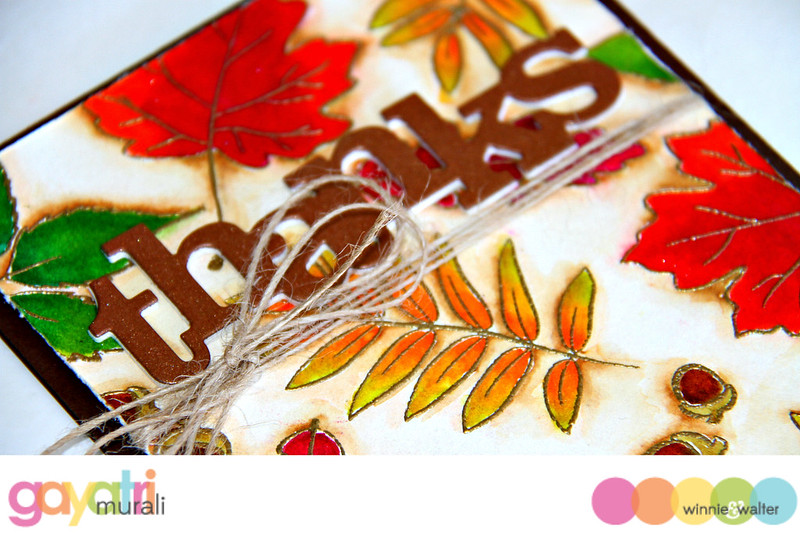
I started with watercolour cardstock and gold heat embossed the leaves and nuts randomly. Then I used Zig clean brush pens to colour them directly and blend. No water used inside because I wanted the colours to be intense. I particularly like the green and orange blend on the leaves. For the background, I have added some brown colour for shadows and highlighting. I then trimmed the panel quarter of an inch smaller than the card front and roughed the edges with scissors.

For the sentiment, I die cut the In a Word: Thanks using a brown shimmer cardstock I had in my stash and three more using white cardstock. I stacked glued them to give dimension and adhered on the panel. To add texture to the autumn/fall themed card, I wrapped around some jute thread and made a bow. This panel is adhered on a brown card base. Here is a closeup of the card.

Thanks closeup

Hope you like my first card. Now my second card is a Christmas card!

Merry Merry Christmas#1

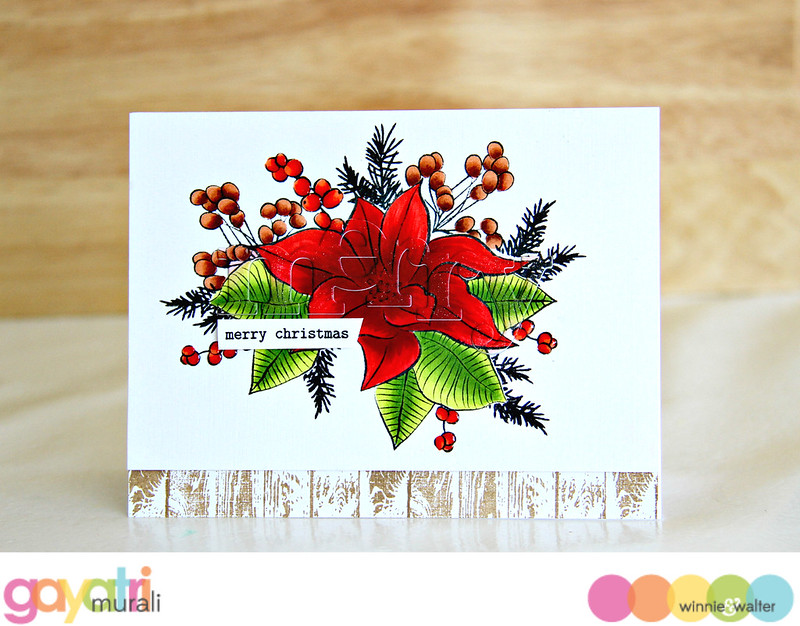
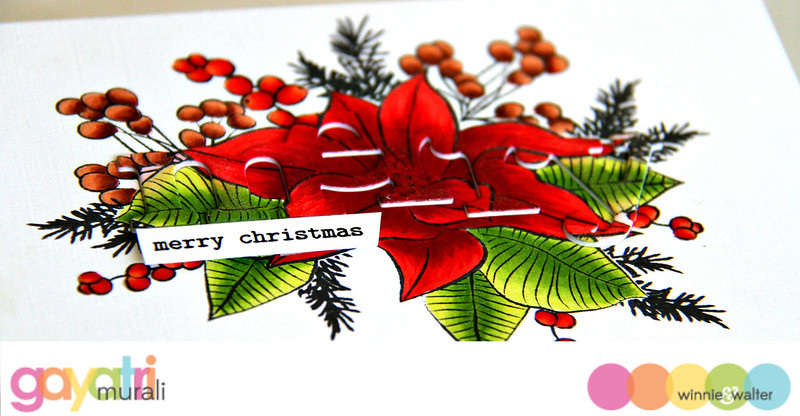
I wanted to do some masking to cluster the images from In Bloom: Elsa's Flora stamp set to make a focal point. So I stamped the Poinsettia to start the cluster, masked the image to stamp the leaf, masked the leaf to stamp more leaves, then berries and sprigs etc. I then coloured them with copic markers. Then I used In a Word: Merry cutaway to die cut right in the middle of the cluster. I also die cut four more of the Merry using white cardstock then stacked and glued them all with the coloured image die cut on the top.  I adhered an adhesive sheet behind the negative panel and in laid the die stck back in place including all the bits and pieces. Note: I did not stack glue the bits and pieces. Here is closeup of the inlaid diecut.

Merry Merry Christmas flat

I stamped the secondary sentiment from another new stamp set on a strip of white cardstock and adhered using foam adhesives. To add to the festivity, I brush the inlaid die cut with Wink of Stella clear shimmer pen. I stamped the woodgrain image from a new stamp set using brown ink towards the bottom of the card front. Then, I trimmed an inch off the bottom of the main panel and adhered  the panel on the card front using foam adhesives. I also added glossy accent to the berries.

Merry Merry Christmas closeup

Are you liking what you are seeing? If you want to see more inspiration, check out Winnie & Walter Blog for more from the design team. Make sure you write down your list to buy :) If you want these new sets and dies premiered today, then leave a comment on Winnie & Walter Blog to enter a chance win. More details are on Winnie & Walter Blog.

I will see you tomorrow with more Winnie & Walter goodness :)
Have a lovely day!

My blog signature

Monday, October 26, 2015

Published!


Hello everyone,

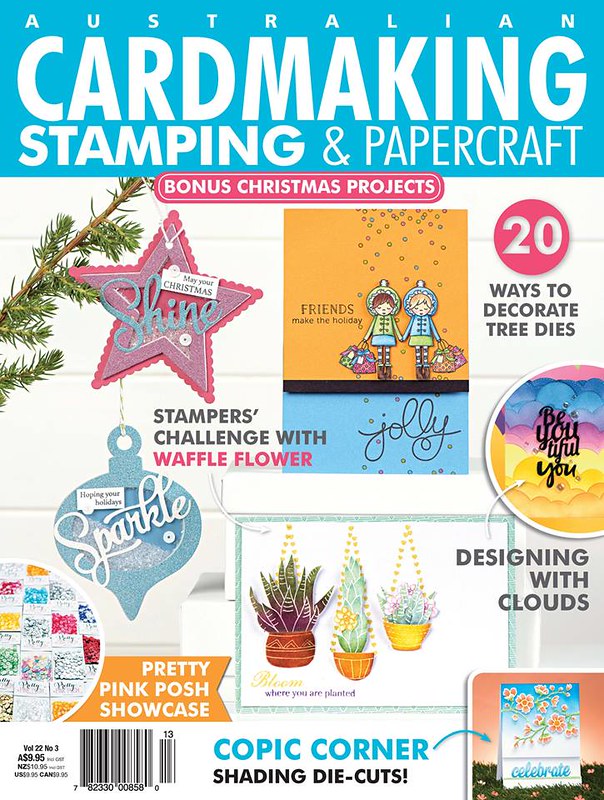
A quick post to share one of my card published in the latest Australian Cardmaking, Stamping and Papercraft magazine.

12074818_471915026321199_983904894288197882_n

See that card inside a circle on the right side for designing with clouds theme! Thats the one. Here is the full reveal.

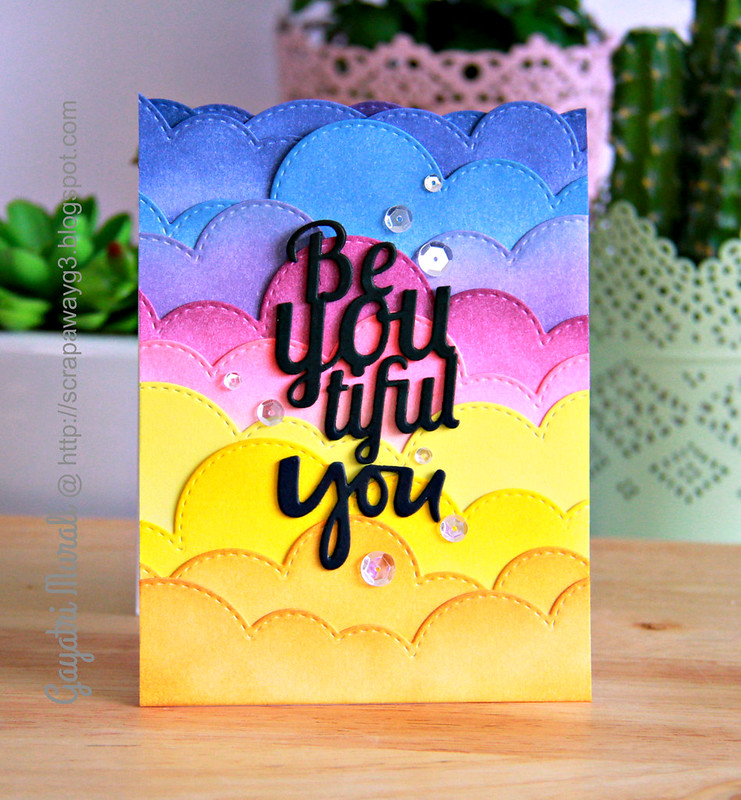
Beautiful you card

I have used Taylored Expressions Build a Scene: Rolling Clouds dies to make my background. I die cut  the clouds, sponged distress inks on them and then layered glued them to make my background. To keep the background as the highlight because that is the theme, I added another die cut as the sentiment in contrast colour. The sentiment is from Essentials by Ellen. And embellished with Pretty Pink Posh Sparkly Clear sequins. Hope you like it.

The latest edition of the Australian Cardmaking Stamping and Papercraft magazine is now available to purchase from all the major supermarkets and news agencies. If you like to subscribe to the magazine, HERE is the link. There are plenty of inspirations for you from some talented designers. And a full page feature on Pretty Pink Posh products.Get it quick before they are sold out.

Thanks for stopping by today!

My blog signature

Friday, October 23, 2015

Pretty Pink Posh and Altenew Collaboration Blog Hop!


Hello and welcome to the Pretty Pink Posh and Altenew Collaboration Blog Hop!


I love collaboration blog hops! They give me the opportunity to showcase products from some of my favourite companies. Altenew is one of my favourite companies and so is Pretty Pink Posh, otherwise I wouldn't be working as one of their design team member, right?  Okay, without any further delay, here is my card, made using some of my favourite Pretty Pink Posh and Altenew products.

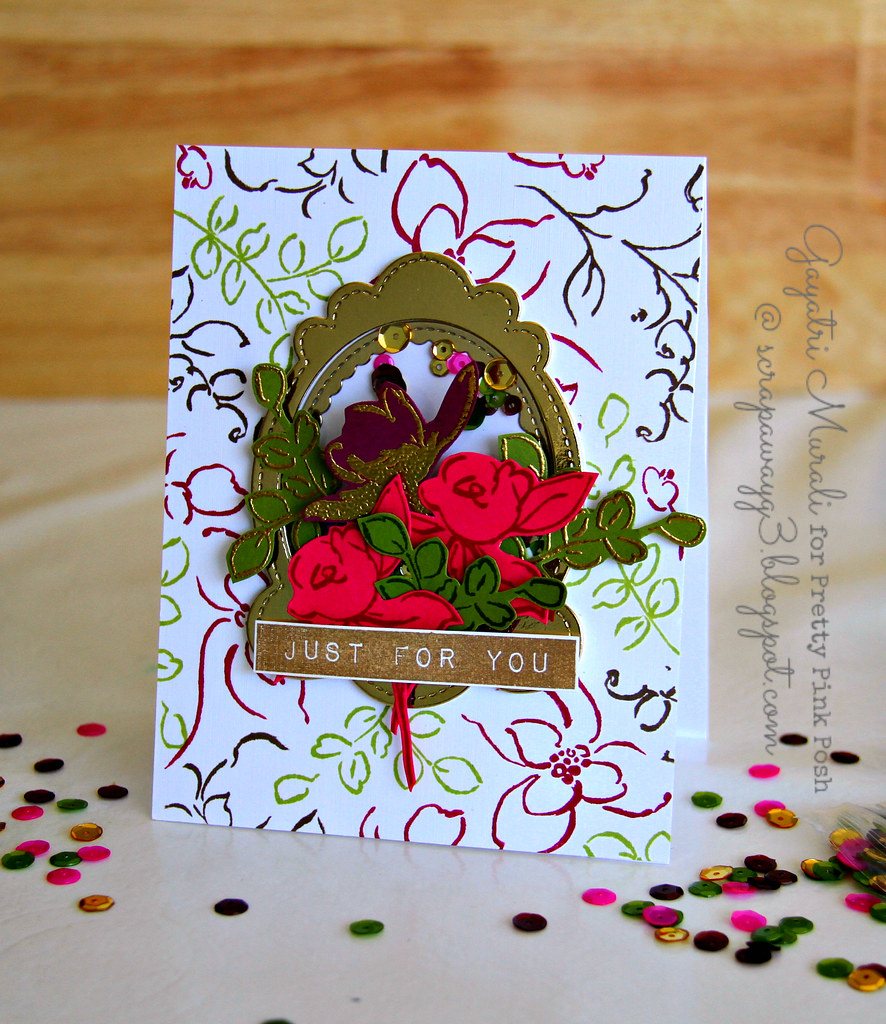
Just for you card


I started with the new Royal Garden Mix sequins from Pretty Pink Posh as my colour inspiration. I love the pinks, brown, burgundy, green and gold combination in the mix, because are bold, rich and beautiful. Love them. With those colours in mind, I stamped the flowers from the new Golden Garden Altenew stamp set on a white card front.

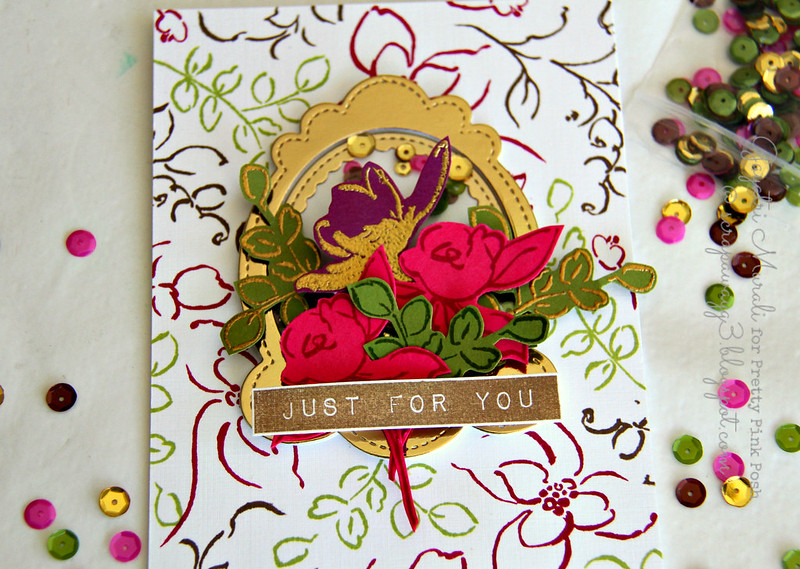
Just for you closeup

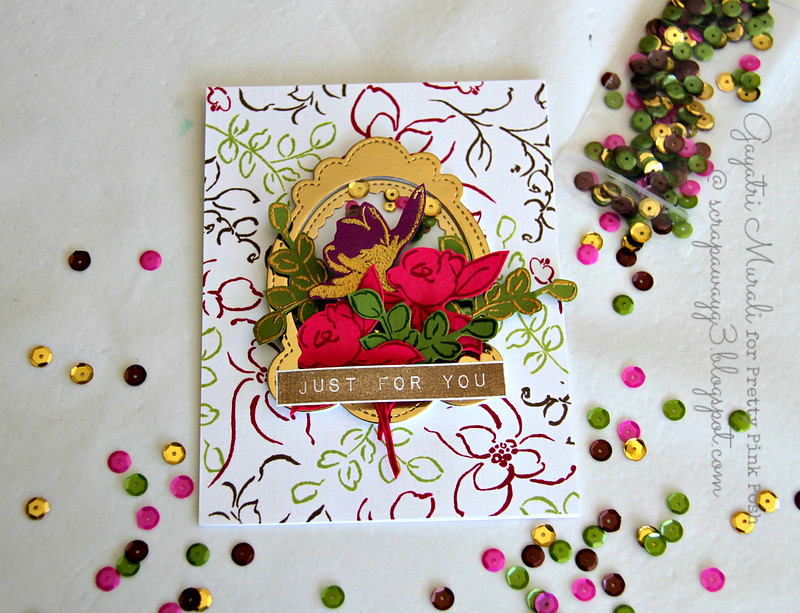
For the focal point, I die-cut the new Decorative Tag 1 Die from Pretty Pink Posh using gold cardstock and made a shaker element with the Royal Garden Mix sequins inside. I adhered this shaker tag on the centre of the card front. Then I stamped and gold heat embossed a few leaves and a flower and also just stamped few leaves and flower using coloured inks on coloured cardstock. I hand-cut them out and cluster glued them on the shaker tag element on the card front. The sentiment is from Altenew's Label Love stamped in gold ink

Just for yo card flat!

I really love the colours on my card, especially the gold accent in the decorative tag die, the gold embossing and the gold sequins in the mix. Just beautiful. Hope you like it!

Your next stop is the gorgeous and talented Anna Kossakovskaya's blog. If this is your first stop, then here is the list of all the design team member from both companies participating in the blog hop.


Make sure you leave some love on all the blogs. There are two $30 gift certificates each from both Pretty Pink Posh and Altenew to giveaway. Please comment before Monday, Oct 26 11:59 EST. Winners will be announced on the PPP and Altenew blogs.

Card Supplies:


Thanks for stopping by today!
 Happy Hopping!
My blog signature