Saturday, February 18, 2017

You are so loved!


Hiya everyone, Hope your weekend is off to a great start. I have a card share today using Simon Says Stamp Suzy's Take My heart watercolour panels from Hey Love collection. I coloured a bunch of them and made a set of cards. Shared one of them on valentine's day. Here is another.

You are so Loved card

Instructions:

1. Card base is Desert Storm kraft cardstock.

2. Coloured the panel with Zig clean colour brush pens and water brush.

3. Added highlights using Sakura white gel pen.

4. Die cut the panel using the largest postage stamp edge die from Simon Says Stamp Postage Stamp Edge die set.

5. Adhered the panel on the card front using foam adhesives.

Couple of closeup shots of the card.

You are so loved closeup

You are so loved card closuep1

Card Supplies:


Thanks for stopping by and have a lovely weekend.

My blog signature

Wednesday, February 15, 2017

Simon Says Fantastic Floral!


wed-newchallenge-header

Hi all and welcome to another week on the Simon Says Stamp Wednesday Challenge
Thank you for joining us for the Cute Challenge and we hope you will all join us again this week too.
We will be back soon with the name of the lucky winner of the $50 Voucher
This week the challenge is
Fantastic Florals 
Simply pop a flower or 2 on your creations, they can be stamped, handmade, store bought, whatever you like!
This week we are showcasing Altenew Products this week. You don’t have to use them for the challenge but if you have them we would love to see them used.
As always Simon Says Stamp will be giving away $50 voucher to shop at the fabulous Simon Says Stamp Store
50dollar_voucher_600px
I went to town with this challenge. I made three cards. 
Here they are: Card #1
SSS altenew card


Instructions:

1. Card Base is white cardstock.

2. On a card panel, I sponged Cracked Pistachio and Spun Sugar distress inks on the edges.

3. I used various Simon Says Stamp stencils to layer over the sponged edges and sponged Abandoned Coral and Peacock Feathers distress inks. This adds layer and interest on the background.

4. I stamped the images from Altenew's Wild Hibiscus stamp set all around the panel.

5. The sentiment Hey Love die from Simon Says Stamp Hey Love collection, die cut using black cardstock, stacked and glued and adhered on the centre of the panel.

6. The completed panel is adhered to the cardfront and embellished with Clear Droplets from Pretty Pink Posh.

Here is a closeup of the card.

SSS altenew card1 closeup
Cards #2.

I actually started with this card for this challenge. Then got carried away :)

SSS altenew card no2

Instructions:

1. Card base is white card stock.

2. I trimmed a white card panel to the size of the card front.

3. I stamped the floral images from Altenew Beautiful Day stamp set using shades of grey dye inks with black outline.

4. Then used copic markers R20, R21 and R22 to colour the background in ombre .

5. I used Simon Says Stamp Falling Heart Stencil over the panel and sponged Abandoned Coral distress inks to add layers.

6. The sentiment Hey Love die from Simon Says Stamp Hey Love collection, die cut using black cardstock, stacked and glued and adhered on the centre of the panel.

7. I adhered this panel to the card front, brushed Wink of Stella clear shimmer on the stacked sentiment and embellished with Clear Droplets from Pretty Pink Posh.

Here is the closeup of the card.

SSS altenew card2 clsoeup

Card #3
After making the first two card, I now need a third card in the mint colour to make a set of three cards.

SSS altenew card no3

Instructions:

1. Card base is white card stock.

2. I trimmed a white panel to the size of the card front and sponged distress inks Cracked Pistachio, Peacock Feathers and Evergreen Bough.

3. I again using various Simon Says Stamp stencils on the panel and sponged distress inks Evergreen Bough and Peacock Feathers to add interest and layers to the background.

4. Then I stamped the images from Altenew's Hennah Elements stamp set using black ink from top of the panel to about 3/4th of the panel to the bottom.

5. The sentiment Hey Love die from Simon Says Stamp Hey Love collection, die cut using black cardstock, stacked and glued and adhered on the centre of the panel.

6. I adhered the completed panel on the card base, brushed Wink of Stella clear shimmed on some parts of the stamped elements and finally embellished with Clear Droplets from Pretty Pink Posh.

Couple of closeups of the card.

SSS altenew card 3 closeup2

SSS altenew card 3 closeup

So now it’s YOUR turn to get out your floral supplies and join in!
Do you use Instagram ?  If so please add  #ssswchallenge to your challenge entry uploads so we can see them on there too !
There are fabulous Give Aways and inspiration from fabulous designers on a daily basis over on the Simon Says Stamp Blog , if you haven’t subscribed by email you may want to so you don’t miss out.

Simon Says Stamp
You have until Wed  8am Ohio time. 1pm UK time, 2 pm CET to join in
No backlinking allowed, Only 5 new creations will be eligible in the prize draw
word-verif
Thanks for stopping by my blog today.

My blog signature

Tuesday, February 14, 2017

Woof! Be my Valentine!

Happy Valentine' day everyone! Sharing a valentine's day card using Simon Says Stamp watercolour panel from Suzy's Take My Heart from Hey Love collections.

Be my valentine card

Instructions:
1. Card Base is Kraft cardstock.

2. I coloured the printed watercolour panel from Suzy's Take My Heart from Hey Love collection using Zig Clean Colour Brush Pens and water brush.

3. I die cut the panel using the largest of the postage stamp die from Postage Stamp Edge die set by Simon Says Stamp.

4. I adhered this panel on the card front using foam adhesives.

5. Finally used white gel pen to add highlights.

Simple and quick to create. Couple of closeups of the card.

be my valentine closeup

Be my valentine closeup1 
Card supplies:


Thanks for stoping by my blog today. Have a lovely day!
My blog signature

Thursday, February 9, 2017

Sneezin's Greetings! Its release day!


Hello everyone, How are you? Hope you have enjoyed my Taylored Expressions projects for past three days. Today is the release day! Yay! All the new gorgeous products we have been sneak peeking are all available for purchase from Taylored Expressions store right now :)

I am showcasing some more new products today. First up is Spring Grumplings stamp set and dies.


I love the grumplings series. If you already don't know, Taylored Expressions has this Grumplings series of stamp set and dies which are just fantastic with hilarious sentiment. They are my favourite series. Check them out. The Spring Grumplings are no better. I love playing with these grumplings. Makes me so happy. I combined Spring Grumplings stamp set with the new Spring Florals stamp set and coordinating dies to make my card.

GAYATRISpringGrumplings1THURS

Instructions:

1. Card base is made of Granny Smith cardstock and stamped on with foliage and dots stamps from Spring Floral stamp set and Granny Smith TE dye ink.

2. I then die cut a round card base using the largest stitched circle die and Lavender Glaze cardstock. I adhered this on the centre of the card front.

3. I stamped the Spring Grumpling image on watercolour paper using Oreo Hybrid ink and coloured with Zig Clean Brush Pens. Then die cut the image out using the coordinating die.

4. I stamped the wreath, foliage and flowers from Spring Florals stamp set using Granny Smith, Sprinkles, Strawberry Milkshake and Lemon Meringue TE dye inks. Then die cut them all out using the coordinating dies.

5. The sentiment from Spring Grumplings stamp set is white heat embossed on a strip of Oreo cardstock and trimmed with fishtail ends.

6. I adhered the wreath on the stitched circle card front using foam adhesives, then the grumpling image on the top left of the wreath with the flower and leave cluster on the bottom right of the wreath. I tucked in the sentiment below the grumpling image.

7. I brush wink of stella on the flowers and added TE enamel shapes on the flower centres.

8. I also stamped another sentiment from Simply Said Spring on the inside of the circle card.

Here are the closeup of the card.

GAYATRISpringGrumplingscloseupTHURS


GAYATRISpringGrumplingscloseup2THURS

Card Supplies:


The second project I am showcasing today is an embossing folder called Redeemer.


I love this embossing folder and perfect to create stained glass effect. I combined this embossing folder with the new My Redeemer Lives stamp set, coordinating dies, Prayers Script die and You're in My Prayers stamp set to make my card.

GAYATRIRedeemerEfTHURS

Instructions:

1. My card base is Sugar Cube cardstock.


2. I used an acetate sheet and a few copic refills in blues and greens to create a stained glass like background. The colours are really bright and bold.

3. I die cut a frame using the largest frame die from Stitched Frame Stacklet and gold mirror cardstock.

4. I embossed vellum using the Redeemer embossing folder.

5. I adhered the gold frame on the vellum embossed panel and them on the stained glass acetate sheet. The vellum panel softens the bright and bold acetate panel and makes it look beautiful.

6. For the focal point, I gold heat embossed the cross from My Redeemer Lives stamp set and die cut using the coordinating die. I adhered this die on the centre of the vellum panel.

7. For the sentiment, I die cut Prayers Script die using gold mirror cardstock and gold heat embossed the smaller sentiment on a strip of white cardstock from the You're in My Prayers stamp set. Both are adhered over the cross as shown.

8. The entire panel is adhered on to the card front using foam adhesives and embellished with gold sequins.

Here are some closeup of the card.


GAYATRIredeemerEfCloseupTHURS

GAYATRIredeemerEFTHURSVC

GAYATRIRedeemerEfTHURSV

Card Supplies:


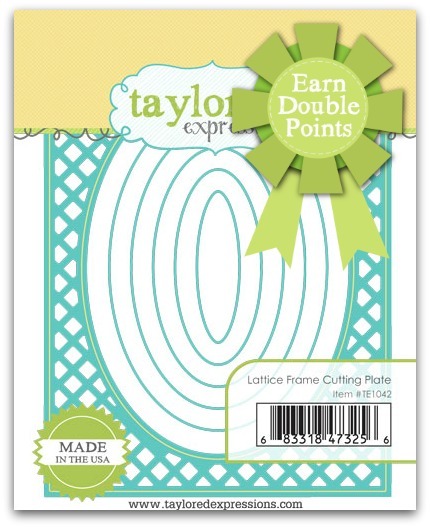
This month, we have got two ways to earn DOUBLE CRAFTY POINTS! If you're not a Crafty Points member, it's free and easy to join. Just create an account at the TE webstore and you're automatically enrolled to begin earning crafty points with every purchase. For a limited time, you'll earn 120 Crafty Points on the purchase of the Enamel Shapes Bundle and 54 Crafty Points on our Exclusive Lattice Frame Cutting Plate! Offers valid on qualifying purchases made between 9am CST on Thursday, February 9, 2017 and 11:59 pm CST on Sunday, February 12, 2017 and only while supplies last. Crafty Points are only available on purchases made via our Taylored Expressions store.


Hope you are inspired by my projects. Check out Taylored Expressions Blog for more details. All the new release stamp sets and dies are now available for purchase at Taylored Expressions Store.

Happy Shopping and thanks for visiting my blog.

My blog signature