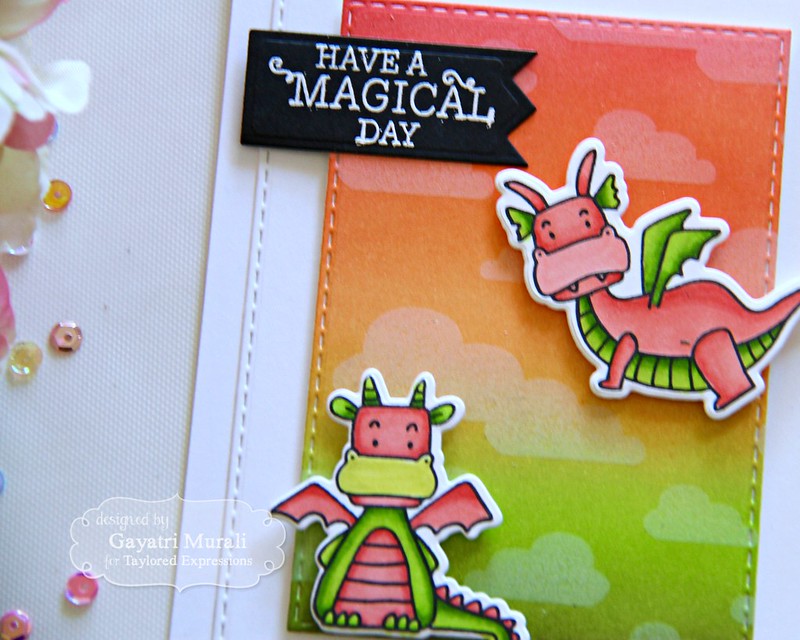
Happy Sunday everyone! I have a card tutorial to share today. This card is made using Taylored Expressions stamp set called Magical Days stamp and die combo. I made this card for the release in the month of Janurary 2017.
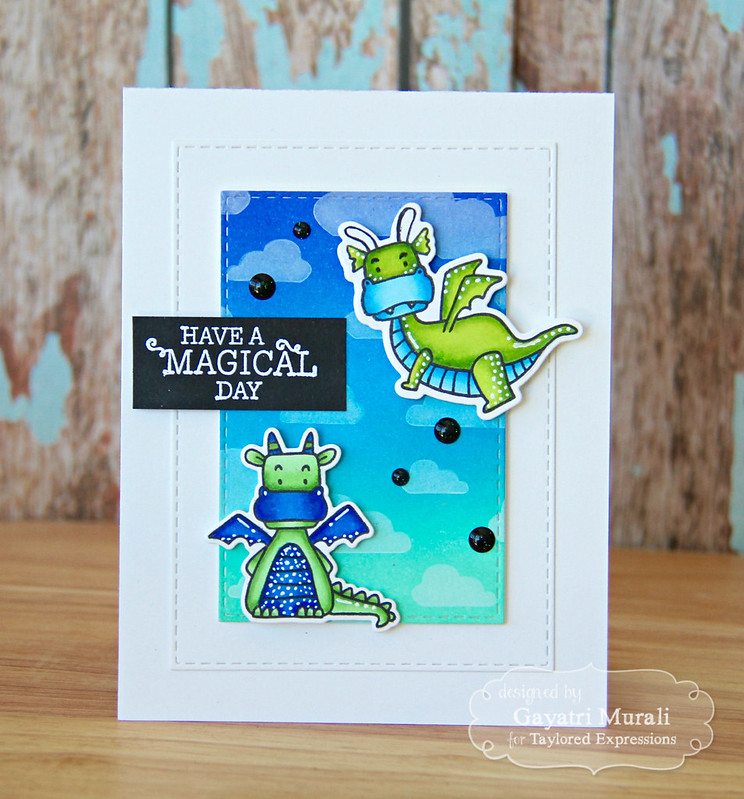
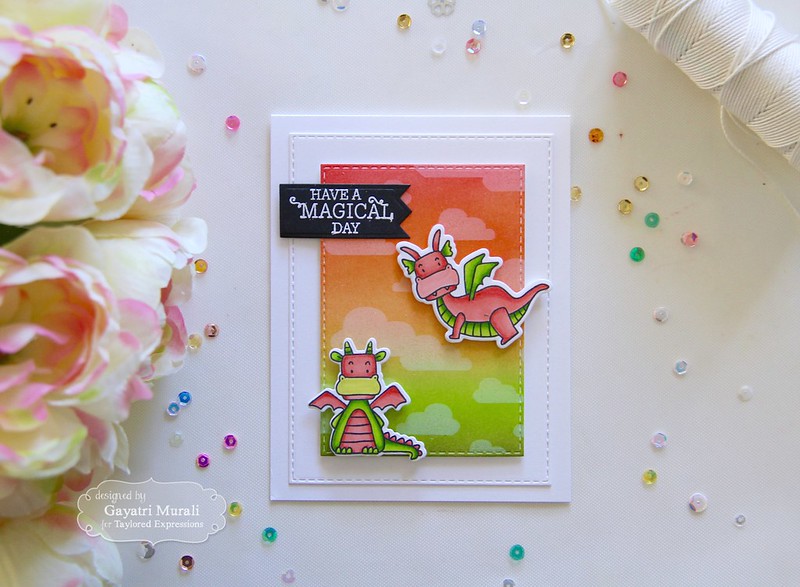
I received a request for a tutorial for this card. Sorry it took me so long to make it. It is here now. I decided to use the same process but change a little to make another card. I changed the colour, less details, less embellishments and slightly bigger panels. Here is the new card.

So here is the pictorial tutorial of this card.
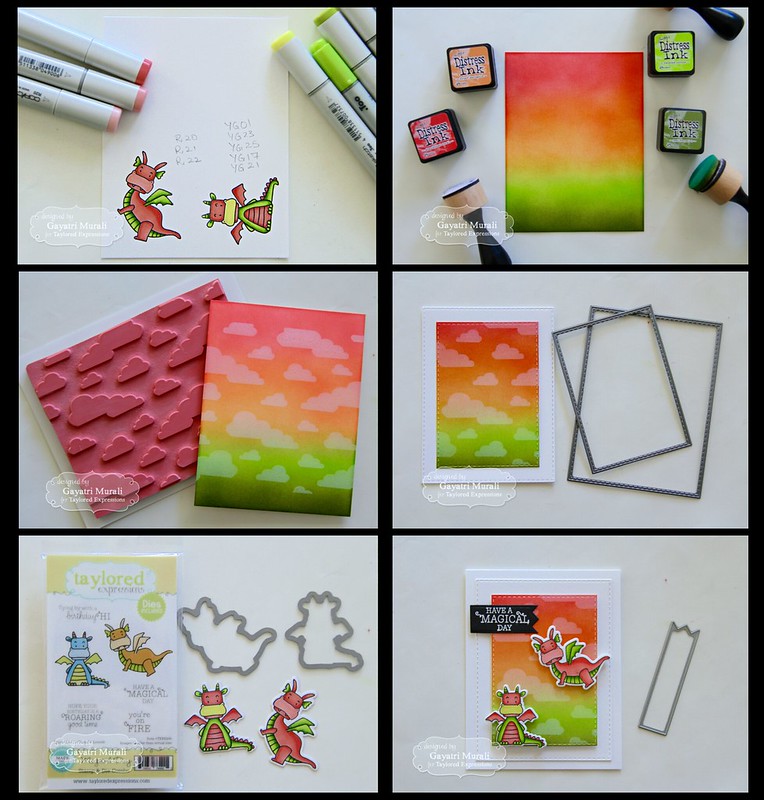
Instructions:
1. I stamped and coloured the dragons from Magical Days stamp and die combo using copic markers. I used R20, R21, R22, YG01, YG21, YG17, YG23 and YG25.
2. For the background, I sponged distress inks - Abandoned Coral, Dried Marigold, Twisted Citron and Peeled Paint. I loooove the colours together. One of my favourite colour combo.
3. I stamped the Cloud Nine background stamp on the sponged panel using Taylored Expressions Sugar Cube white pigment ink.
4. I die cut this panel using the third largest stitched rectangle die and another white panel using the largest stitched rectangle die from Stitched Rectangle Stacklets.
5. I die cut the dragons using the coordinating dies and white heat embossed the sentiment on Oreo cardstock which I then die cut using the smallest banner die from Banner Stacklets 4.
6. To assemble the card, I adhered the sponged panel on the white panel using foam adhesive, the dragons on the sponged panel using foam adhesives as well.
7. The completed panel on the Sugar Cube card base flush and sentiment flush on the sponged panel.
8. I did not add enamel dots on this card. You can add Taylored Expressions Oreo enamel shapes is you wish.
8. I did not add enamel dots on this card. You can add Taylored Expressions Oreo enamel shapes is you wish.
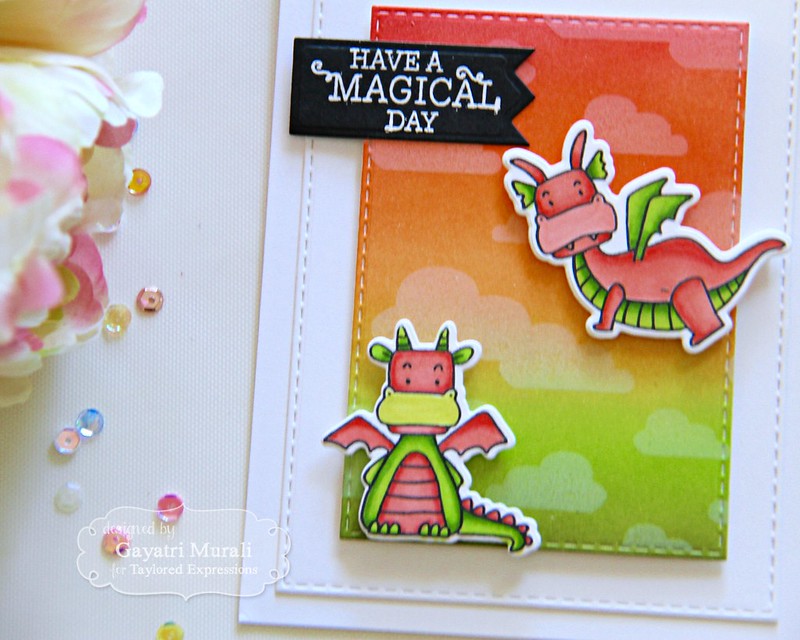
Here are some closeup photos of the card.


Thanks for stopping by my blog today. Enjoy the rest of the weekend.


5 comments:
Fantastic! Another stunning background. Thank you for the tutorial!
fabulous tutorial Gayatri. The colours on this one are so pretty and what adorable dragons
Gorgeous blending Gayatri, thanks for the tutorial! I love those clouds you added.
LOVE those colorful backgrounds!
Love love love the background...thanks for sharing this tutorial!!! ❤
Post a Comment