Hello dear friends,
I have a very colourful and vibrant card to share with you today. One of my favourite technique to do is to custom make my own background for my cards. This makes my happy because I use techniques or stamp or both and the result is very unique every time. The process itself gives me great pleasure and results are amazing. Of course, there are times when things don't turn out the way you wanted but this card turned out better than expected. Here it is.

This is how I did my background. I sponged Spun Sugar, Worn Lipstick, Picked Raspberry, Spice Marmalade and Ripe Persimmon distress ink in that order on to my card panel. Distress inks take a little time to dry. I wanted the panel to be dry dry because I wanted to stamp on it. And you get a really clean crisp image when the distress inks are really dry. Of course you can zap it with heat gun. Anyway, I used the image from Sprigs stamp set by Penny Black to stamp with Versafine Black Ink. This is a pigment ink, so this ink also takes sometime to dry as well. Make sure you don't smudge the ink. I loved the contrast of black against the coloured background.
I then used the stitched rectangle die from Stitched Duo 2 die from Pretty Pink Posh to die cut the centre rectangle from the panel. I also die cut three more rectangles out of black cardstock and one using vellum cardstock. Now, I stacked and glued the three black rectangle then the stamped rectangle on the top. The stamped frame negative is adhered to the card base. I then inlaid and glued the stacked rectangle panel back in place. This panel has a bit of dimension although it is inlaid back in its place.
On the vellum rectangle die cut, I stamped and white heat embossed the flower bouquet image and sentiment also from the same Sprigs stamp set. I added tiny drops of glossy accent behind the heat embossed area and also on the four corners of the vellum panel and adhered it on top of the inlaid panel on the card front.You can hardly see the glossy accent behind the vellum. I then used Strawberry Burst and Sunshine Glow iridescent sequins and Metallic Silver 4mm sequins from Pretty Pink Posh to accent and bring all the colours on the card together. Then used black twine to tie around into a bow. Here is a closeup of the card.
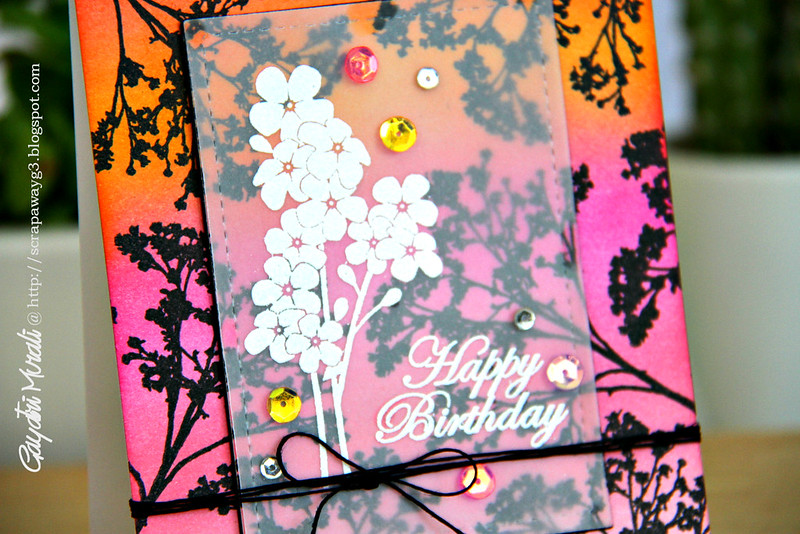
I absolutely love the background. To customize the background for another card, I do the same process but just change the colours. Or heat emboss the stamped images to get texture. So have fun customizing your card background and make it unique.
Thanks for stopping by my blog today.


12 comments:
I love how you did the background Gayatri and the stamped velum overlay. Thank you for sharing this technique. Hugs, Ursula
wow what a background...love the use of vellum over it so it still shines through.
The background is stunning...inlaying and layering your center piece is brilliant. Adds dimension without too much bulk and makes your vellum panel retain the spotlight.
Love the ombre in the background. Just gorgeous!
Very nice card gayatri love those colours ....vellum overlay awesome.....
beautiful card!! love love love the vibrant background!! it's very beautiful!! love the stamping as well...
I love the card it is so cheery...awesome colours!
I am speechless!
What a gorgeous card, love the colours and the embossing. Hugs Jo
What a gorgeous background, Gayatri ... those branch silhouettes are fabulous with the wonderful sponged colours ... and the slip of vellum is just lovely! Anita :)
Wow! Love this! I wish I could come up with something this awesome all on my own:) You are so talented and inspiring!
Beautiful! Simply beautiful.
Post a Comment